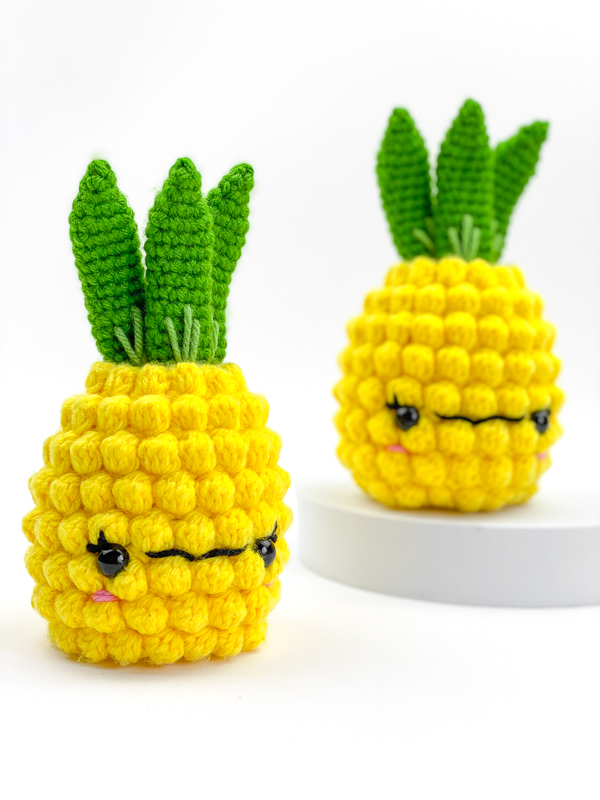
This post was sponsored by JOANN – My favorite craft store to visit for all my yarn and tools that I use. Also, you can’t resist all their coupons!
As the year rotates, it’s easier to get different seasonal foods into your system. I have one in mind that I always get excited for when the sun starts showing up more. Can you guess what is?
I was asked by JOANN to come up with a project to help represent the warmer months and I didn’t think there could be anything better than this tropical fruit, a pineapple! Although typically in the middle of controversy as a pizza topping, it’s hard to deny just how tasty it can be on its own.
My goal was to make this project cute enough to eat and I hope I have achieved this! This pattern hits a great middle ground of a new stitch but still accessible for anyone who already knows how to crochet. JOANN is always helping me push my creativity and it’s way too satisfying to use this textured stitch.
Ready to learn a new stitch?
Speaking of a different stitch, this one involves a fun new technique that I haven’t used for my amigurumi yet – the bobble stitch! Using a bunch of double crochets, this is a fun stitch to keep your brain healthy while you snack on some fruit and play around with some double crochets.
You will be able to find the full pattern down below with all the written and photo instructions to get started. You will also be able to find all the materials I used from JOANN stores as well!
JOANN is always trying to help me find ways to make crochet more appealing and accessible to all of you. They’ve become my go to when it comes to materials, especially the yarn I use!
This project takes more yarn than my typical dolls so be prepared – Big Twist Value from JOANN is my top recommendation (You will find the colors I sued down below) As a blogger, creating my own designs is made easy with JOANN.
Other criteria someone might meet who would enjoy this project:
- Someone looking to try a new stitch (the bobble stitch)
- Pineapple Lovers
- Someone looking to make a gift
- Someone looking for a fun pattern with repetition

So where can you find what you need?
You can find every single thing I used for this project from JOANN stores and you will see all of that hyperlinked for you. JOANN is my favorite place to go for materials and the yarn I love the most for amigurumi can be exclusively found there as well. When purchasing, I earn a little bit of the commission, so thank you for supporting me as a blogger!
If you’re looking for the perfect project to get ready for the warmer months, I think this is a great way to kick it off. This is a user friendly way to learn a brand new stitch while creating a fun doll with JOANN’s yarn
All editorial content and projects are intellectual property of Vincent Green-Hite, designer of Knot Bad.
This post was sponsored by JOANN Stores but all ideas and opinions are my own. Please do not claim this pattern as your own. If you wish to share this pattern, you may link to this pattern but please do not reprint it on your site. You may keep a copy for your own personal use but please DO NOT sell the pattern or distribute it.
You may sell products made from this pattern but please clearly credit the design to Knot Bad and link it my website knotbadami.com Make sure to post it! Use the hashtag #yarnpunk and #handmadewithjoann when posting it and please feel free to tag me and show me how yours turned out! You can also find the Facebook group and subreddit r/yarnpunk to post to as well!
My other social media platforms you can find me at:
Instagram: @knot.bad
Tik Tok: @knotbad
Twitter: @knotbadcrochet

So here’s what you’ll need:
All the yarns can be substituted with any jumbo weight yarn (size 4)
These colors will be interchangeable and identified with Color A and Color B to decide which kind you would like to make.
- 1 Skein in Big Twist Value Varsity Yellow(Color A)
- 1 Skein in Big Twist Value Forest Green(Color B)
- 1 Skein in Big Twist Value Light Green (Color A)
- 1 Skein in Big Twist Value Black
- 1 Skein in Big Twist Value Pink
Enjoy what I do? You can send me a tip if you would like or even follow me on Ko-fi!

Don’t forget to pin this pattern for later! It can be easy to forget so make sure you have this tucked away for a rainy day on your Pinterest Boards.
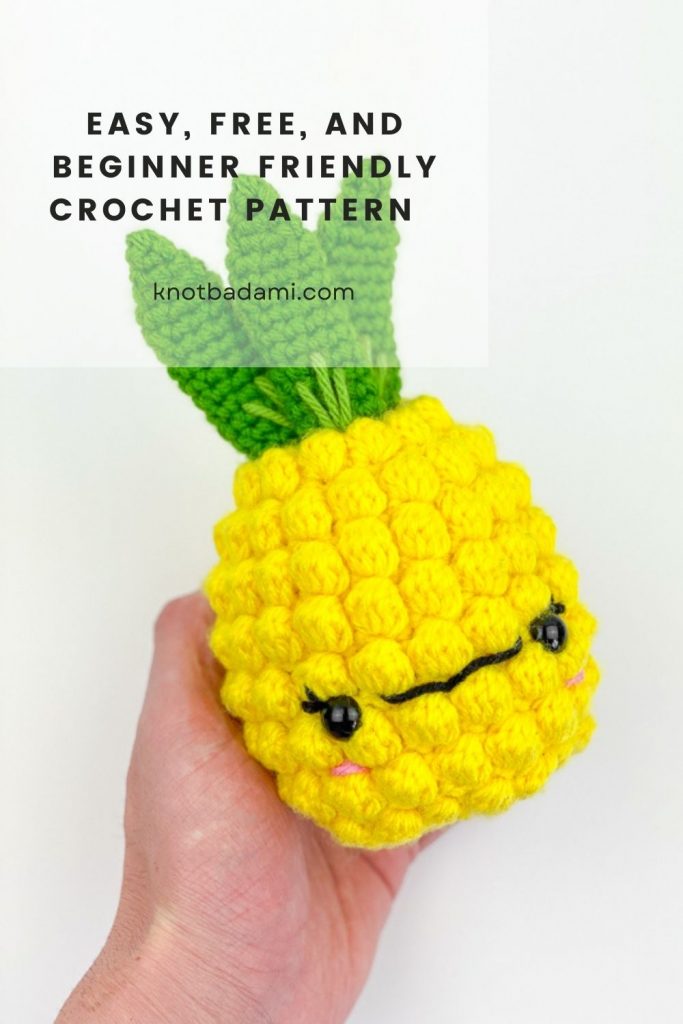
Skill Level:
Easy+
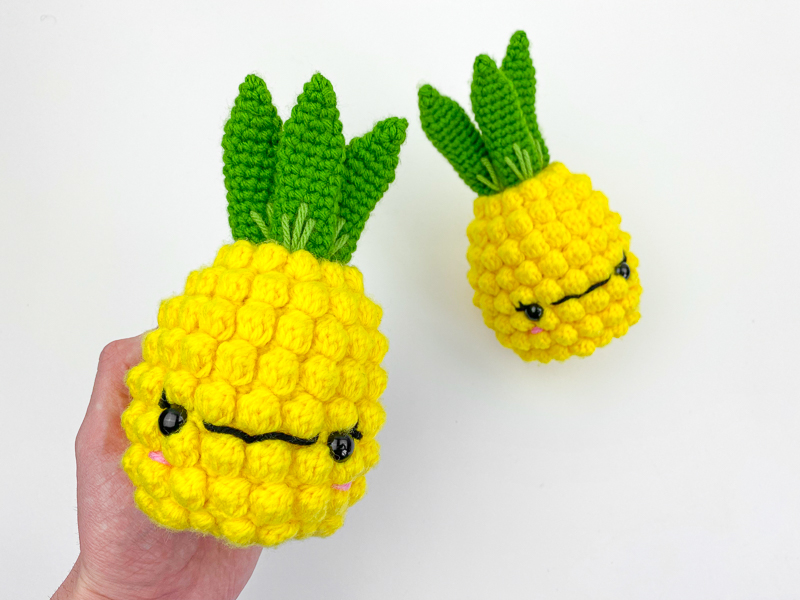
Dimensions
Height: 7″ inches
Width: 3.75″ inches
Abbreviations (In US terms)
Sl st – Slip Stitch
Ch – chain
Sc – Single Crochet
Inc – Increase
Inv dec – Invisible Decrease
Dc – Double Crochet
FLO – Front Loop Only
* *- Repeat
FO – Finish Off
( ) – Number of stitches
Notes:
- This pattern is worked continuously and not joined.
- This pattern is written in US terms
- You can find helpful tutorials throughout, but if you would like to find some of my tips and tricks you can head HERE!
- The photo for each step will be found BELOW explanation.
- Find my YouTube tutorial for the Magic Ring here!

Let’s Begin
Main Body
Begin in Yellow
Rnd 1: 6 Single crochet into Magic Ring (6) (Click here for video tutorial!)
Rnd 2: *Inc* around (12)
Rnd 3: *Sc, Inc* around (18)
Rnd 4: *Sc 2, Inc* around (24)
Rnd 5: *Sc 3, Inc* around (30)
Rnd 6: *Sc 4, Inc* around (36)
Our rounds will now consist of the bobble stitch! The written pattern (from round 7) will be after this photo tutorial. This will be the photo tutorial on how to do the bobble stitch. When seeing the word “bobble”, it will be this technique below. Be sure to start at Round 7 because it each round begins with an “sc”.
With that said, here is the photo tutorial:
After the first sc, yarn over and insert your hook into the next indicated stitch (as you would a double crochet)


Yarn over and pull through the first two loops.

You will now be left with 2 loops on your hook

Yarn over again and insert your hook into the same stitch
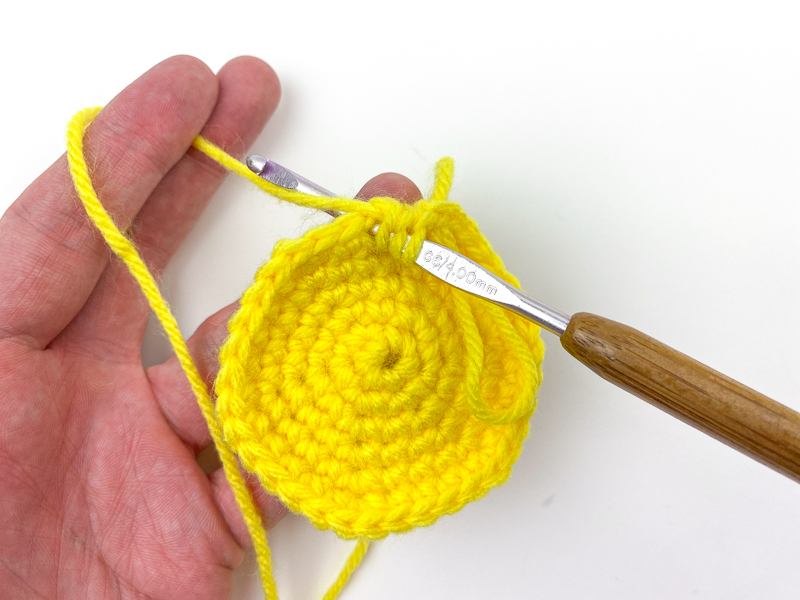
Yarn over and pull through the first 2 loops

Yarn over and insert the hook through the same stitch and pull through the first 2 loops 3 more times (5 in total)
You will have 6 loops on your hook when all are finished

Yarn over and pull through ALL 6 loops
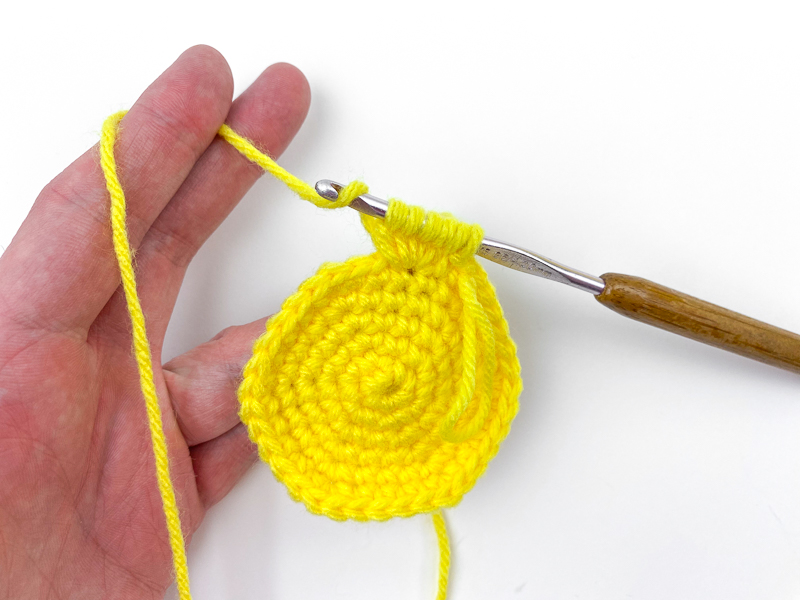

Single crochet into the next stitch. Continue the pattern and your work will puff out!
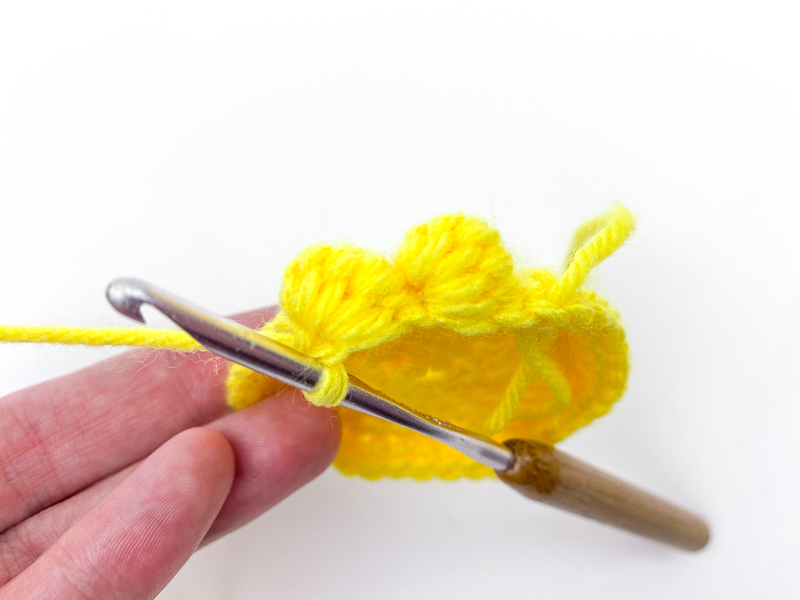
Rnd 7: *Sc, bobble* around (36) (Your rounds will be ending with a bobble stitch into the final stitch – that will let you know you’re doing it correctly)
Rnd 8: Sc around into each stitch (36)
It will be written below, but continue repeating rounds 7 and 8 for 13 rounds.
Rnd 9: *Sc, bobble* around (36)
Rnd 10: Sc around (36)
Rnd 11: *Sc, bobble* around (36)
Rnd 12: Sc around (36)
When working in the round, you would typically be flipping your work so the “right side” would be facing outwards (click here to see what I am talking about!)
However for this project, the “wrong side” will be facing outward as you can see below. This will make decreasing feel a little different which you will see when you reach that portion of the pattern.

Rnd 13: *Sc, bobble* around (36)
Rnd 14: Sc around (36)
It’s time to insert in the two 12mm safety eyes into your doll! Looking straight ahead, from the top of your first round of puff stitches, count as 1. Between each round, count up to 3. This will be the round that your safety eyes will be inserted into.

Looking horizontally where you will be inserting your safety eyes, it can be tricky to find the accounted stitch.
Instead, we can count the “center” stitches in between the top and bottom puff stitches. Between both of the safety eyes, we can count three of these stitches.

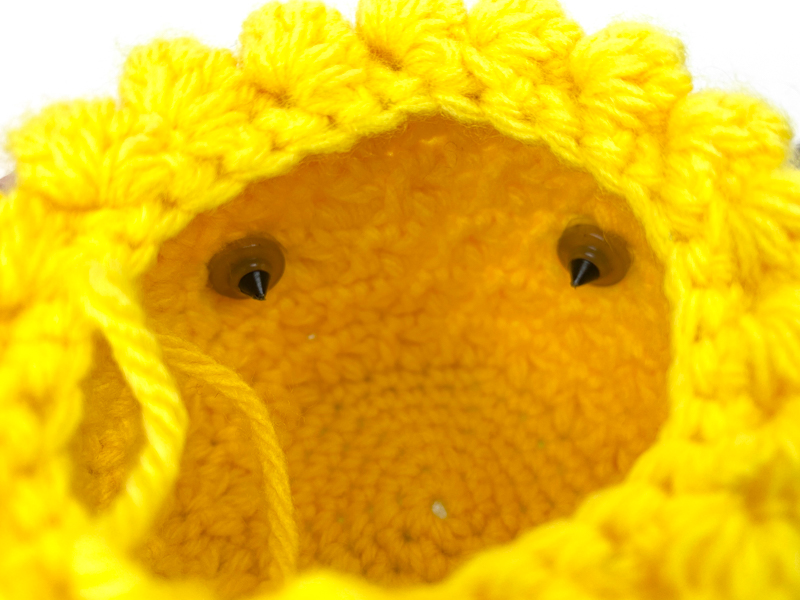
Rnd 15: *Sc, bobble* around (36)
Rnd 16: Sc around (36)
Rnd 17: *Sc, bobble* around (36)
We will now begin invisible decreasing. When doing so, work into the front loop only!
Insert your hook into the first front loop.
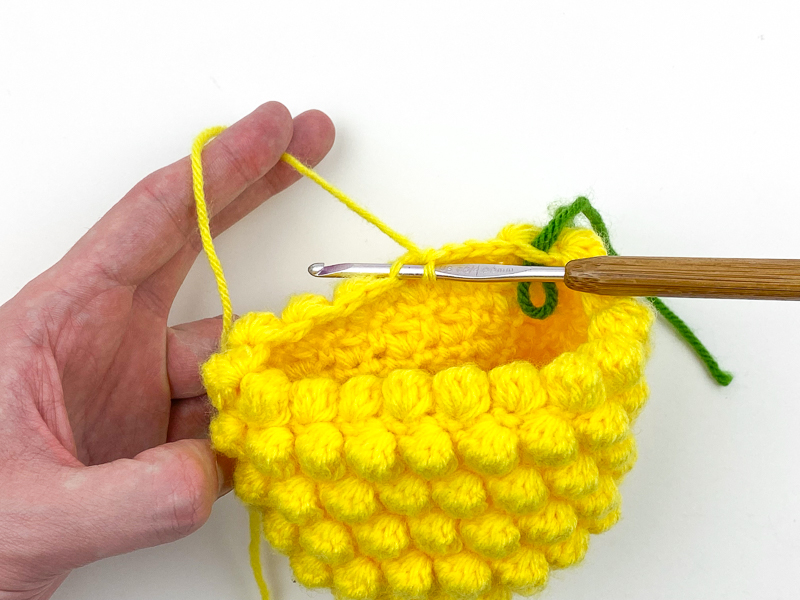
Before yarning over, insert your hook into the back loop of the next stitch. (the stitch furthest away from you)

Yarn over and pull through the first loop.
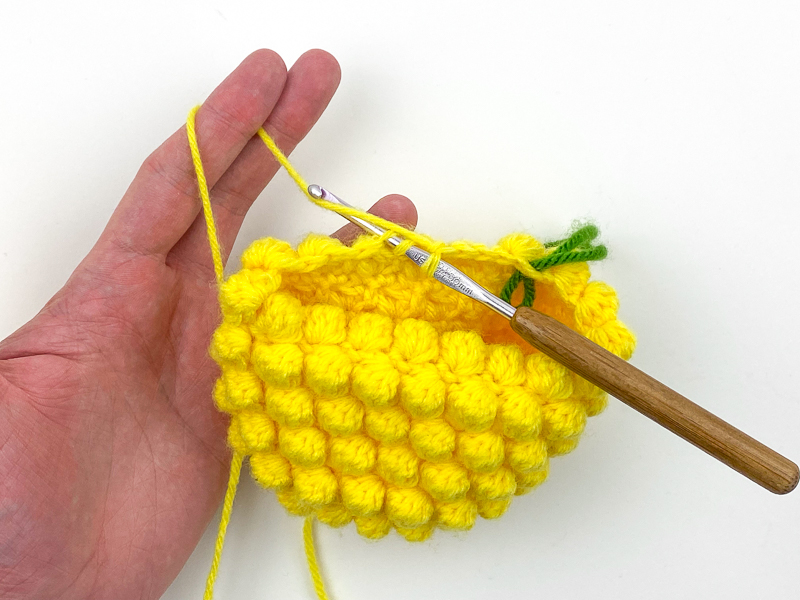
Yarn over and pull through all 3 loops!
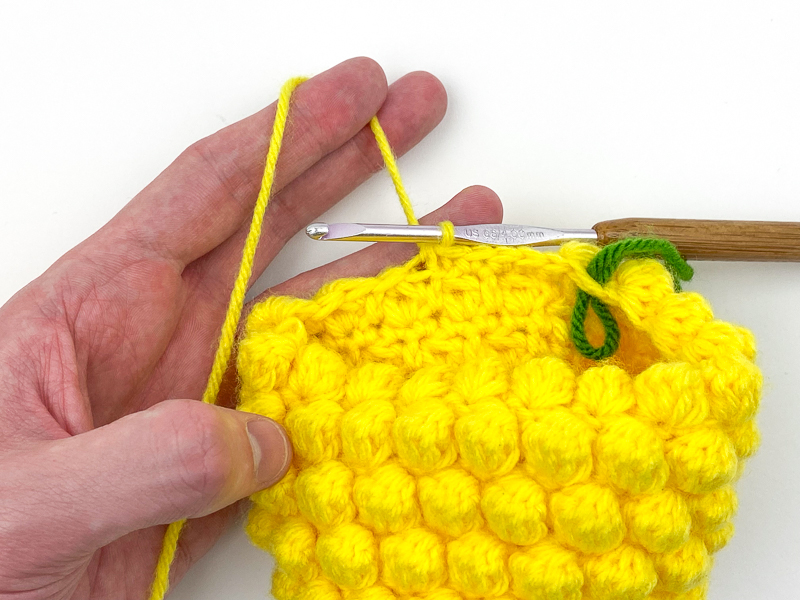
Rnd 18: *Sc 4, Inv dec* around (30)
Rnd 19: *Sc, bobble* around (30)
This will also be a great time to be stuffing your work – stuff until your work is as firm as you would like.

Rnd 20: *Sc 3, Inv dec* around (24)
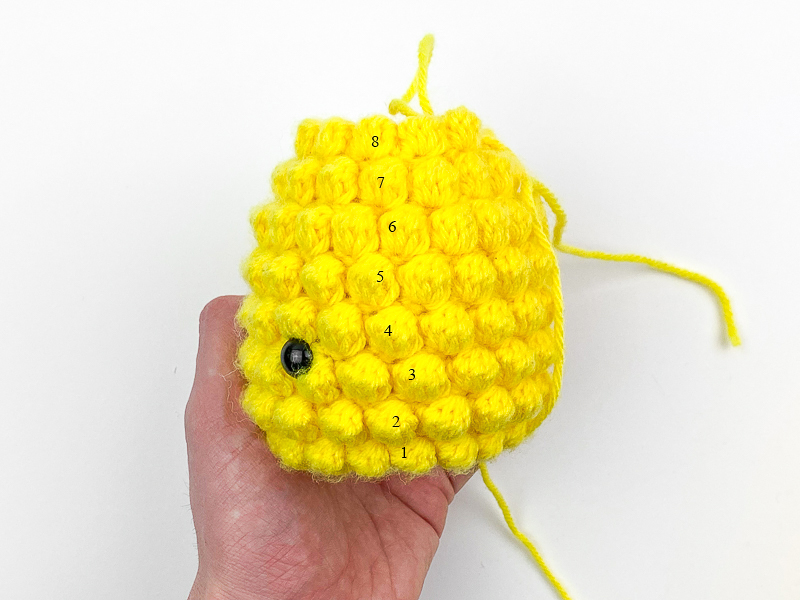
Rnd 21: *Sc, bobble* around (24)
You have now reached your final bobble stitch round! When counting all of the rounds, you should be able to count 8 in total:
Tip: For the next two rounds, it can be difficult to get your hook through. I suggest “pinching” your work to make that process easier for yourself!


Rnd 22: *Sc 2, Inv dec* around (18)
Rnd 23: *Sc, Inv dec*around (12)
Be sure to stuff more if you need to before closing the hole!
Rnd 24: *Inv Dec* around (6) It may be difficult to do the inv dec from here, free free to decrease normally!

Sew the hole closed (tutorial here) Finish off.
Leaves (Make 3)
Begin in Green
Rnd 1: 4 Single crochet into Magic Ring (4) (Click here for video tutorial!)
Rnd 2: Sc around (4)
Rnd 3: *Sc, Inc* around (6)
Make sure to flip your work so the right side is facing out! This can be difficult so try your best to fold it. Here is how it starts to how we want – as you can see, the shape is so much better!

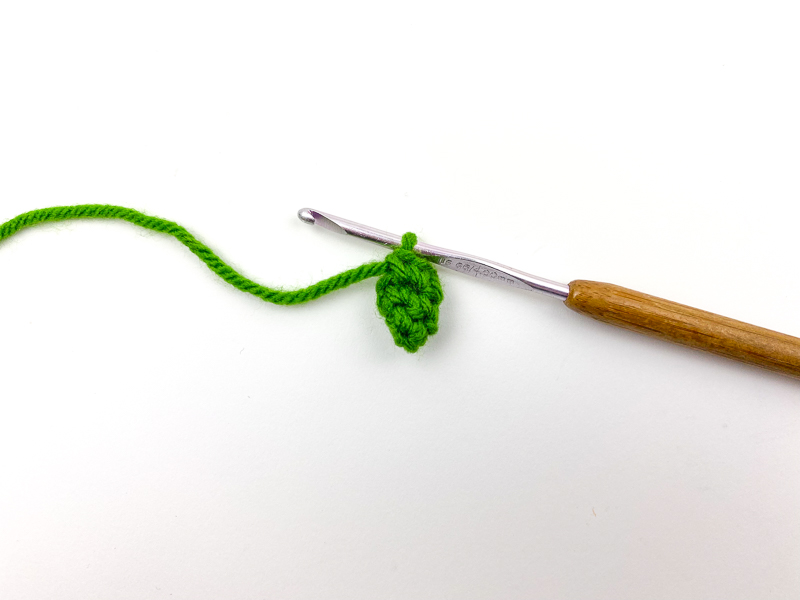
Rnd 4: *Sc, Inc* around (9)
Rnd 5 – 14: Sc around (9)
Slip stitch into the stitch after the last of round 9. Finish off and leave tail for sewing.
(These will NOT be stuffed)

You will still have a tiny hole up top. Do not worry about this as it wont be noticeable – the reason we stopped decreasing so early is so we can make the top of the pineapple more flat and easier to sew onto.
Assembly
Attaching the leaves onto the body
Notes before starting:
- The leaves will not be stuffed.
- Don’t worry about the leaves being straight to begin with – you will be able to bend them when they’re securely fastened.
With two of the leaves, place in the middle of the top of your pineapple side by side, with half of the yellow rounds still visible as seen below:
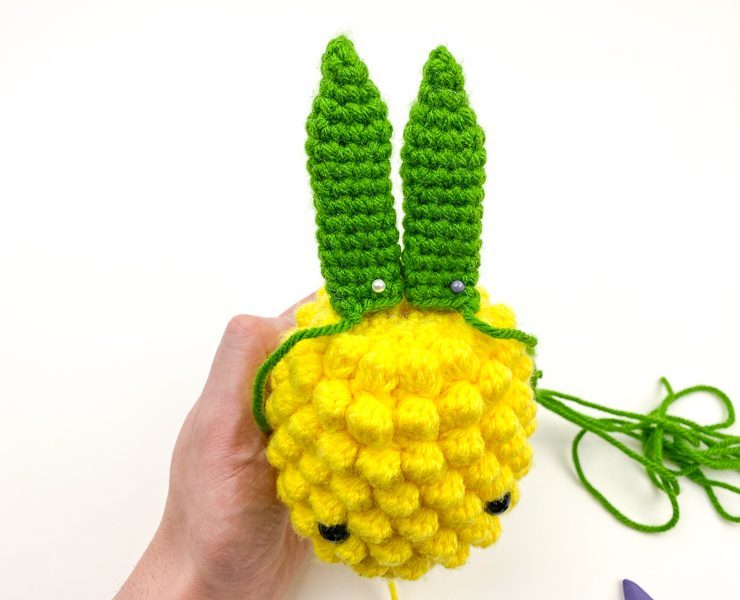
With both leaves side by side, take one out and sew onto the body.

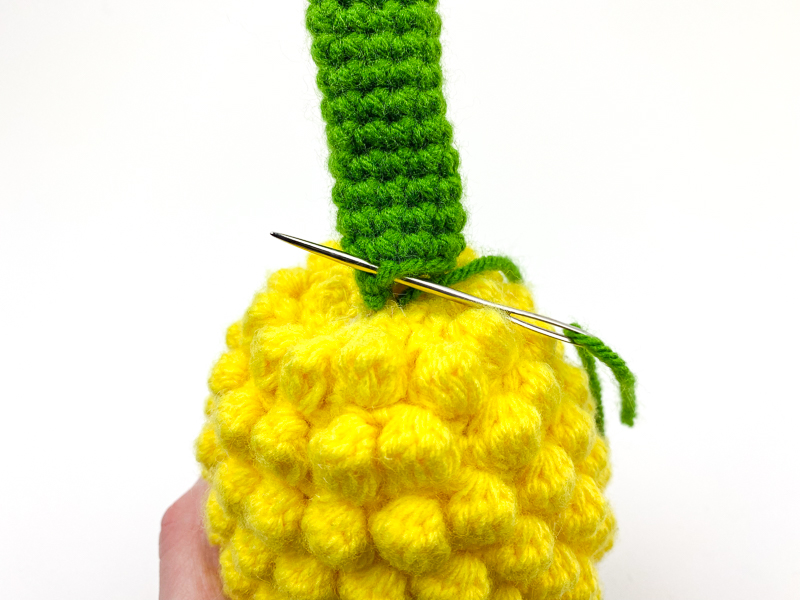
Knot off to keep your work secure.

Attach the next one on as well next to each-other

With both of the back leaves secured into place, we will now be using that vacant front area and sew on the front leaf in the center.
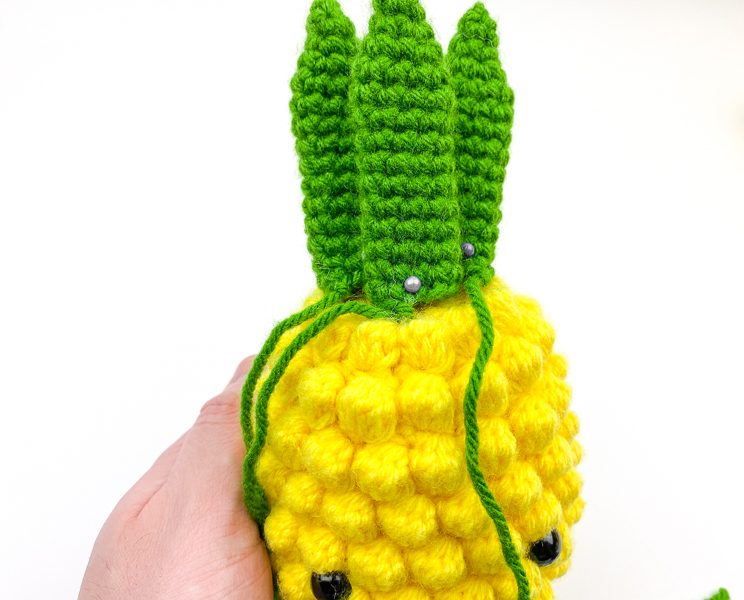
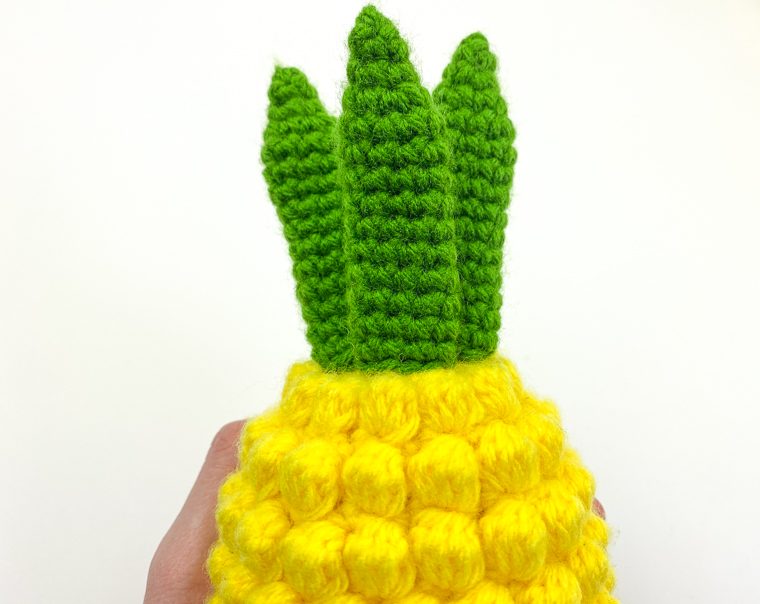
Embroidering
With all three leaves attached (2 in the back, 1 in the front) you will now take the light green yarn with the darning needle and start from the bottom of the front leaf and insert into the 5th stitch up. (Starting from the bottom of the leaf)
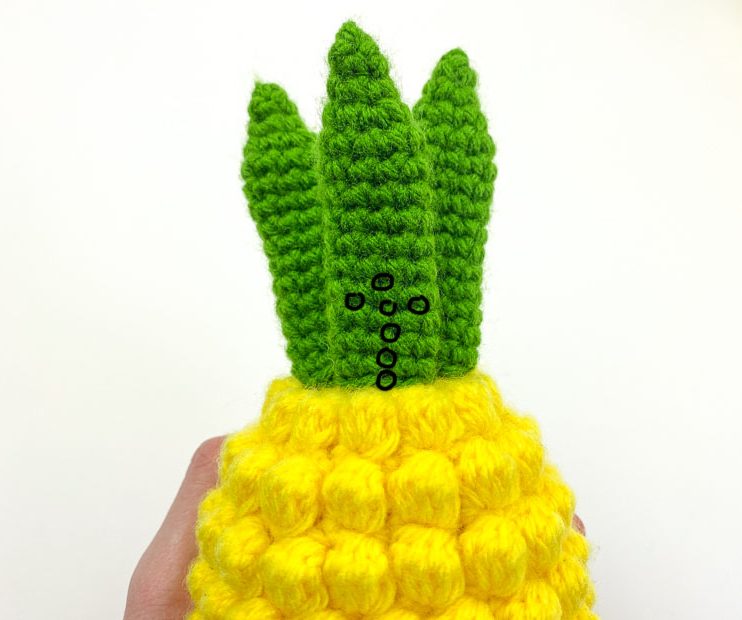
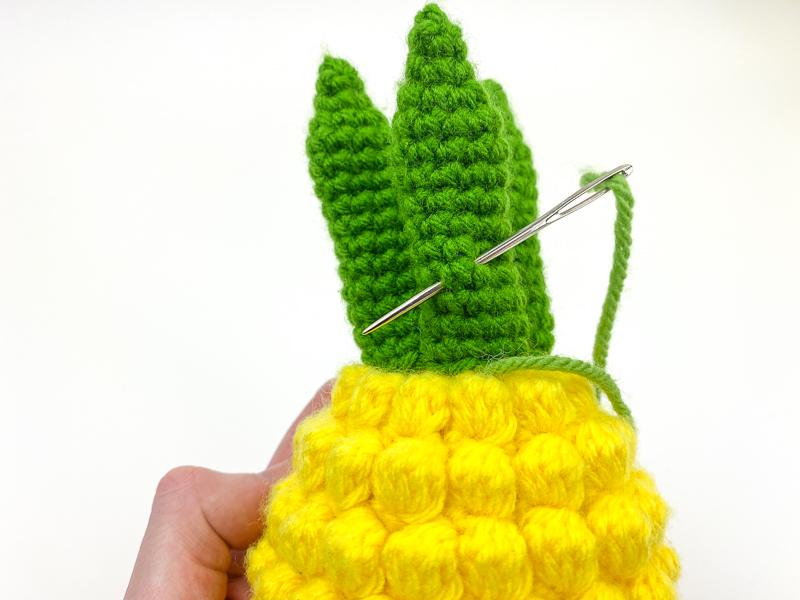
Down one stitch and one stitch to each side (as seen above), pull the light green yarn through and pull through the bottom.
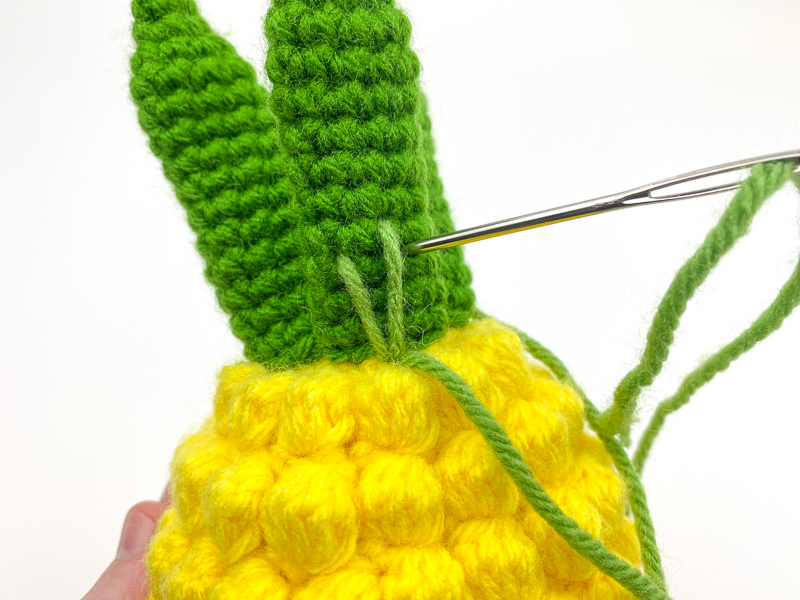
Complete this same process on the other two leaves
With the leaves now attached, you can bend them to how you wish

It’s now time to sew on the face!
Beginning with the smile, insert your needle through the center stitch between the puff stitches. Pull along to both the left and right sides and pull. The yarn will naturally curve around the bobble stitches.

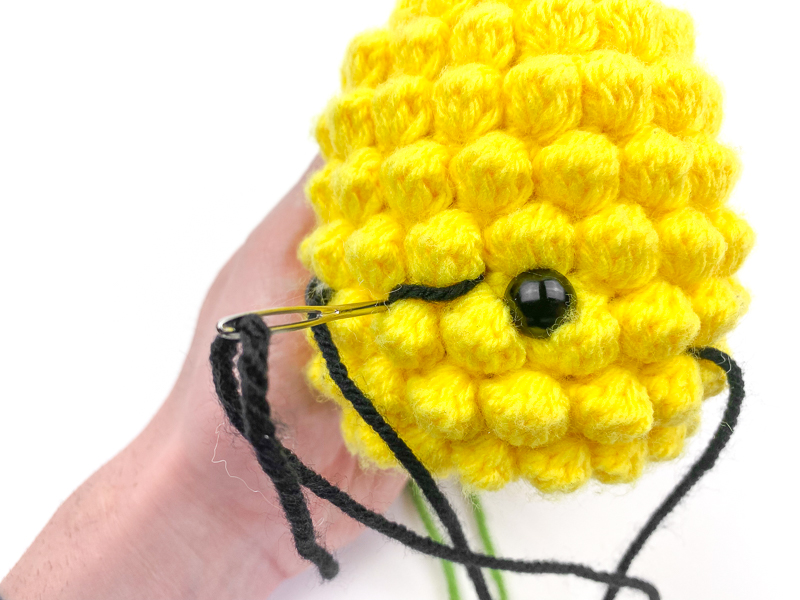
Finally, add on both the lashes and blush onto your project!
When sewing on the eyelashes, you may notices that the vertical lash is going directly through the puff stitch.

You’re now DONE!
Yay! I hope you enjoyed this pattern and that you come out of it feeling like you learned something new. I do think this is such a cute pattern and I think everyone around you will love it, too. A giant thanks to JOANN for giving me the opportunity to show all of my creativity to my readers. They are my favorite place to gather everything I need to really push my imaginative boundaries!
All editorial content and projects are intellectual property of Vincent Green-Hite, designer of Knot Bad.
This post was sponsored by JOANN Stores but all ideas and opinions are my own. Please do not claim this pattern as your own. If you wish to share this pattern, you may link to this pattern but please do not reprint it on your site. You may keep a copy for your own personal use but please DO NOT sell the pattern or distribute it.
You may sell products made from this pattern but please clearly credit the design to Knot Bad and link it my website knotbadami.com Make sure to post it! Use the hashtag #yarnpunk and #handmadewithjoann when posting it and please feel free to tag me and show me how yours turned out! You can also find the Facebook group and subreddit r/yarnpunk to post to as well!


