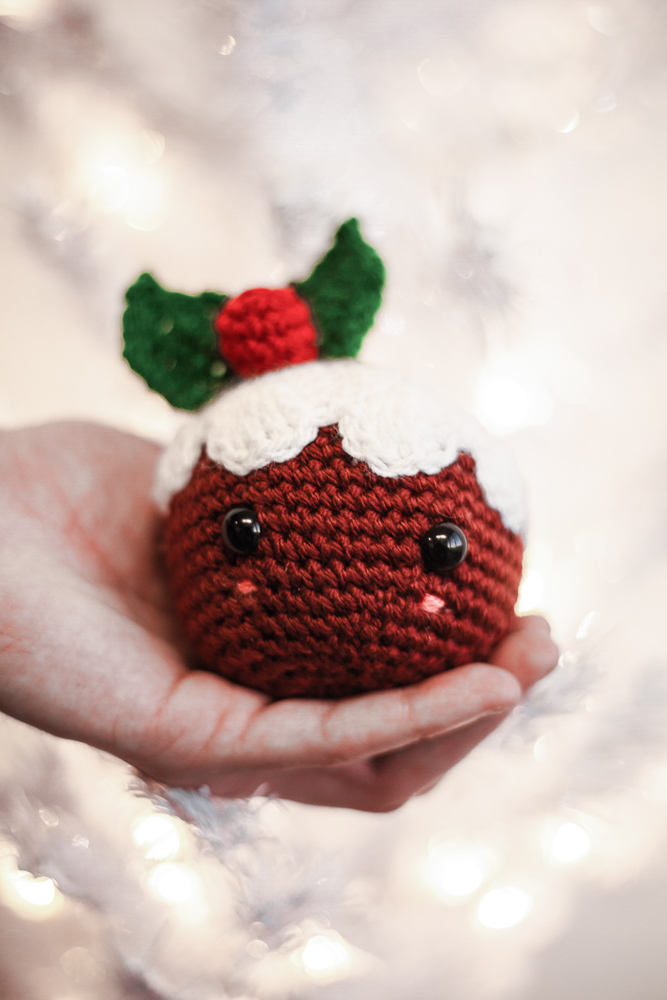
Yummy, dessert! The holidays are great for a number of reasons, but I think the true magic comes from the desserts and sweets that we get to indulge into! Calories don’t count for holidays, right? I am going to assume that applies for the entire season.
To create this ornament, we are using Lion Brand Yarn’s Basic Stitch Yarn along with all the other materials you may need to hang it up in your tree! All the materials you will need can be found at your local JOANN stores, online and offline. Can’t wait to see how you decorate your homes using JOANN!
I’ve teamed up with JOANN to bring you an ornament collection this season! This is just one of the three – You can head HERE to find the other two as well! JOANN is a place to bring in all the magic of the holidays when it comes to crafting and using yarn is no exception.
All editorial content and projects are intellectual property of Vincent Green-Hite, designer of Knot Bad. This post was sponsored by JOANN Stores but all ideas and opinions are my own.
Click the photo below to complete the entire collection!
So here’s what you’ll need:
Lion Brand Yarn Basic Stitch (in white, green, red, white, and brown)

Skill Level: Easy
Dimensions:
Width – 4″ inches wide
Height – 4″ inches long
Gauge:
Not needed for this project
Abbreviations:
Ch – chain
Sc – Single Crochet
Inc – Increase
Dec – Decrease
Hdc – Half Double Crochet
Dc – Double Crochet
Tc – Triple Crochet
Sl st – Slip stitch
FO -Finish Off
Don’t forget to Pin for later!

Let’s Begin!
Begin in color of the main body
Rnd 1: 6 Sc into Magic Ring (6)
Rnd 2: *Inc* around (12)
Rnd 3: *Sc, Inc* around (18)
Rnd 4: *Sc 2, Inc* around (24)
Rnd 5: *Sc 3, Inc* around (30)
Rnd 6: *Sc 4, Inc* around (36)
Rnd 7: *Sc 5, Inc* around (42)
Rnd 8: *Sc 6, Inc* around (48)
Rnd 9-15: Sc around (48)
Rnd 16: *Sc 6, Dec* around (42)
Rnd 17: *Sc 5, dec* around (36)
Be sure to insert the safety eyes!
Rnd 18: *Sc 4, dec* around (30)
Stuff firmly!
Rnd 19: *Sc 3, dec* around (24)
Rnd 20: *Sc 2, dec* around (18)
Rnd 21: *Sc 1, dec* around (12)
Finish off and sew hole shut (if it seems weird to be sewing it up so early, here’s how I go about doing it!)
Top Frosting (in white)
Rnd 1: 6 Sc into Magic Ring (6)
Rnd 2: *Inc* around (12)
Rnd 3: *Sc, Inc* around (18)
Rnd 4: *Sc 2, Inc* around (24)
Rnd 5: *Sc 3, Inc* around (30)
Rnd 6: *Sc 4, Inc* around (36)
Rnd 7: *Sc 5, Inc* around (42)
Rnd 8: *Sc 6, Inc* around (48)
Rnd 9: *Sc 7, Inc* around (54)
Rnd 10: Sc around (54)
Beginning the drips
Rnd 11: Ch 1, *Sk 1, 5 tc, ch 1, sk 2, sc into third. sc into next two stitches, ch1. Repeat from * around and sc into last.
Finish off and leave long tail for sewing

Holly
Ball
Rnd 1: 6 Sc into Magic Ring (6)
Rnd 2: *Inc* around (12)
Rnd 3-4: Sc around (12)
Rnd 5: *Sc, dec* around (6)
FO
Leaves (make 2)
Ch 8
Sc into second chain from hook, hdc, dc, tc,dc,hdc,sc 3x into last, hdc,dc, tc, hdc, sc.
ch1, turn. sc into next 3, ch 3, sl st into same stitch. repeat around

Putting it all together!
With the white frosting top, lay it flat on top of the body. Using your long tail, sew on the “drips” around! (Pinning it in place will also be helpful)


Now it’s time to add the holly on top! Add the two leaves first and then the red ball into the center.
Please do not claim this pattern as your own. If you wish to share this pattern, you may link to this pattern but please do not reprint it on your site. You may keep a copy for your own personal use but please DO NOT sell the pattern or distribute it.
You may sell products made from this pattern but please clearly credit the design to Knot Bad and link it my website knotbadami.com
Make sure to post it! Please feel free to tag me and show me how yours turned out!


