
This post was sponsored by JOANN – My favorite craft store to visit for all my yarn and tools that I use. Also, you can’t resist all their coupons!
The Flowers are Blooming!
Summer is here! This part of the year is actually pretty excited for an amigurumi artist. With each new season, designers’ color palettes begin to change and I really like the variety you can get out of the “springtime” feel. Every color collides in a fun way and JOANN has all the yarn i need. Do you have a favorite flower you like to see bloom every year?
Speaking of spring, this was a great time to come out with a flower pattern of course! Seeing flowers bloom in the spring is such an unexpected surprise even though it happens every year. Over in the Pacific Northwest, the flowers we get are remarkable.
I did want to try and diversify my project from other flower projects of the spring and I am aiming for a home décor goal this time. Keeping it classy, we’re keeping our flowers in a modern vase! As you can tell, I am working on my home décor skills with the help of JOANN stores.

Everyone Deserves Flowers
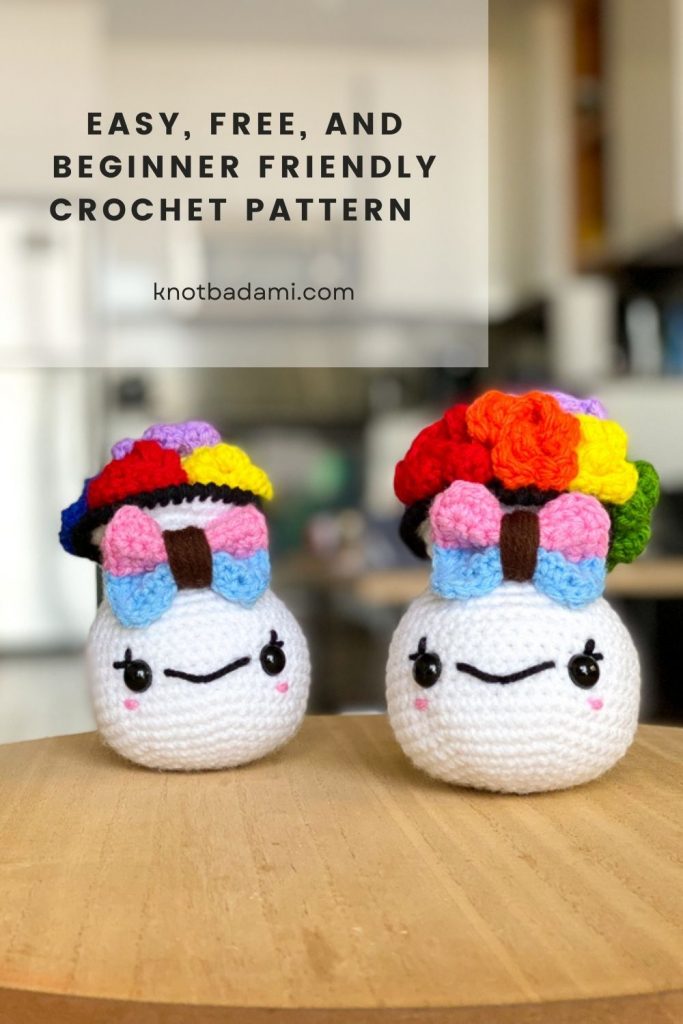
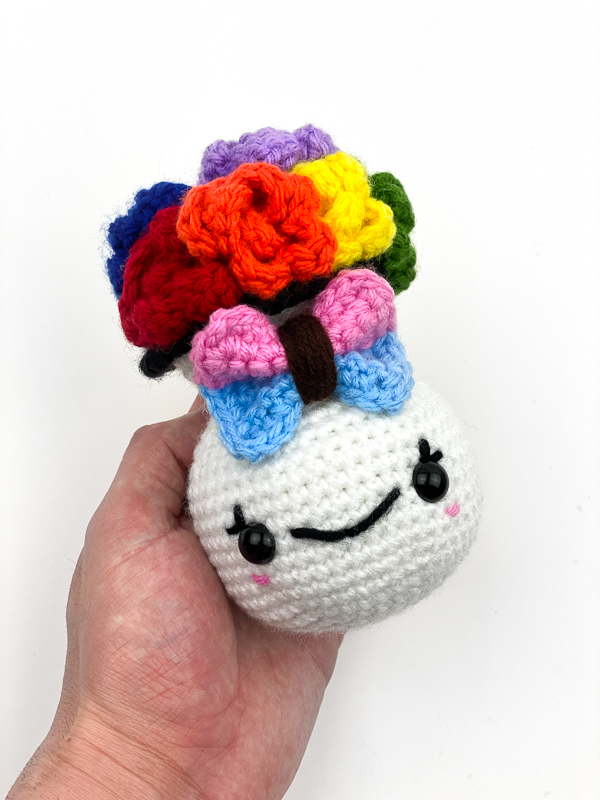
Although this is a summer idea, this project does go live during Pride Month and I wanted to add a small ode to this project. When looking at all of the colors, they all represent the colors of the pride / Inclusivity Flag. There are so many colors that show inclusivity and I wanted to be thoughtful with this.
No matter who or where you are in the community, everyone deserves flowers either from a loved one or just for themselves. It’s a shame we’ve dictated who flowers are for and I hope that this can be a small token to let you know the Yarn Punk community is safe for anyone.
I am looking forward to creating this vase later in the year with different colors as well – feel free to change it up however you wish!
What is the Progress Pride Flag?
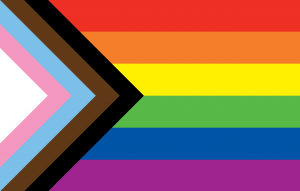
Here is some info about the flag:
“Designed in 2018 by Graphic designer Daniel Quasar, Quasar added a five-colored chevron to the classic Rainbow Flag from 1978 to place a greater emphasis on “inclusion and progression.” Quasar’s Progress Pride Flag added five arrow-shaped lines to the six-colored Rainbow Flag, which is widely recognized as the symbol of lesbian, gay, bisexual and transgender (LGBTQ+) community.”
“The flag includes black and brown stripes to represent marginalized LGBTQ+ communities of color, along with the colors pink, light blue and white, which are used on the Transgender Pride Flag.”
Click here to find more information in a helpful article by V&A
Crafting is Inclusive
Beyond just this project, crafting itself is inclusive and should be available to everyone – JOANN stores does a great job at bringing all crafters together and making it accessible to get started on your favorite crafts. Spring / Summer is often seen as a time of renewal and an opportunity to refresh, trying out a new craft like crochet might be the revival you need from this past winter. Enjoy this project from JOANN and I to start the warmer months off with!
I hope you can find welcoming spaces and communities with your craft. Can’t wait to see how you breath a new breathe of fresh air into your life with the new season! Seeing it in my home brings me joy.

It’s Summer Break
JOANN is always helping me spark my creativity and the materials I use make all the difference. Since its spring cleaning time, I think it’s a great opportunity to swap out those old materials and replace them with some fresh tools. JOANN has everything you need to feel like you’re in a new mindset and you can find all the materials I used (down below) in person and online.
JOANN is my go to when it comes to materials, especially the yarn I use! As a blogger, creating my own designs is made easy with them. You’ll see below that I have a favorite yarn – I am excited for you to try it out. (Spoilers: It’s Big Twist Value)
Down below, you can find the free and easy crochet project to create your own Roseate Rose Vase. I hope you can add this project to your new list of projects to make for your home – these flowers will never wilt!
This pattern is perfect for you if:
- You need to add some home décor to your house
- You want to practice your sewing skills.
- You are looking for a pattern that is easy but still has more stitches to make it more challenging than an absolute beginner pattern.

Thank you for all your support
You can find every single thing I used for this project from JOANN stores and you will see all of that hyperlinked for you. JOANN is my favorite place to go for materials and the yarn I love the most for amigurumi can be exclusively found there as well. When purchasing, I earn a little bit of the commission, so thank you for supporting me as a blogger!
All editorial content and projects are intellectual property of Vincent Green-Hite, designer of Knot Bad.
This post was sponsored by JOANN Stores but all ideas and opinions are my own. Please do not claim this pattern as your own. If you wish to share this pattern, you may link to this pattern but please do not reprint it on your site. You may keep a copy for your own personal use but please DO NOT sell the pattern or distribute it.
You may sell products made from this pattern but please clearly credit the design to Knot Bad and link it my website knotbadami.com Make sure to post it! Use the hashtag #yarnpunk and #handmadewithjoann when posting it and please feel free to tag me and show me how yours turned out! You can also find the Facebook group and subreddit r/yarnpunk to post to as well!

My other social media platforms you can find me at:
Instagram: @knot.bad
Tik Tok: @knotbad
Twitter: @knotbadcrochet
Twitch: Yarnpunk
So here’s what you’ll need:
All the yarns can be substituted with any size 4 worsted weight yarn. (The yarn I am using is acrylic)
- 1 Skein in Big Twist Value White
- 1 Skein in Big Twist Value Lilac
- 1 Skein in Big Twist Value Varsity Red
- 1 Skein in Big Twist Value Varsity Blue
- 1 Skein in Big Twist Value Varsity Yellow
- 1 Skein in Big Twist Value Cornflower Blue
- 1 Skein in Big Twist Value Forest Green
- 1 Skein in Big Twist Value Orange
- 1 Skein in Big Twist Value Black
- 1 Skein in Big Twist Value Pink
- 1 Skein in Big Twist Value
Scissors
2 x 12mm Safety Eyes
 Dimensions
Height: 5.5″ inches
Width: 3.5″ inches
Enjoy what I do? You can send me a tip if you would like or even follow me on Ko-fi!

Skill Level:
Easy+
Abbreviations (In US terms)
Sl st – Slip Stitch
Ch – chain
Sc – Single Crochet
Dc – Double Crochet
Inc – Increase
BLO – Back Loop Only
* *- Repeat
FO – Finish Off
( ) – Number of stitches
[ ] – Referring to a section of the pattern
Don’t forget to pin this pattern for later! It can be easy to forget so make sure you have this tucked away for a rainy day on your Pinterest Boards.
Notes:
- This pattern is worked flat in the row
- This pattern is written in US terms
- You can find helpful tutorials throughout, but if you would like to find some of my tips and tricks you can head HERE!
- Find my YouTube tutorial for the Magic Ring here!
- The photo for each step will be found BELOW the explanation.
- Everything you see in this pattern will be adjustable to your own liking. The colors you choose to the face you create is all up to you!
Let’s Begin!
Main Body (Vase)
Begin in White
Rnd 1: 6 Single crochet into the Magic Ring (6) (Click here for video tutorial!)
Rnd 2: *Inc* around (12)
Rnd 3: *Sc, Inc* around (18)
Rnd 4: *Sc 2, Inc* around (24)
Rnd 5: *Sc 3, Inc* around (30)
Rnd 6: *Sc 4, Inc* around (36)
Rnd 7: *Sc 5, Inc* around (42)
Rnd 8: *Sc 6, Inc* around (48)
Rnd 9 – 16: Sc around (48)
Rnd 17: *Sc 6, Dec* around (42)
Rnd 18: *Sc 5, Dec* around (36)
Counting from the magic ring, insert the your safety eyes into round 13 with 9 stitches apart.

Rnd 19: *Sc 4, Dec* around (30)
Rnd 20: *Sc 3, Dec* around (24)
Rnd 21: *Sc 2, Dec* around (18)
(The rest of the pattern will be creating the top of the vase)
Rnd 22: *Sc 2, Inc* around (24)

Rnd 23: *Sc 3, Inc* around (30)
Rnd 24: *Sc 4, Inc* around (36)
Rnd 25: *Sc 5, Inc* around (42)
Rnd 26: In the BLO, Sc around (42)

We will now be creating the border
Rnd 27: Crab stitch around (photo tutorial below)
Slip stitch into the next stitch. Ch 1.

Insert your hook into the previous stitch (to the right of the current stitch)

(We will be performing a single crochet) Yarn over and pull through the first loop. Yarn over and pull through both loops as you would a single crochet


Continue single crocheting into each stitch around, crocheting to the right side. Here is how your crab stitch border will appear:


When reaching the end, insert your hook into the final white stitch (where your initial slip stitch was placed) Pull through both loops and slip stitch


From the top, you will be able to see the back loops exposed:


Top of the Vase
Begin in White
Rnd 1: 6 Single crochet into Magic Ring (6) (Click here for video tutorial!)
Rnd 2: *Inc* around (12)
Rnd 3: *Sc, Inc* around (18)
Rnd 4: *Sc 2, Inc* around (24)
Rnd 5: *Sc 3, Inc* around (30)
Rnd 6: *Sc 4, Inc* around (36)
Finish off and leave tail for sewing
**This will be important to know before moving forward:
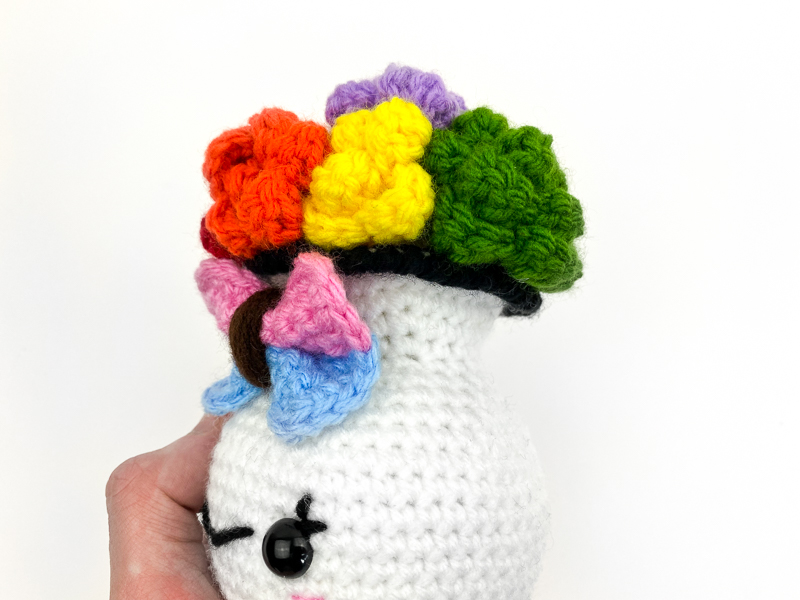
If you would like to make the overfilling vase of flowers, keep following along the normal pattern. As you can see here, the border is more flat than standing. If you would like to be able to see the ride and top of the base, make 6 small flowers instead of just the 4 listed below.
High Border:

Flat border:
Flowers
Large (Make 2 in Blue and Green)
Chain 53
In 3rd chain from hook, Dc. Dc x 3 more in the same stitch (4 in total). **Sl st into next stitch, ch 1. Skip the following stitch, Dc x 4 into the next stitch. Repeat from **. Sl stitch into final stitch, finish off and leave tail for sewing.
Small Flowers (Make 4 in red, yellow, orange, and purple)
Chain 25
In 3rd chain from hook, Dc. Dc x 3 more in the same stitch (4 in total). **Sl st into next stitch, ch 1. Skip the following stitch, Dc x 4 into the next stitch. Repeat from **. Sl stitch into final stitch, finish off and leave tail for sewing.
Your work will be curling when crocheting and you’ll be leftover with a curly mess.

With the ends of your piece, straighten out so the curls are in a spiral until it creates a rose shape (seen below):

With the tail of your yarn threaded through the darning needle, insert your needle upward through all the layers to the top. You will be going back down through all the layers in a “/\” shape.

Going back down through the flower, insert your needle through all layers

With your needle, insert through all the layers along the bottom of the rose to keep it secure.

Bow
Begin in light blue
Ch 10
Row 1: In 3rd chain from the hook, Sc. Sc across (8)
Row 2 – 4: Ch 1, turn. Sc across (8)
Switch to pink
Row 5 – 8: Ch 1, turn. Sc across (8)
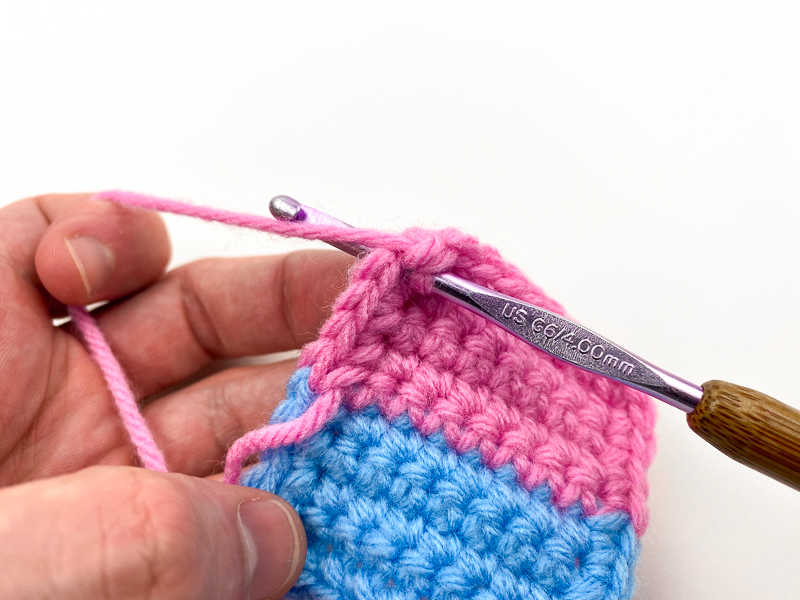
Creating the border
Ch 1. Sc into the first stitch on the EDGE (or side) of your work. Sc x 2 into the same stitch (3 total)


Sc across until the color change – through the last loop of the single crochet in blue, pull the pink yarn through both loops.

Sc across until the corner stitch. Into the corner stitch, sc x 3 into the same stitch. Your work will naturally begin to turn.

Sc across until next corner, sc x 3 into the corner stitch.. Sc across the next edge and switch colors when applicable. Sc x 3 into the following corner stitch using the pink yarn.

Sc along the last edge. Into the last corner stitch, sc into the first stitch of the initial [sc x 3].


Into the middle stitch of the initial [sc x 3], sl st.
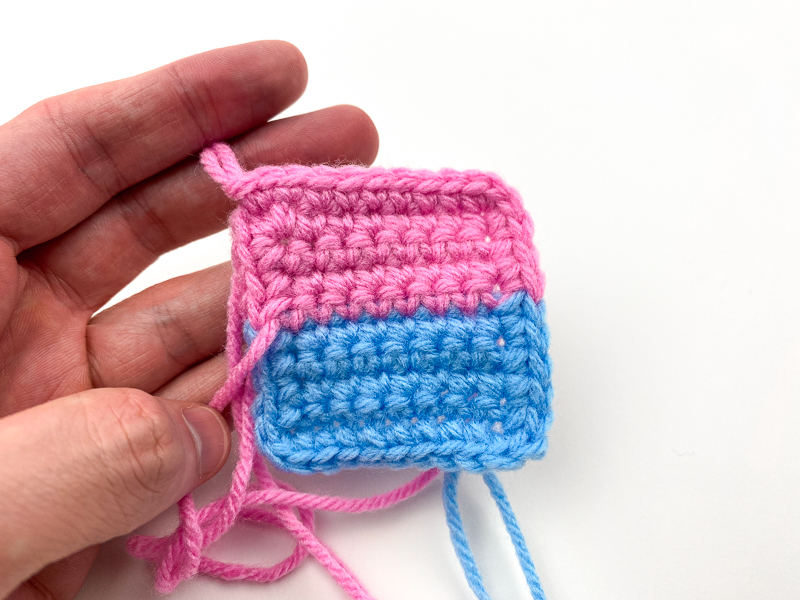
Finish off.
Using a long strand of brown yarn (roughly 50″ inches will do) insert through the center of the square panel.

Pinch your work so it is scrunched.

With your long tail of brown yarn, wrap around tightly to keep it in place. You can wrap as many times as you wish depending on how thick you would like it to be!

Weave the yarn through the back of the piece. Leave tail for sewing.

Assembly
The main body of the vase should be firmly stuffed in the first “ball” shape.
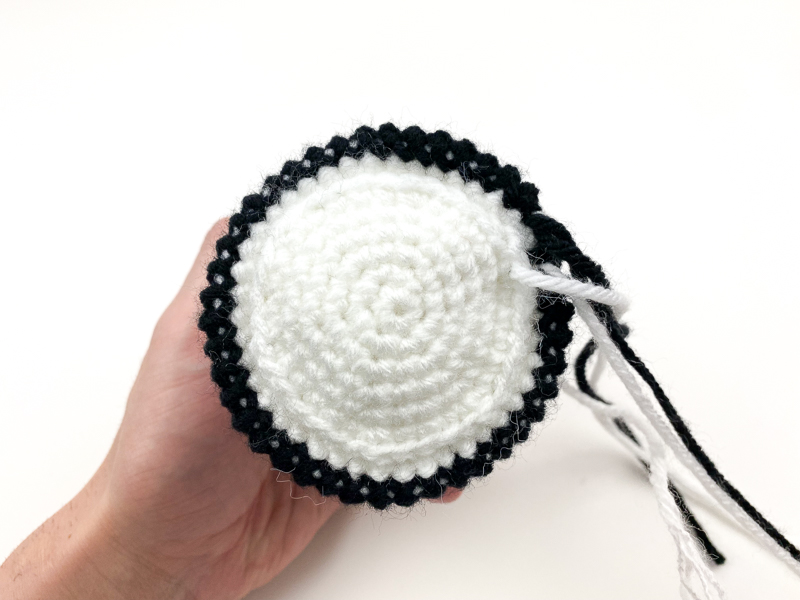
Using the piece for the top of the vase, thread your yarn through the darning needle. With your darning needle, insert into the first back loop (I like to start where the begin where the previous round ended) Have your needle begin from inside of the circle and then move outward.

Into the next loop, insert needle though the loop and next stitch on the piece being attached.

Continue weaving through corresponding loops and stitches.
For every 6th loop when going back into the stitches of the Vase Cover, insert into the SAME stitch from the previous stitch. This is to offset the math since there are 48 loops and only 42 stitches. (all see below)


As you can see below, both strands are going into the exact same stitch. Continue this all the way around!

As your work begins to close, be sure to stuff your work firmly

Attaching the Flowers
*The flowers on this pattern will be squished together pretty tightly. We have created the back two flowers to be taller / larger than the rest so it they can still be seen when looking forward at your vase. To begin, placement is going to be very important – Down below, you will see each placement and for every two roses, you will sew into place.
You can place the flowers in any way that YOU like!
Beginning with the blue flower, place in the back left position.

With the tall green rose, place on the back right, with both flowers squished together (it’s okay if you want some of the flower hanging off like like I did!)

Every time we get a good idea of positioning for 2 of our flowers, it will be a great time to start sewing (You can always pin the other flowers into place to make sure you’re happy with placement)
With your darning needle, pull through the bottom of the flower and pull through to sew into place.


Once the two back roses are attached, position the red and yellow flowers to the front of the base. Sew into place.

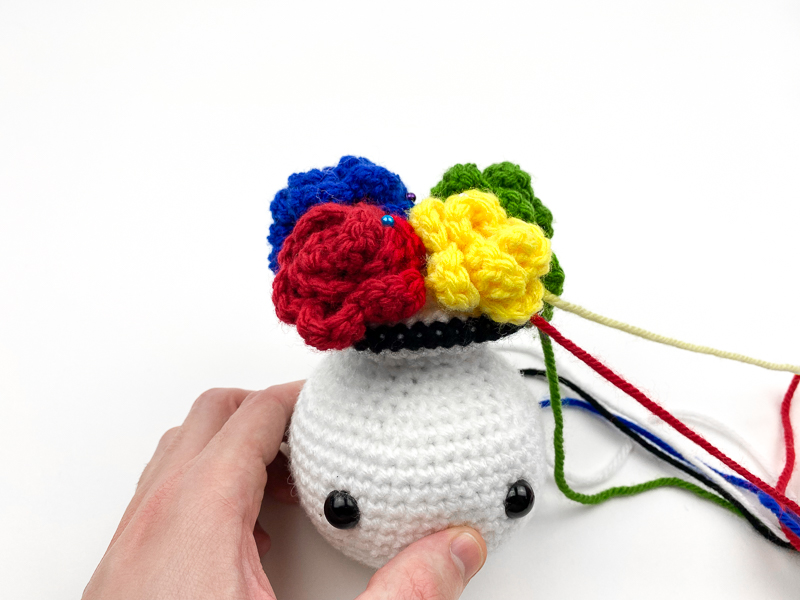

Time to sew on the last two flowers! Positioning to the TOP of the other flowers, place the orange in the front at a slight angle. Place the purple flower behind on top of the blue and green flowers.


Attaching the Bow
With the tail on the backend of the bow, attach to the very front and try to have it go UNDERNEATH the border of the vase top.


The last step to your project is to embroider the face on! Thread your yarn through your darning needle and add the eyelashes, smile, and blush!

With all your tails woven in and you’re feeling secure with all your pieces, you’re done!! Congrats!!!

I hope this fun project has a place in your home this spring. I myself will be moving into a new space at the time of writing this post and I am very excited to have a fresh start as well. I am so excited to try and “smell the roses” and I hope to see all of your online!
Let me know what kinds of things you’re going to be doing for yourselves in the comments below – perhaps craft even more?
Thank you to JOANN who continue to inspire me with everything they have to offer in this welcoming space. Be sure to find everything you need from JOANN stores in person and online! You’ll be seeing their lovely name around my channels, I guarantee you.
All editorial content and projects are intellectual property of Vincent Green-Hite, designer of Knot Bad.
This post was sponsored by JOANN Stores but all ideas and opinions are my own. Please do not claim this pattern as your own. If you wish to share this pattern, you may link to this pattern but please do not reprint it on your site. You may keep a copy for your own personal use but please DO NOT sell the pattern or distribute it.
You may sell products made from this pattern but please clearly credit the design to Knot Bad and link it my website knotbadami.com Make sure to post it! Use the hashtag #yarnpunk and #handmadewithjoann when posting it and please feel free to tag me and show me how yours turned out! You can also find the Facebook group and subreddit r/yarnpunk to post to as well!


