6******Order your Lion Brand Yarn HERE!
Hooded Blueprint Scarf

Portland rains. A lot. We are kind of known for it, and as someone who tries to achieve maximum volume in his hair, I’m sure you can guess why I’m not always stoked on the rain. Although I hate getting my hair wet, I realized why it was always happening to me; literally none of my coats in my wardrobe had hoods! Since scarves are pretty much part of my identity at this point (I feel naked without them), I knew there would be a fix to this issue; a hooded infinity scarf! It’s so cozy, warm, and has the function of keeping your head dry without having the hood hang on your back like a normal coat or hoodie, which I think is such an added bonus.
Today, I bring you the Hooded Blueprint Scard Made from Lion Brand Yarn’s Jeans Yarn, it’s such an easy project to get done over the weekend!

Skill Level: Easy
Materials:
2 Skeins in Jeans Faded (any worsted weight will work!)
6mm hook
Darning Needle
Scissors
Stitch Marker
Gauge: 14 sts x 12 rows = 4×4″


Abbreviations:
Ch – Chain
Sc – Single Crochet
Inc – Increase
Hdc – Half Double Crochet
Rep- Repeat
( ) – number of stitches at the end of the round

Here is the free pattern!
Ch 177
Row 1: Into second chain from hook, hdc. Hdc across until end of the chain. (176)
Row 2-35: Ch 1, turn. Hdc across (176)
Row 36: Ch 2, Puff Stitch into first stitch. *Skip one stitch, puff stitch into next, repeat from * until end of row.

Once you have the full piece, it should look like this! (Down below)
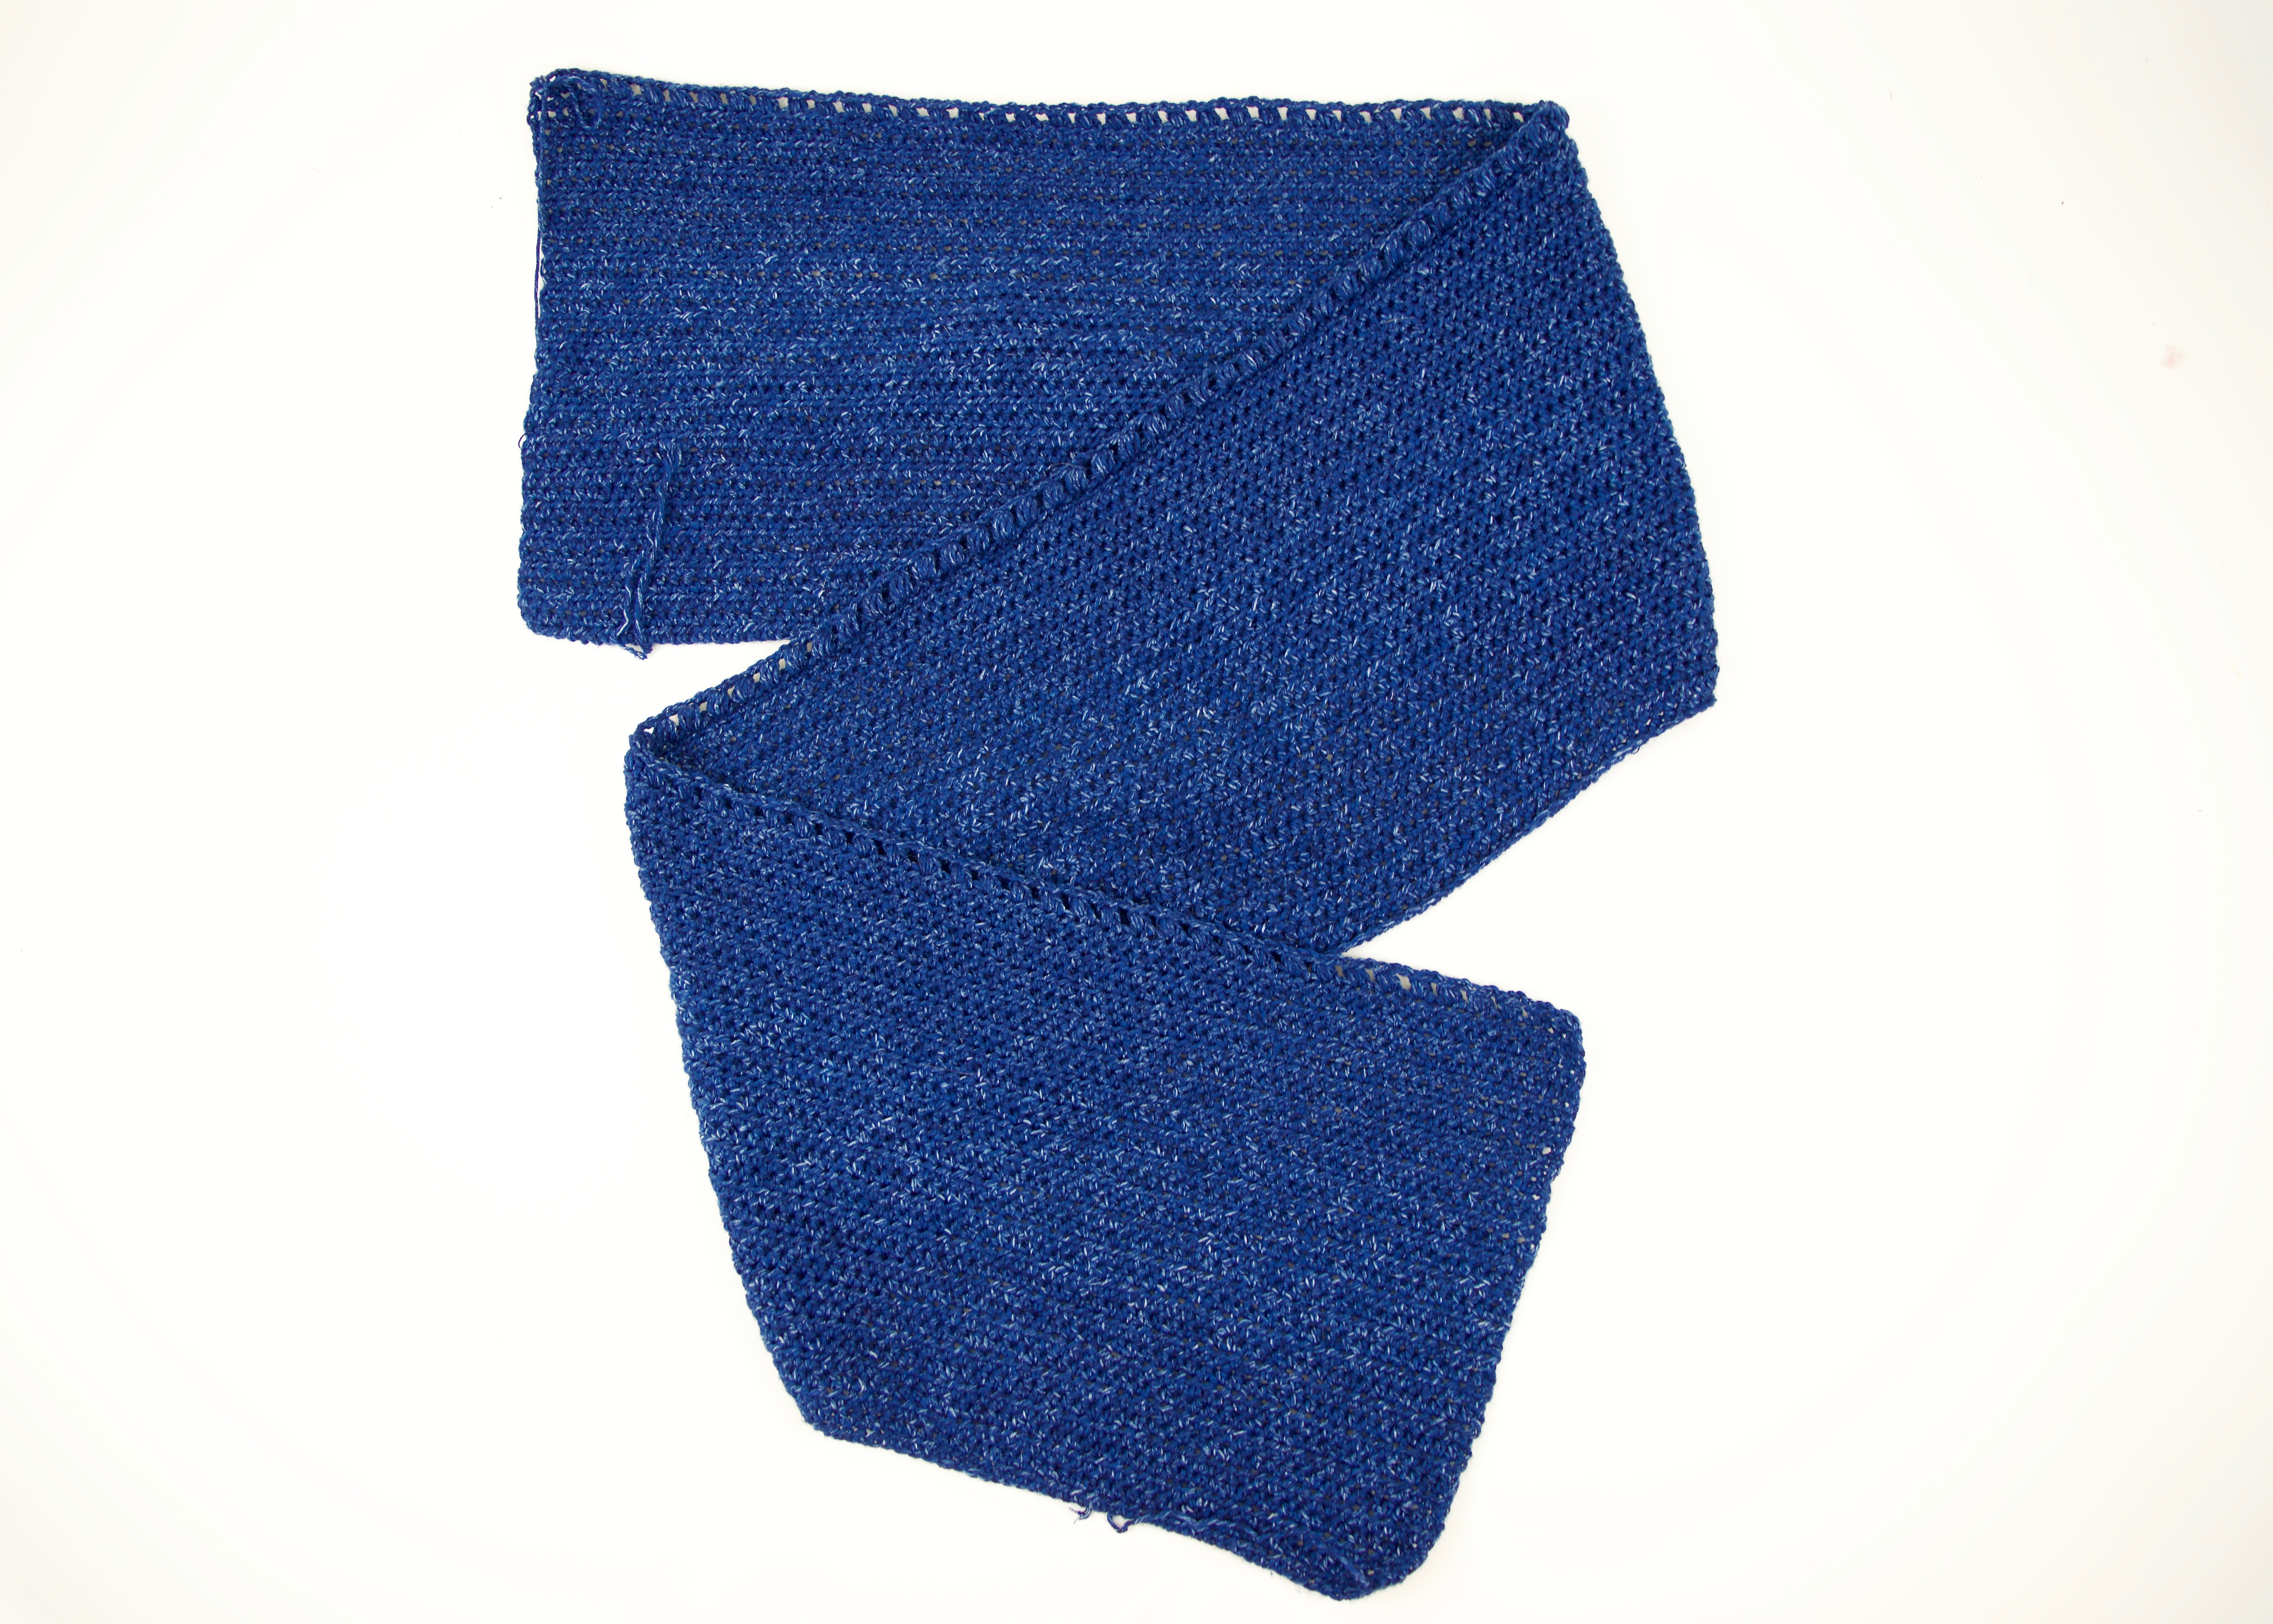
When you’ve finished this part up, fold you work in half. Sew together the two unattached ends together.

When folded, you will sl st across to combine the scarf.
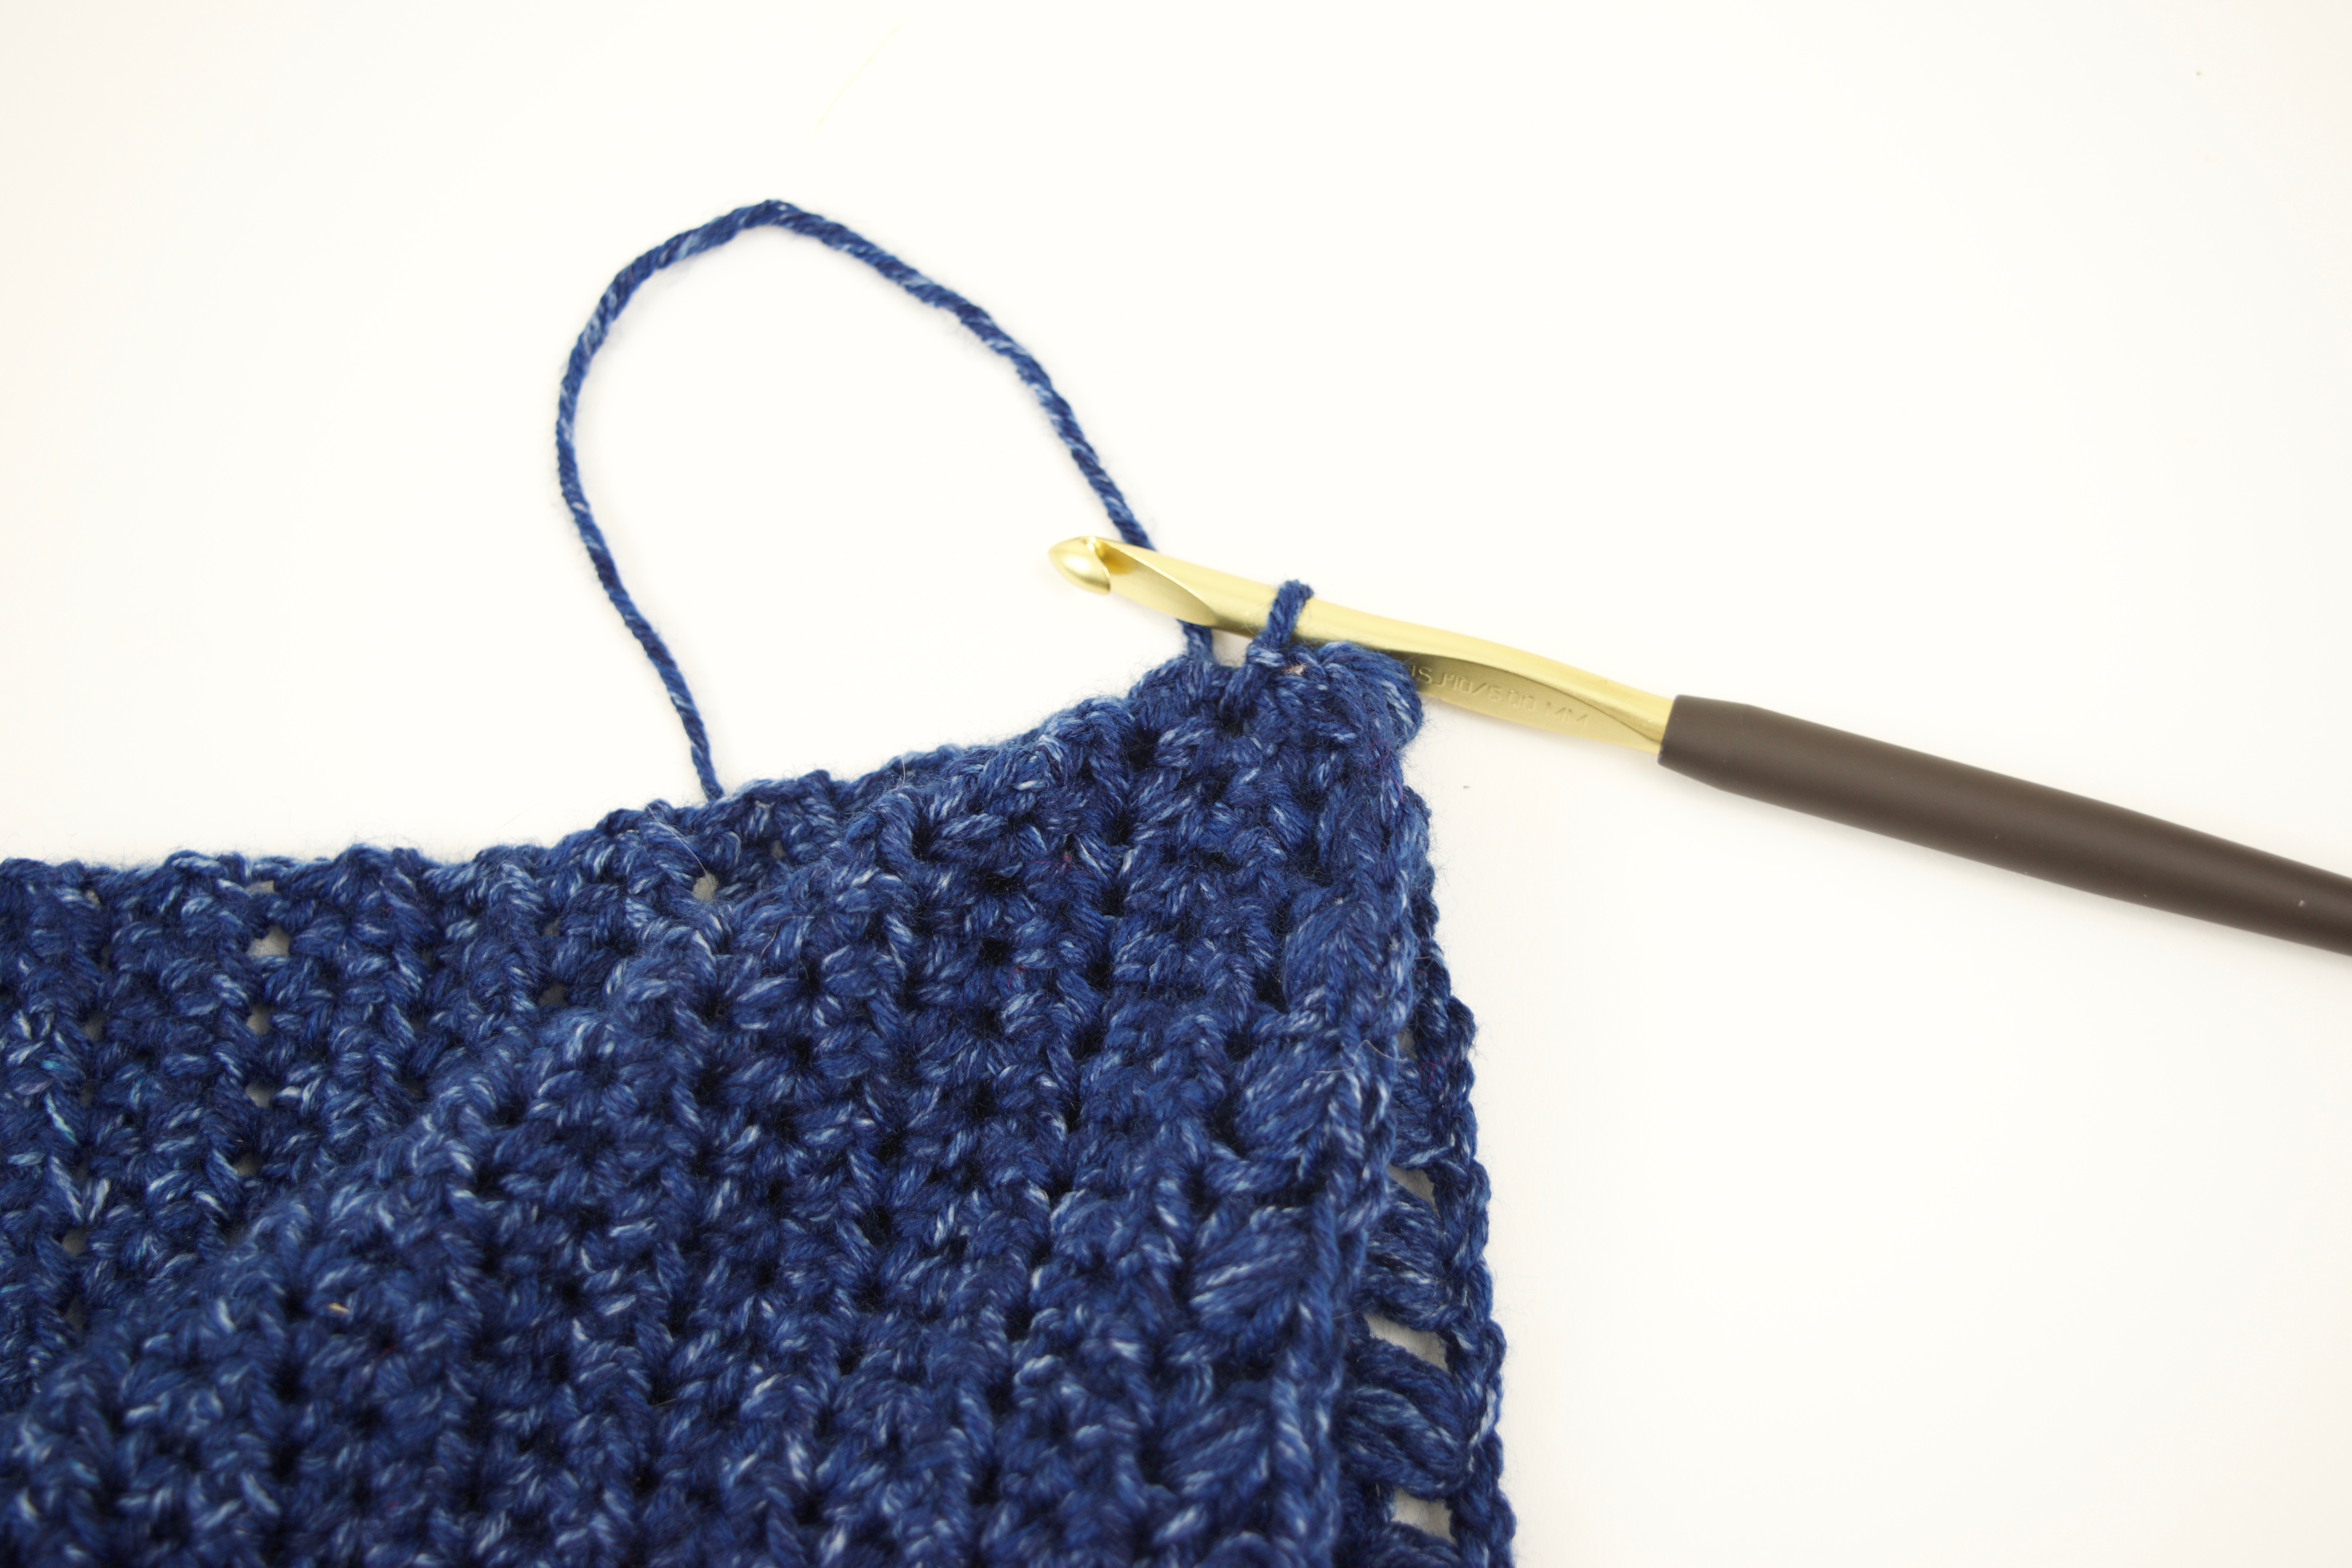
On the long side, you will continue slip stitching (or sewing) down the side for 8 1/2 inches (this creates the hood!) Down below shows where you will be seaming it together:

When its pulled open like this, this is how the hood will look when sewing down the LONG end!

You may not sell my patterns or claim them as your own. You may make items to sell (i.e. on Etsy, at craft fairs) from my patterns but I ask that you link back to my blog and provide credit for the pattern. You are welcome to share my patterns on social media so long as you link back directly to my blog post (providing the link). No copy & paste of my patterns will be allowed under any circumstances.
Be sure to tag @knot.bad and @yarnpunk on your socials and use the #yarnpunk!
What are the safety eyes used for?
That was typo on my end, still too attached to my amigurumi patterns lol
Just the pattern I’ve been looking for. Our food pantry clients will enjoy these!
I really love this pattern. But I’m not sure I understand the final step to make the hood. Could you post some more pictures or maybe a video?
Hi, thank you! I added one more picture with arrows to show where to seam downward. After attaching both ends, you will work down the long side which will create the hooded portion! Let me know if you still need more clarification! 🙂
Thanks, that makes much more sense. I’m making mine with Premier Sweet Roll in Black Pepper Swirl. My stitches seem to be coming out much taller than yours. I may reduce to 24 rows. Can’t wait til it’s done ?
Finding hard to understand the making of hood. Can you explain how to make the hood part? Thanks
Hi! I uploaded a new picture with the arrows signifying where to seam – So, once you attach the two ends together to create the infinity portion of the scarf, you will lay it flat, and seam together the long end downward, which you close it off and create a hood portion! If that still isnt helpful, I will try to add more graphics or perhaps a video 🙂
Did you really only use one skein on this? I’m currently using a worsted weight yarn with higher yardage and I’m not even half way through and my skein is nearly gone. I’m even still using a 4mm hook. I’m definitely going to run out long before I get to the puffs.
Hi! That is a huge typo and not quite sure how I ended up putting 1. It is much more than 1, you are correct. I believe with my tension, I was bale to do this pattern in 2 skeins! I apologize for inconvenience, I appreciate you taking the time to let me know!
I really like this pattern and enjoyed crocheting it. I have one request, would you include the instructions on how to crochet the puff stitch, under special stitches?