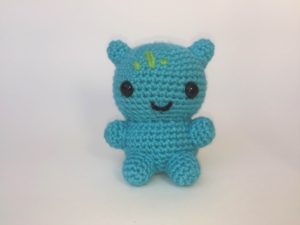
Crochet Charmander Pattern
Make one of the 3 original starters form the Kanto Region, Charmander! The free pattern will be available down below, but don’t forget to check out the other three from the Kanto Starters! (Click their picture to find them!) If you don’t have easy access to yarn, I highly recommend using Lion Brand Yarn to get your yarn!
If you want to make the other starters (can’t NOT have a full set!), they are available ass free patterns as well!
Terminology:
Ch Chain
St Stitch
sc Single crochet
Inc Increase, 2 sc in the same space
Dec Decrease, single crochet 2 together
Notes: This Pattern is worked in continuous rounds and stands about 5 inches tall! Made in worsted weight yarn.
You will need:
US 4 mm hook (any size will be okay, but this is what the picture is made in. Size of hooks determine the size!)
Yellow Yarn
Red Yarn
Orange Yarn
Beige Yarn
Yarn needle for sewing
Stitch marker
Fiberfill for stuffing
Two 12mm safety eyes
Pet Brush
Head/Body:
(Begin in Orange)
Rnd 1: Magic Ring 6 (6)
Rnd 2: [Inc] x 6 (12)
Rnd 3: [Sc, Inc] around (18)
Rnd 4: [Sc 2, Inc] around (24)
Rnd 5: [Sc 3, Inc] around (30)
Rnd 6: [Sc 4, Inc] around (36)
Rnd 7: [Sc 5, Inc] around (42)
Rnd 8-14: Sc around (42) *Place eyes in row 12, 8 stitches apart*
Rnd 15: [Sc 5, Dec] around (36)
Rnd 16: [Sc 4, Dec] around (30)
Rnd 17: [Sc 3, Dec] around (24)
Rnd 18: [Sc 2, Dec] around (18)
Rnd 19: [Inc] around in Front Loop only (36) Begin stuffing head firmly
Rnd 20-24: Sc around (36)
Rnd 25: [Sc 4, Dec] around (30)
Rnd 26: [Sc 3, Dec] around (24)
Rnd 27: [Sc 2, Dec] around (18)
*You can stuff the body now or wait till the end. Don’t stuff the body as firmly as the head. Let the body be a little squishy so it can sit!**
Rnd 24: [Sc, Dec] around (12)
Finish off and leave tail to close hole
Arms (Make 2)
(Begin in orange)
Rnd 1: Magic Ring 6 (6)
Rnd 2: [Inc] x 6 (12)
Rnd 3-4: Sc around (12)
Finish off and leave long enough tail to attach
Legs (Make 2)
(Begin in orange)
Rnd 1: Magic Ring 6 (6)
Rnd 2: [Inc] x 6 (12)
Rnd 3-5: Sc around (12)
Finish off and leave long enough tail to attach
Tail
(Begin in orange)
Rnd 1: Magic Ring 5 (5)
Rnd 2: [Sc 4, Inc] x1 (6)
Rnd 3: Sc around (6)
Rnd 4: [Sc 5, Inc] x1 (7)
Rnd 5: [Sc 6, Inc] x1 (8)
Rnd 6: [Sc 7, Inc] x1 (9)
Finish off and leave long enough tail to attach
Stomach
(Begin in Beige)
Rnd 1: Magic Ring 6 (6)
Rnd 2: [Inc] x 6 (12)
Rnd 3: [Sc, Inc] around (18)
Rnd 4: [Sc 2, Inc] around (24)
Assembly: First, you want to stuff the head very firmly. However, before you close up the body portion, don’t firmly stuff the body. You want to keep it a little squishy so it can sit and it has that cute look to it! First thing to attach is the stomach! Begin attaching the arms to the sides, lightly stuffed. After, attach the legs that will also be lightly stuffed. The legs can even overlap the stomach. You can either attach them straight forward or have them slightly going to the side. But make sure to pin them so you can make they will sit! Now, attach the tail to his back side, which will also give him support to sit up straight! To give the tail its flames, pull through a couple pieces of yellow and red yarn. They can be whatever length you desire. Now, with a pet brush for hair, brush out the strands until the are frizzy like the picture! The final step is to embroider a smile on 🙂
If you have ANY questions, please do not hesitate to contact me! You can reach me via Etsy at Knot Bad Crochet or Instagram @knot.bad These patterns were inspired by Pokemon, and I do not own the rights. Please do not claim this pattern as your own; You may sell or gift your creations, all I ask is that you link my shop if you do decide to sell! And if you decide to post it on Instagram, please tag me! I would love to see how it turns out! 🙂 Happy Crafting!


