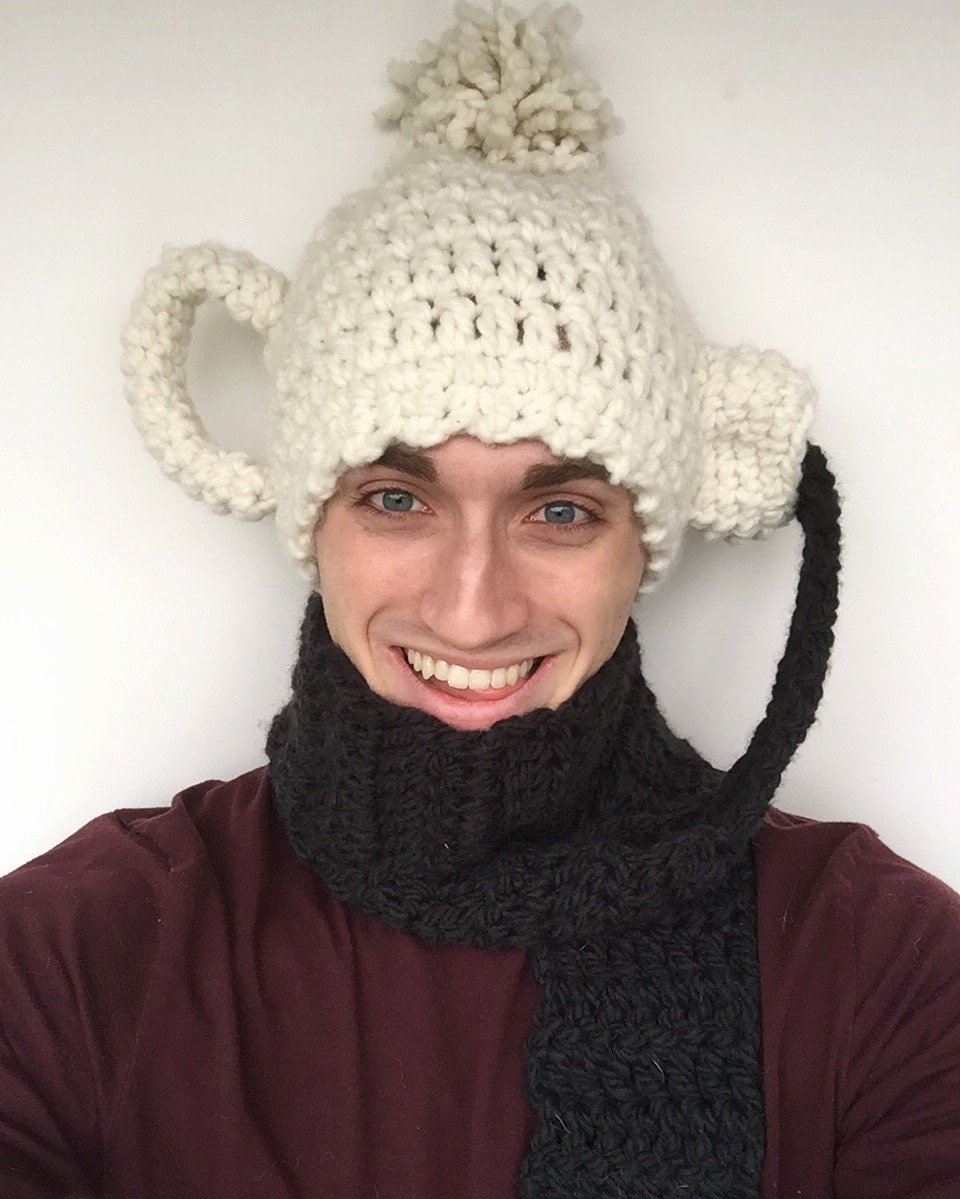
For all you coffee and tea enthusiasts out there; what better way to show your love for the substance than wear it on your head? Acting as a hat and scarf, you’ll be able to keep warm on the outside as your drink keeps you warm on the inside!
Things you will need:
Category #6 – Bulky – 294 yards
– Lion Brand Yarn Lion Brand Yarn with their Wool-Ease Thick & Quick works perfectly for this!
– Black
Crochet Hook Size M/ 9.00 mm
Tapestry (Yarn) Needle
Tape Measure
Scissors
Gauges:
Hat Gauge 4” sq = 7 stitches x 5 rows
Scarf Gauge 4” sq = 7 stitches x 4 rows
Stitches Used:
Sl st – Slip Stitch
Sc – Single Crochet
Inc – Increase
Hat (Begin in White)
Rnd 1: Chain 3
Rnd 2: Sc in second chain from and Sc to end. (2)
Rnd 3: Ch 1, turn. Sc into previous stitches (2)
Rnd 3: Repeat [Rnd 3] until desired length. 19” will fit an average woman’s age and 20” will fit adult mens head.
Rnd 5: Sl st last and first row together and sl st next stitches together to attach both ends to create the band.
Rnd 6: Ch 1. Sc in each stitch all the way around. Sl st back into first ch.
** Number of stitches will vary depending on hook size, yarn thickness, and how tight your stitches are!
Rnd 7: Ch 2, Dc into the same stitch. Dc all the way around into each stitch. Sl st into first ch.
***Do this for 6 more rounds (7 rounds in total, which will be 7.5”-8” inches in height) or until desired length.
Rnd 8: Now you can close the top of the hat! I tend to use my yarn needle and pull all the corners of the hat into the center! By laying your at flat, pull through the other side. With the two “corners” you have, pull them to the center. Now left with 4 “Corners”, pull those to the center. Now pull the 8 corners you have to the center!
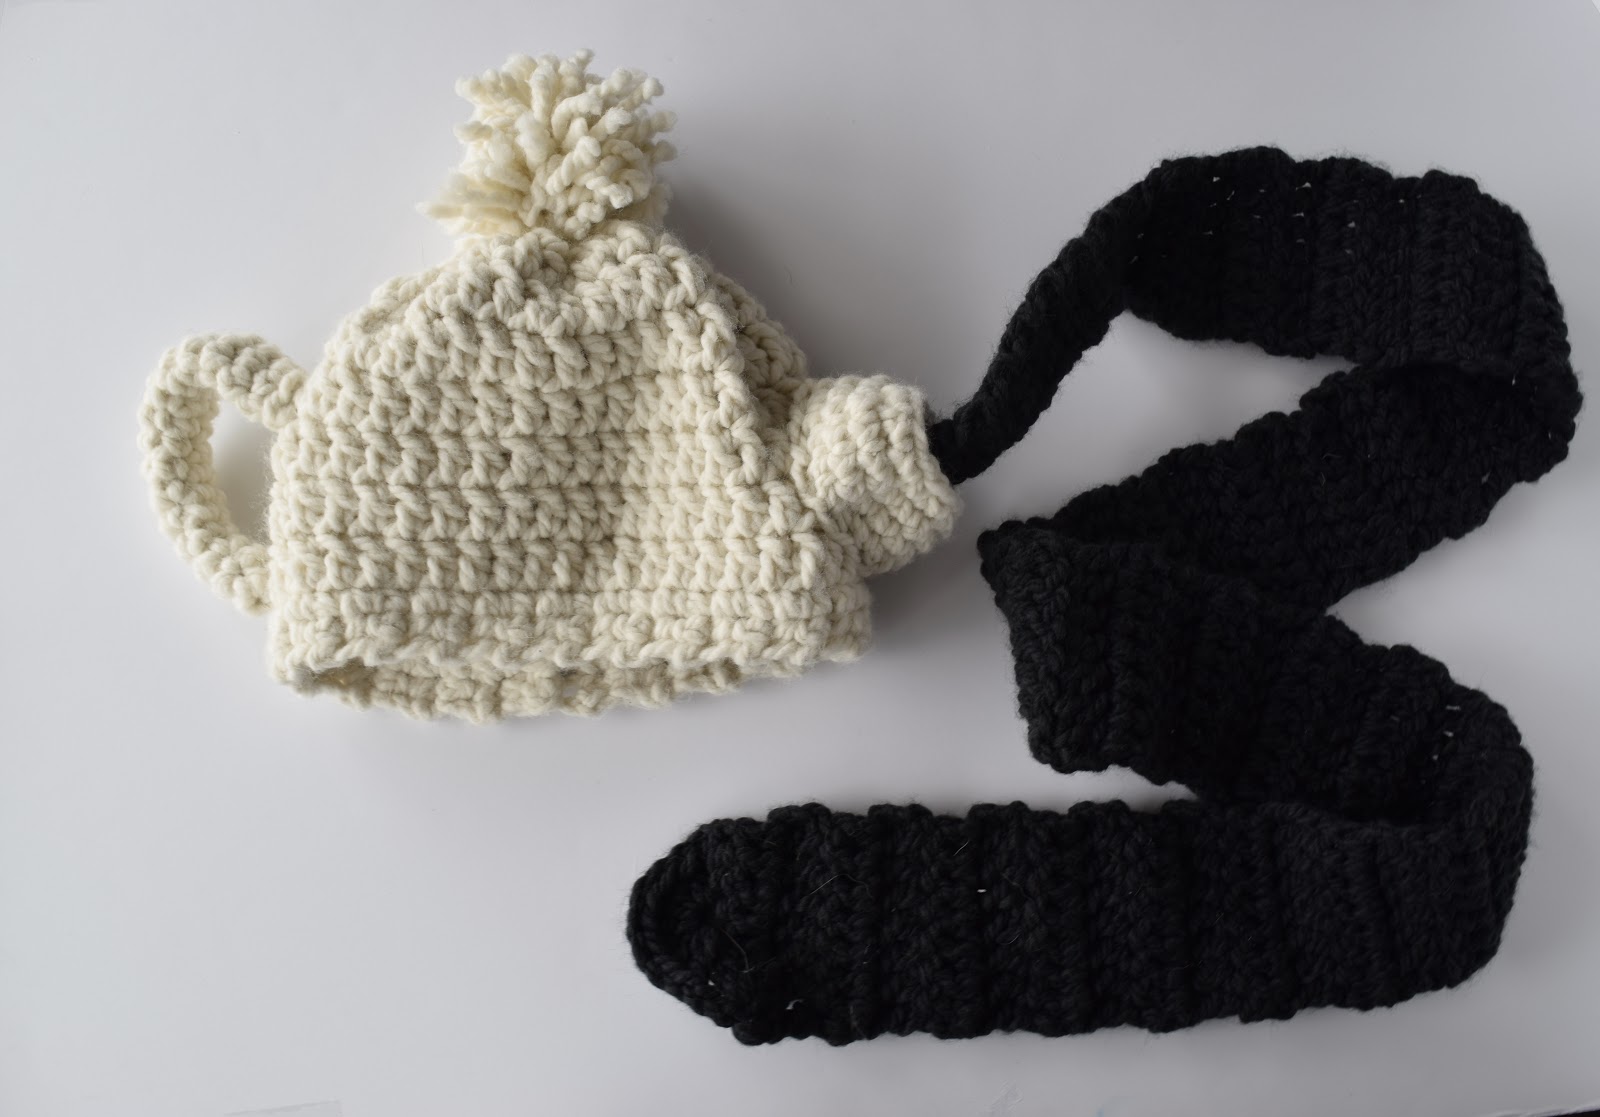
For the cap of the teapot, it is used with a pompom! If you don’t know how to create a pom pom, here is a great tutorial on how to do so; super easy and quick!
Leave a long enough tail and sew it onto the top of the hat!
Handle Bar (Worked in the round)
**** It will be very helpful to leave an initial long tail to be able to sew opposite end!
Rnd 1: Sc 5 into Magic Ring (5)
Rnd 2-15: Sc across (5)
Finish off and leave tail for sewing on this end.
Spout: (Worked in the round)
Ch 18
Rnd 1: Sl st together, ch 1, Sc around (18)
Rnd 2-3: Sl st into first chain, ch 1, Sc around (18)
Rnd 4: Sl st into first chain, ch 1, [Sc, Dec] around (12)
Finish off and leave tail for sewing
Coffee/Tea Scarf
Ch 4
Rnd 1: Sc in second chain from hook, sc across (3)
Rnd 2-18: Ch 1, turn. Sc across (3)
Rnd 19: ch 2, Dc Inc into first stitch, Sc into next stitch, Dc Inc into last stitch (5)
Rnd 20: Ch 2, Dc Inc into first stitch, Sc into next 3 stitches, Dc Inc into last stitch (7)
Rnd 21: Ch 2, Dc into same stitch and Dc across until desired length (Mine was 64 inches long!)
When you have reached your length, Ch 2, Dc into 4th chain from hook. Dc 6 more times into the same stitch. Ch 2, sl into last stitch in row. Finish off. (This should give it a round end!)
Assembly Notes: When attaching the scarf to the hat, it’s easiest to attach the scarf first and then spout second!

Very, cool, I can think of a few people who would like this! Thank you !