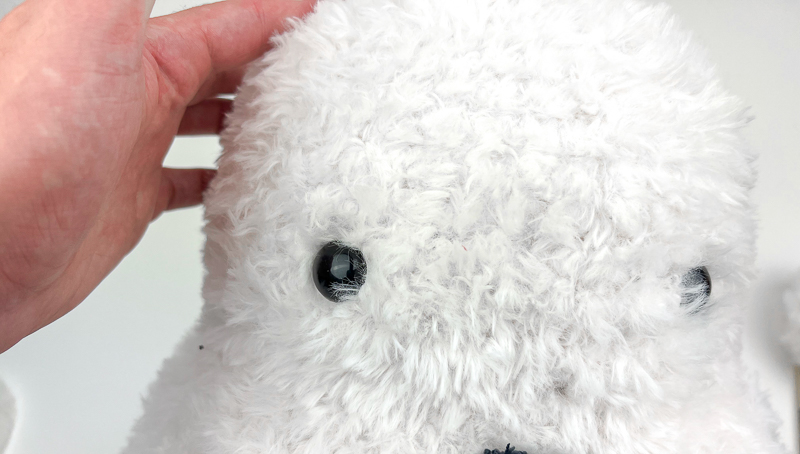
You can find the free pattern down below – you can also find the FULL kit with everything you need from Lion Brand Yarn HERE!
It is always such an honor in joining Lion Brand Yarn’s Christmas Campaign! I am so fortunate to be able to join in with so many other great designers and their work. Lion Brand makes it really easy to get started with crochet projects by offering kits with everything you need! And of course, their wide array of yarn makes it so easy to design with and fun to work with as a crafter.
For this years project, you can find my Silly Snomeman! I know that names looks a little funny but I promise it’s intentional. I have made normal snowmen before but when I was making this project, it was still during summer time. With that said, this pattern is a fusion of a snowman + garden gnome! I thought it was fitting and ideally, this project is meant for all year round (just remove the hat after winter)
This pattern is beginner friendly and after you learn how to read the fuzzy yarn, its a breeze to go through! Super cute and it acts as a great home décor piece. Thank you Lion Brand for sponsoring this project and if you’re looking for the full kit, you can find it here. Down below will be the free pattern.
If you would like to have this pattern in your Ribblr library, you can purchase here for the interactive pattern!
Who is the project good for?
It can be intimidating when you a see project that’s this big with a yarn you may not be used to. Down below are just some attributes for a crafter who would really enjoy this project! Who else do you think would love it?
- Someone looking to challenge themselves with a new yarn
- Someone looking for an easy pattern AFTER you learn the new yarn
- Someone looking to work with 2 different yarns – Sherpa included!
- Someone who wants a project that works up fast
- Someone wanting décor for either the Winter or Summer
So where can you find what you need?
You can find every single thing I used for this project from Lion Brand Yarn you will see all of that hyperlinked for you. Lion Brand Yarn has so many different options and you can find them in stores and online. When purchasing, I earn a little bit of the commission, so thank you for supporting me as a blogger!
To find the pattern, just continue scrolling down the post to find all the written instructions and photo tutorials. If you have any questions, contact me!
To find the Full KIT, tap here to head to Lion Brand Yarn to purchase!
This post was sponsored by Lion Brand Yarn but all ideas and opinions are my own. Please do not claim this pattern as your own. If you wish to share this pattern, you may link to this pattern but please do not reprint it on your site. You may keep a copy for your own personal use but please DO NOT sell the pattern or distribute it.
You may sell products made from this pattern but please clearly credit the design to Knot Bad and link it my website knotbadami.com Make sure to post it! Use the hashtag #yarnpunk and #handmadewithjoann when posting it and please feel free to tag me and show me how yours turned out! You can also find the Facebook group and subreddit r/yarnpunk to post to as well!
My other social media platforms you can find me at:
Instagram: @knot.bad
Tik Tok: @knotbad
Twitter: @knotbadcrochet
So here’s what you’ll need:
3 Skeins of Lion Brand Yarn’s Go For Faux (In Baked Alaska)
1 Skeins of Lion Brand Yarn’s Go For Fleece Sherpa (In Slate)
1 Skeins of Lion Brand Yarn’s Go For Fleece Sherpa (In Fern)
1 Skeins of Lion Brand Yarn’s Go For Fleece Sherpa (In Merlot)
Darning Needle
2 x 18mm Safety Eyes
10mm Hook (N/P)
Let’s talk about the yarn
Yes, the yarn does look quite different than what you might be used to seeing. It’s VERY fluffy and the most difficult part of it is being able to see your stitches while you’re crocheting. It takes a few rounds to get used to but I promise getting the hang of it doesn’t take too long! My advice is that you want to use your fingers to feel for the stitches more than you are relying on your eyes.
Once you get it down, the project goes by so fast! Especially when you’re using a bigger hook for the project. It just glides through your hands and it’s become one of my favorite yarn lines that have come out of Lion Brand Yarn.

Want some more practice with the yarn, you can find my other project, the Polar penguin, by heading to my other blog post!

Enjoy what I do? You can send me a tip if you would like or even follow me on Ko-fi!

Skill Level:
Intermediate (The difficulty to this pattern is seeing the stitches with this kind of yarn!)
Dimensions
(From the tip of the hat to the bottom of the body)
Height (From the tip of the hat to the bottom of the body): 20″ inches roughly
Width: 10″ inches roughly
Gauge:
Gauge is not necessary but if your tension is too loose, try yarning over UNDER the yarn!
Abbreviations (In US terms)
Ch – chain
Sl st – Slip Stitch
Sc – Single Crochet
Dec – Decrease
Inc – Increase (2 single crochets in the same stitch)
( ) – The number inside is the amount of stitches at the end of the round/row!
* *- Repeat
FO – Finish Off
Notes:
- This pattern is worked continuously and not joined.
- This pattern is written in US terms
- You can find helpful tutorials throughout, but if you would like to find some of my tips and tricks you can head HERE!
- The photo for each step will be found BELOW explanation.

Let’s Begin
Main Body
Begin in White
Rnd 1: 6 Single crochet into Magic Ring (6)
Rnd 2: *Inc* around (12)
Rnd 3: *Sc, Inc* around (18)

Rnd 4: *Sc 2, Inc* around (24)
Rnd 5: *Sc 3, Inc* around (30)
Rnd 6: *Sc 4, Inc* around (36)
Rnd 7: *Sc 5, Inc* around (42)

Rnd 8 – 15: Sc around (42)
Rnd 16: *Sc 5, Dec* around (36)
Rnd 17: *Sc 4, Dec* around (30)

Insert your safety eyes into round 12 with 7 stitches apart (This can be changed depending on your liking!)

Begin stuffing your project with polyfill! Continue doing so as you continue working.


Rnd 18: *Inc* around (60)
Rnd 19 – 28: Sc around (60)
Continue stuffing your work
Rnd 29: *Sc 8, Dec* around (54)
Rnd 30: *Sc 7, Dec* around (48)
Rnd 31: *Sc 6, Dec* around (42)
Rnd 32: *Sc 5, Dec* around (36)
Rnd 33: *Sc 4, Dec* around (30)
Rnd 34: *Sc 3, Dec* around (24)
Rnd 35: *Sc 2, Dec* around (18)
Rnd 36: *Sc, Dec* around (12)
Rnd 37: *Dec* around (6)
Add your last minute stuffing and seam the hole closed! (Find the tutorial to do this here)

Your body is now complete!
Hat
Begin in White (With the Go for Faux Baked Alaska)
Rnd 1: 6 Single crochet into Magic Ring (6)
Rnd 2: *Inc* around (12)
Rnd 3: *Sc, Inc* around (18)
Rnd 4 – 5: Sc around (18)

Rnd 6: *Sc, Dec* around (12)
Rnd 7: *Dec* around (6)
Switch to Red Sherpa yarn
On your final single crochet into the last stitch of the round, pull your red yarn through the final two loops.


Don’t forget to stuff with polyfill!

Rnd 8: Sc around (6)
Rnd 9: *Inc* around (12)
Rnd 10: Sc around (12)

Rnd 11: *Sc, Inc* around (18)
Rnd 12: Sc around (18)
Rnd 13: *Sc 2, Inc* around (24)
Rnd 14: Sc around (24)
Rnd 15: *Sc 3, Inc* around (30)
Rnd 16: Sc around (30)
Rnd 17: *Sc 4, Inc* around (36)
Rnd 18: Sc around (36)
Rnd 19: *Sc 5, Inc* around (42)

As you can see in the photo below, the rest of the hat will not be filled.

Rnd 20 – 24: Sc around (42)
Switch to Green Sherpa yarn
Rnd 25 – 29: Sc around (42)


To have a cleaner finish when joining colors, insert your hook into the stitch below the first single crochet and single crochet like normal.


Rnd 25 – 29: Sc around (42)
Finish off.
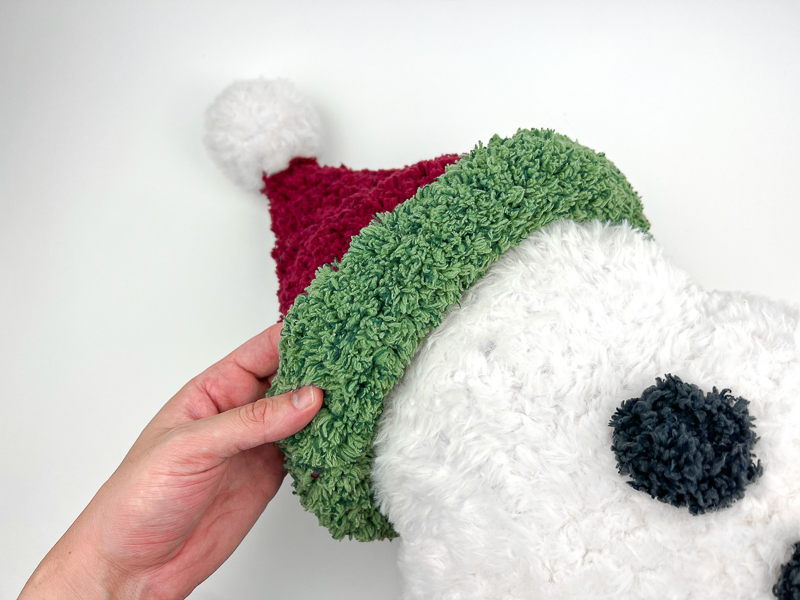
You can now flip the brim of the hat!


Buttons (Make 2)
Rnd 1: 6 Single crochet into Magic Ring (6)
Rnd 2: Sl st into next stitch (6)
Finish off and leave tail for sewing

Onto the Assembly Section!

Assembly
Now that all our pieces are made, it’s time to bring it all together! The photo tutorial will be down below.
Attaching the buttons:
With both of our buttons, the top button will be close to the neck – begin with the top button by weaving in your darning needle!

With your darning needle, pull the yarn through to attach the first button one round away from the neck by pulling the working yarn in and out of the body.

To get the placement for the second button, use roughly 2 fingers wide between each button. Sew on just like before

Putting on the Hat
Tip*: Because your hat is the same size as the head, it’s worth stretching the width of the hat for a few seconds!

Pull the Christmas hat over the head. When doing so, you can also unfold the brim to bring the brim all the way down to the neck (My safety eyes were placed later but they should be inserted on your project!)


Flip the brim up once again so half of the face can be seen

The hat should be covering all the back of the head to stay on better! The hat will not be attached, it will be on snug. However, you can attach if you would like!

Adding the Nose
With the Sherpa yarn, use your darning needle to pull through 3 stitches between the eyes. Wrap back around to add some extra thickness!


YOU’RE DONE!
Congratulations on finishing your own Silly Snomeman. I hope you had a great time with this project and want to make more! I love having mine around – be sure to tag me on social media so I can see what you’ve made!
This post was sponsored by Lion Brand Yarn but all ideas and opinions are my own. Please do not claim this pattern as your own. If you wish to share this pattern, you may link to this pattern but please do not reprint it on your site. You may keep a copy for your own personal use but please DO NOT sell the pattern or distribute it.
You may sell products made from this pattern but please clearly credit the design to Knot Bad and link it my website knotbadami.com Make sure to post it! Use the hashtag #yarnpunk and #handmadewithjoann when posting it and please feel free to tag me and show me how yours turned out! You can also find the Facebook group and subreddit r/yarnpunk to post to as well!


Thank you. You are such a fun and talented young man!