
This post was sponsored by JOANN – My favorite craft store to visit for all my yarn and tools that I use. Also, you can’t resist all their coupons!
Let’s Manifest Together!
At the time of coming up with this project, the holidays are soon ending and we are coming to that kind of exciting / awkward time of the year for many right after the holidays! It’s a new year and now that holiday projects may be out of style, it’s time to decide what will be on your list to make.
Why not make it intentional?
As everyone is setting their goals for the new years, I think it’s nice to work on a project that gives us some of that time to really think about what we want our lives to look like.
I am sure you’ve heard it used before, but we have to manifest our dreams! It might feel silly but I think at least saying it out loud is a good first step.
Want to take it a step further? Let’s write it down! I have teamed up with JOANN stores to bring you our squishy Notable Notepad project and I am excited to be writing down all of my goals for the coming year. I want to be able to focus on my designing, entering the realm of YouTube / Twitch, as well as having a reputable clothing line!
What would you write on your list of goals?
JOANN does such an awesome job of supplying materials for projects and creativity in their isles and I don’t think any of us should put our creativity on the backburner for the new year.
This project is perfect to have in your home, desk / office, and even at school! It can be easy to forget our goals that are in front of us but with this Notepad, it can be a constant reminder.
JOANN makes success so fun in a creative way and I am so excited to be able to offer this free pattern down below! Grab everything you need from JOANN to get started on this easy crochet project.
All editorial content and projects are intellectual property of Vincent Green-Hite, designer of Knot Bad.
This post was sponsored by JOANN Stores but all ideas and opinions are my own. Please do not claim this pattern as your own. If you wish to share this pattern, you may link to this pattern but please do not reprint it on your site. You may keep a copy for your own personal use but please DO NOT sell the pattern or distribute it.
You may sell products made from this pattern but please clearly credit the design to Knot Bad and link it my website knotbadami.com Make sure to post it! Use the hashtag #yarnpunk and #handmadewithjoann when posting it and please feel free to tag me and show me how yours turned out! You can also find the Facebook group and subreddit r/yarnpunk to post to as well!
So here’s what you’ll need:
All the yarns can be substituted with any jumbo weight yarn (size 4)
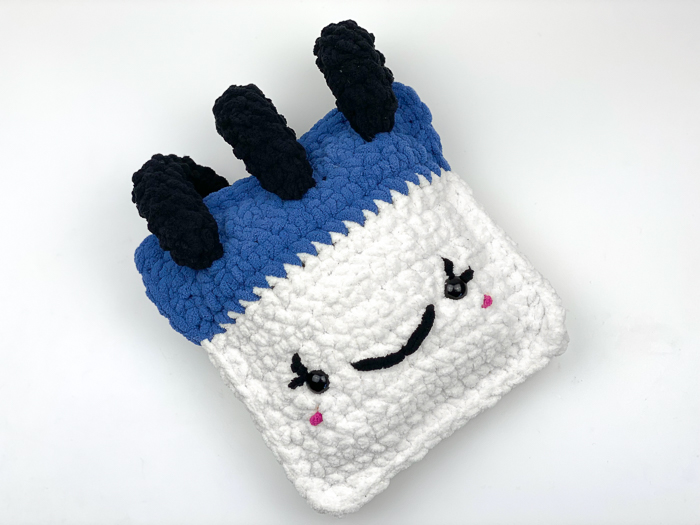
1 Skein in Bernat Blanket (In Country Blue)
1 Skein in Bernat Blanket (In Vintage White)
1 Skein in Bernat Blanket (In Coal)

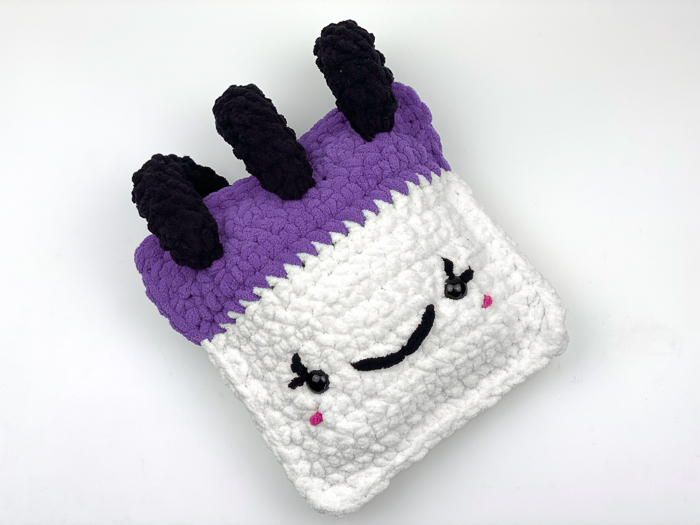
Don’t want to be stuck using the blue I used? Feel free to grab any color you wish for your Notepad!
Dimensions
Height: 10.5″ inches roughly
Width: 8.5″ inches roughly
Skill Level:
Easy
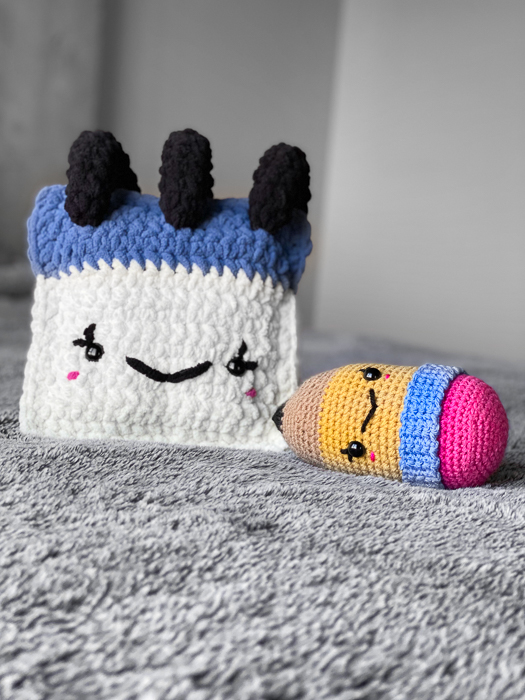
Along with the Notepad, want to also get started on my Pencil Pattern I made with JOANN too? Click the link to find the free pattern to pair with this one!
Abbreviations (In US terms)
Sl st – Slip Stitch
Ch – chain
Sc – Single Crochet
Inc – Increase
* *- Repeat
FO – Finish Off
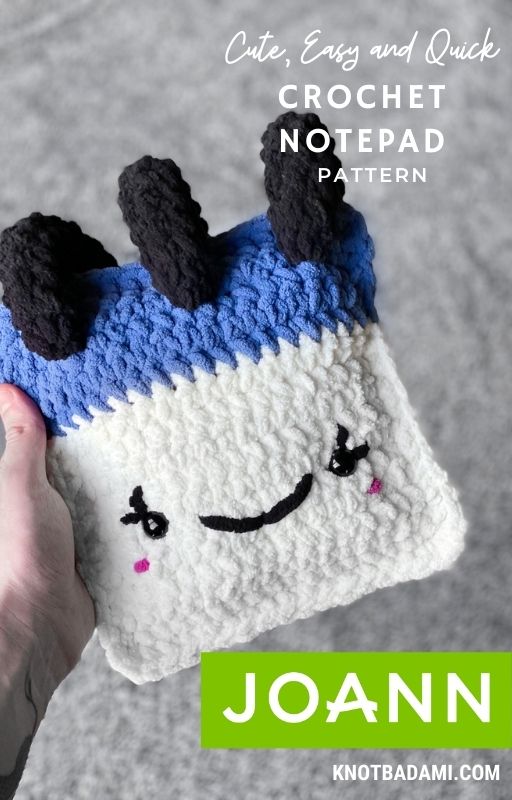
Don’t forget to pin this pattern for later! It can be easy to forget so make sure you have this tucked away for a rainy day on your Pinterest Boards!
Notes:
- This pattern is worked in the row
- This pattern is written in US terms
- You can find helpful tutorials throughout, but if you would like to find some of my tips and tricks you can head HERE!
- The photo for each step will be found BELOW said step.
- Find my YouTube tutorial for the Magic Ring here!
Don’t forget to pin this pattern for later! It can be easy to forget so make sure you have this tucked away for a rainy day on your Pinterest Boards!
Let’s Get Started!
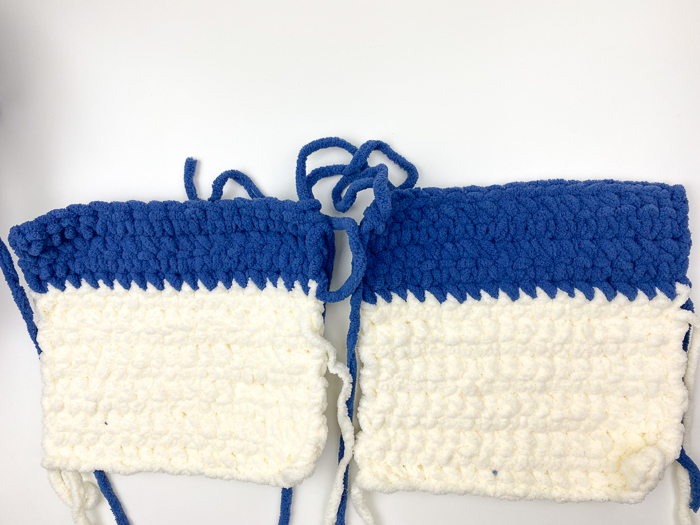
Main Body (You will be making 2 Panels)
Begin in White
Chain 18
Row 1: In second chain from hook, sc. Sc across entire chain (17)
If you’re tension is too tight, feel free to chain to 19 instead! 17 will be the amount of stitches you will want.
Row 2 – 11: Ch 1, turn. Sc across (17)
Switch to Blue
Row 12 – 16: Ch 1, turn. Sc across (17)
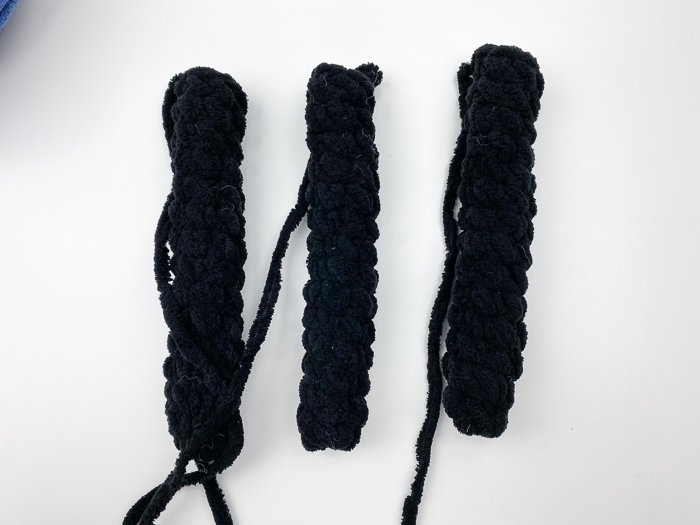
Rings (Make 3)
Begin in Black
Rnd 1: 6 Single crochet into Magic Ring (6) (Click here for video tutorial!)
Rnd 2 – 15: Sc around (6)
Be sure you’re stuffing while working!
Assembly
***For a lot of these photos, there was a leftover detail that didn’t actually make it onto the final product! However, if you like how that black line looks, there will be a tutorial at the very end of the pattern on how to surface crochet with this jumbo yarn!
We will now be single crocheting together our two panels to create the full body! With both of your panels, lay flat on one another.
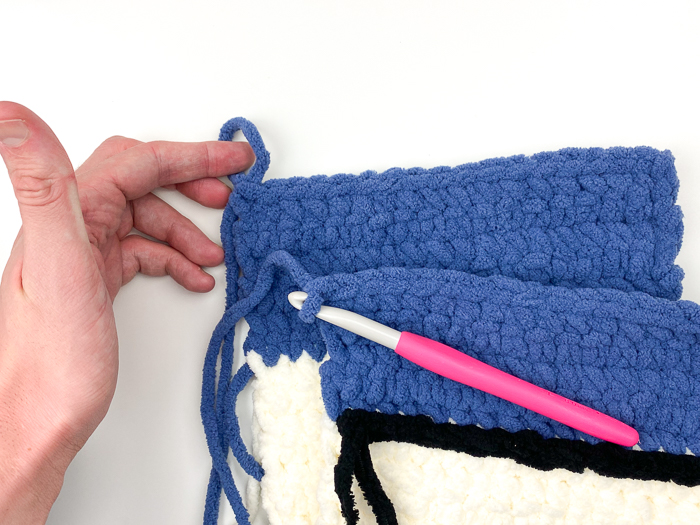
With both corners lined up, use your hook to Chain 1.
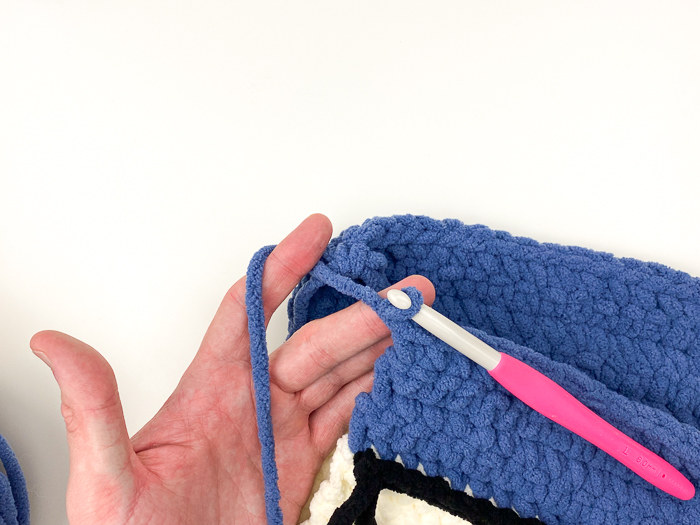
With your working yarn, insert your hook through BOTH of the panels while turning your work. (You will be doing a single crochet!)
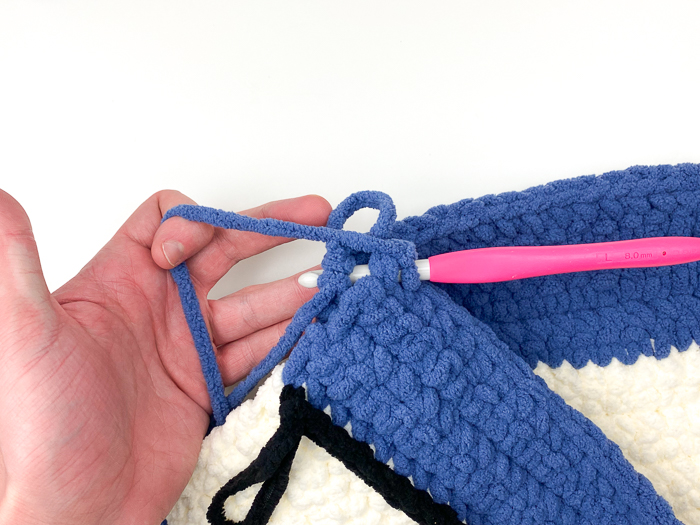
Into the next stitch, we will be doing another single crochet through both panels as we work alongside our project!
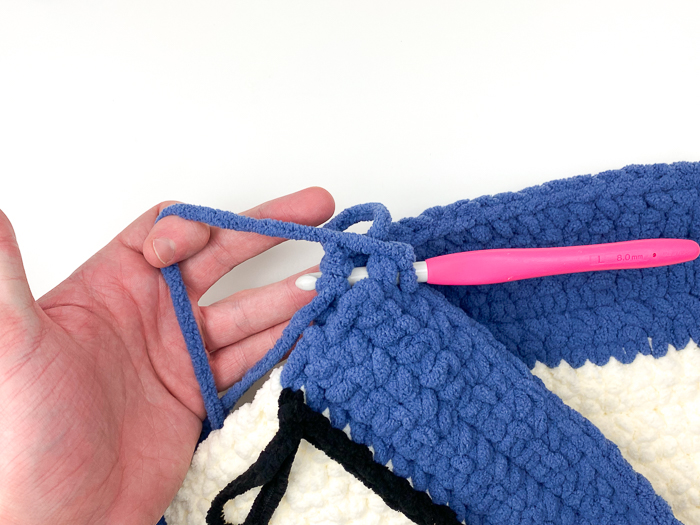
Yarn over and pull through to perform a single crochet through both panels.
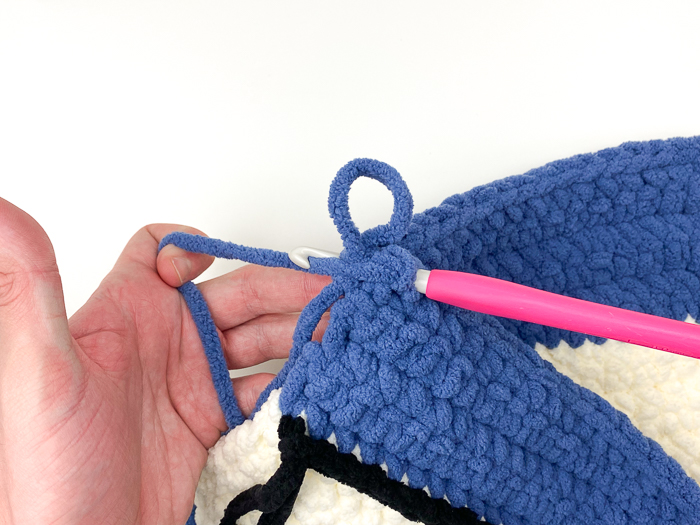
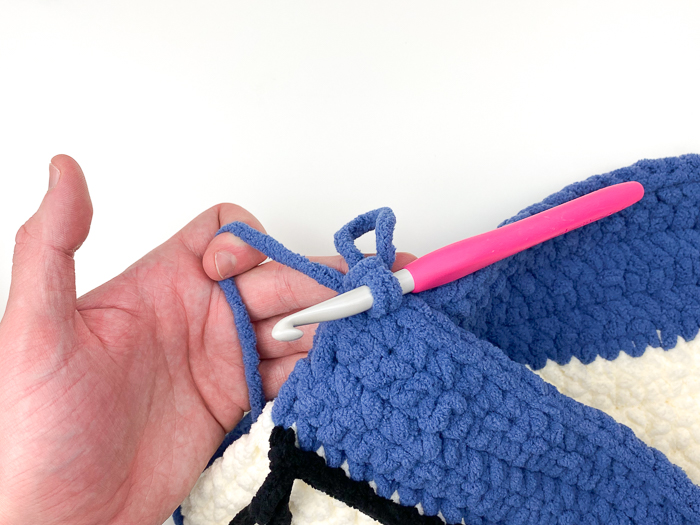
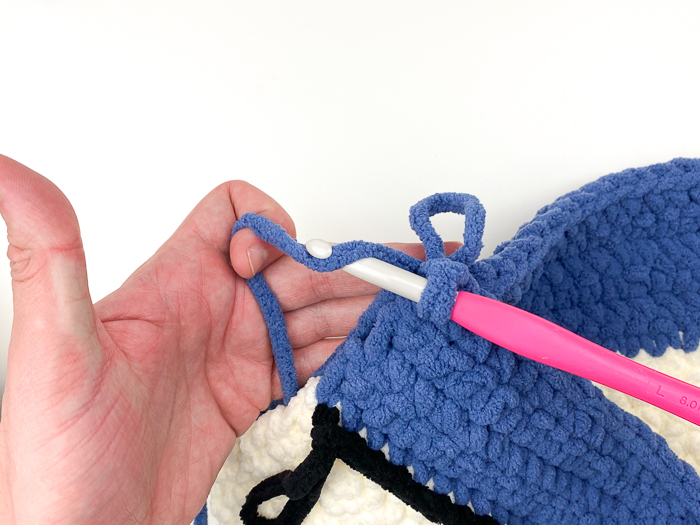
Continue your single crochet along the side of your project until we reach the white yarn!
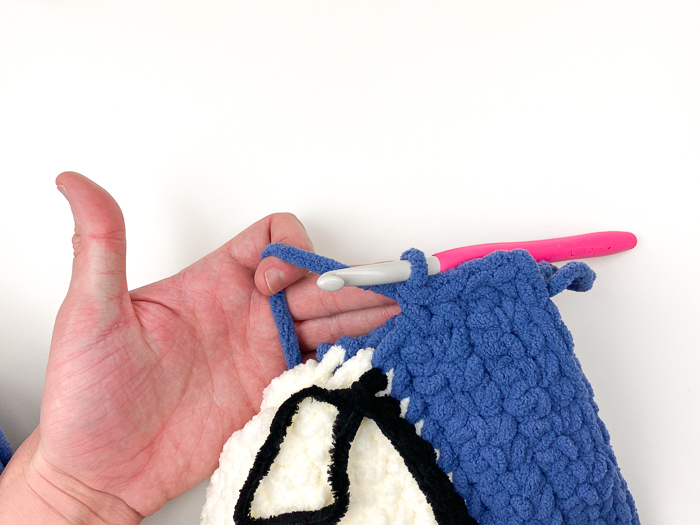
The next stitch is where you’ll be inserting your hook and attaching the white yarn into.
Single crochet until the last two loops are left on your hook.
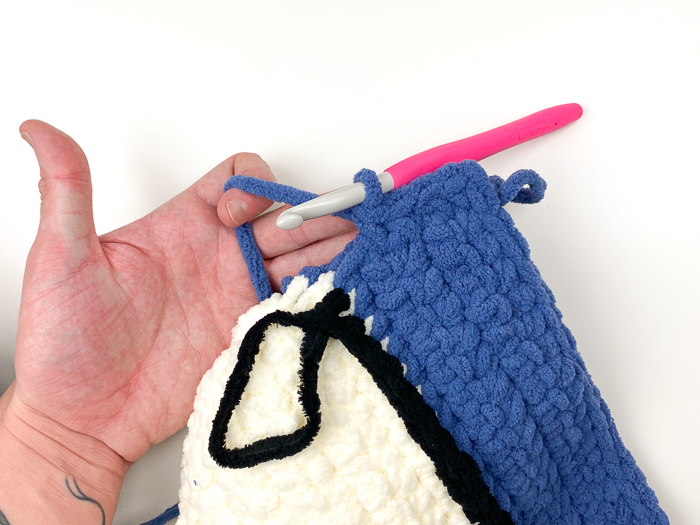
Into the last two loops, attach your white yarn.
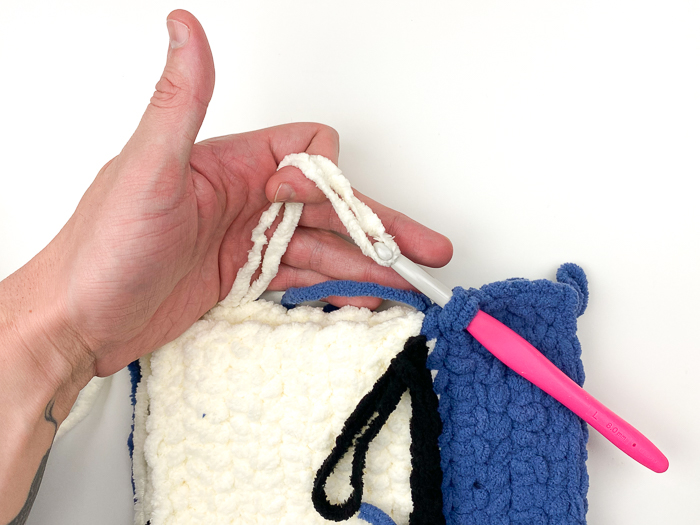
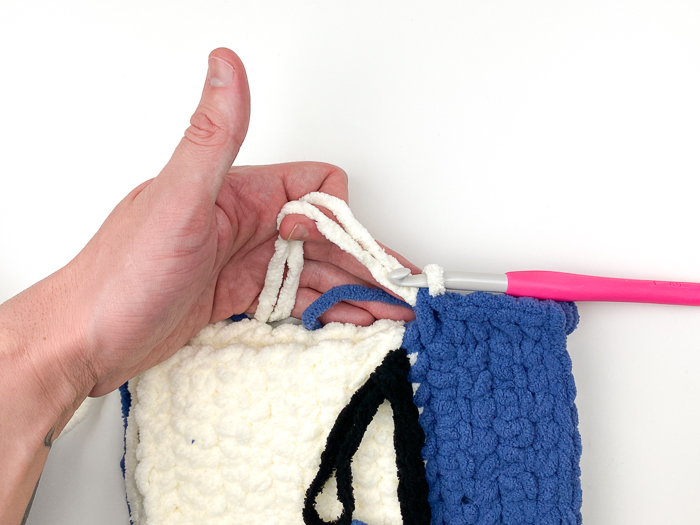
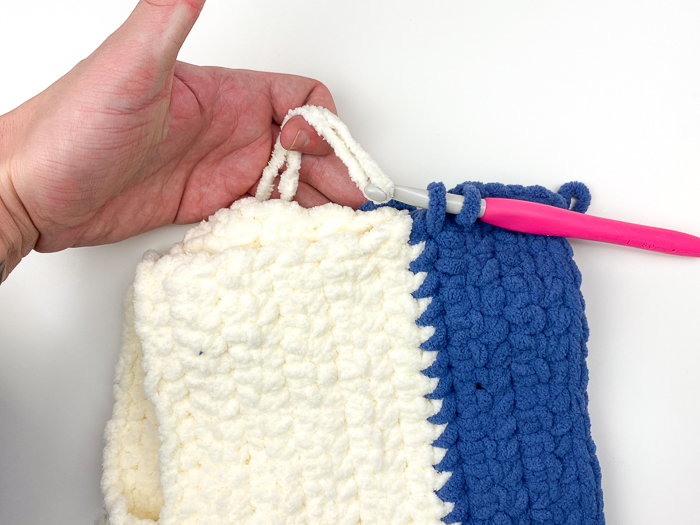
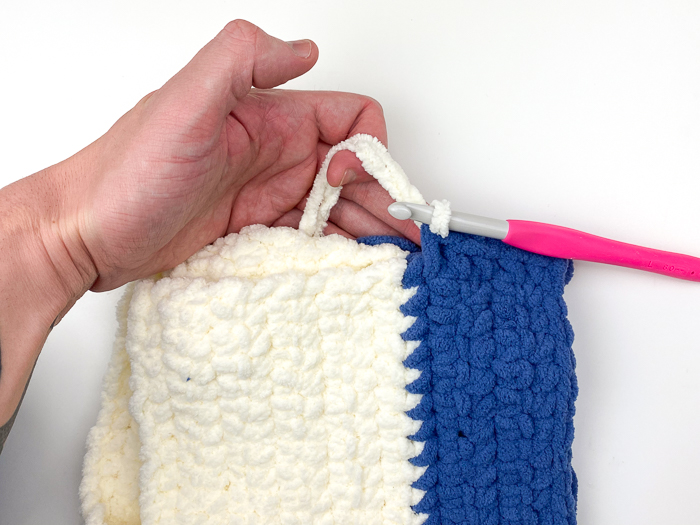
Continue all the way down along your project and then perform 3 single crochets into the corner stitch to turn your work.
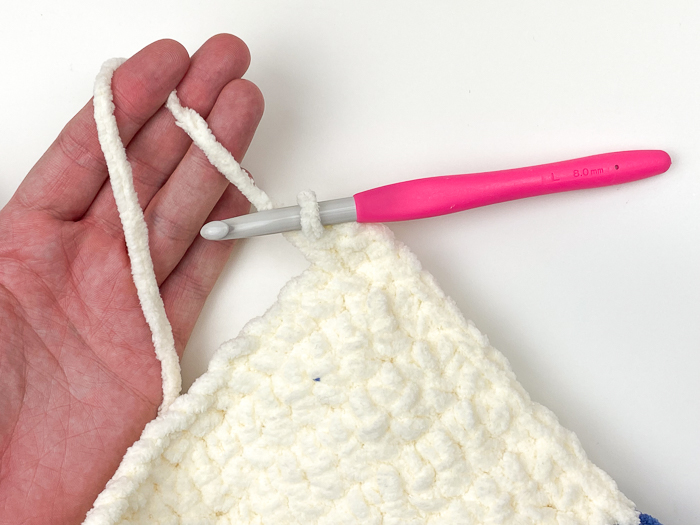
Before we get to our last side of the panels, it’s time to insert your safety eyes and begin stuffing!
From the first row (the starting chain, but you can count the border of single crochets, inert your eyes into row 7 with 9 stitches apart)
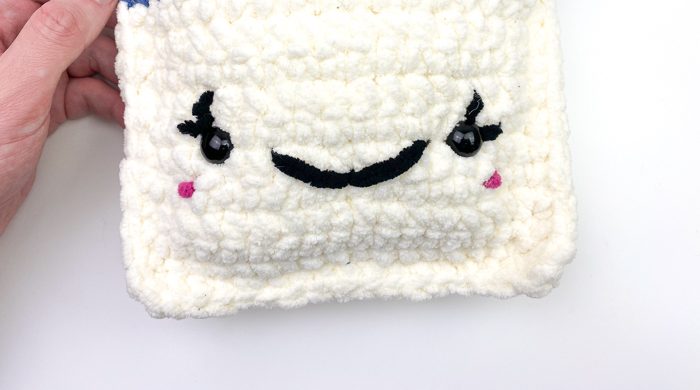
Into the body, we will be filling our project with polyfill! You can choose the firmness however you wish but I kept mine on the lighter side.
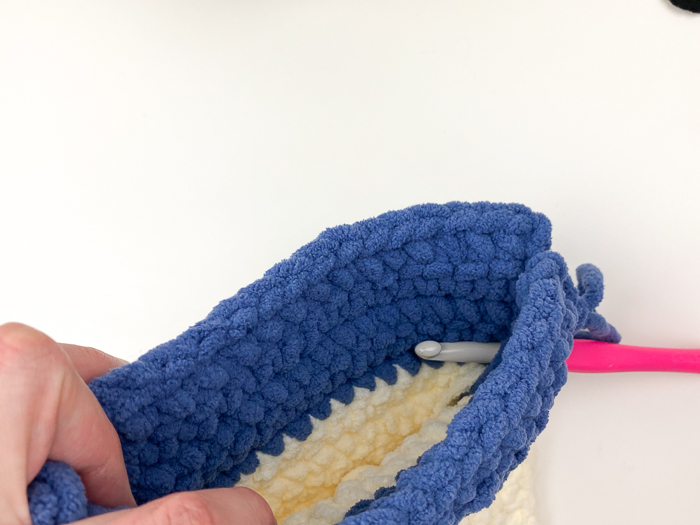
Attaching the Rings
With your darning needle, sew the front of your ring to the front of the project that is in blue. All three rings will be 4 stitches apart so be mindful! Do this for all three from front to back.
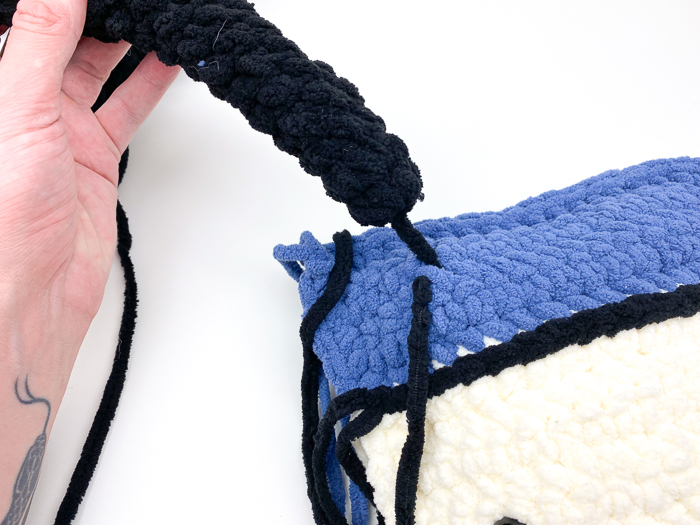
And attach from the back!
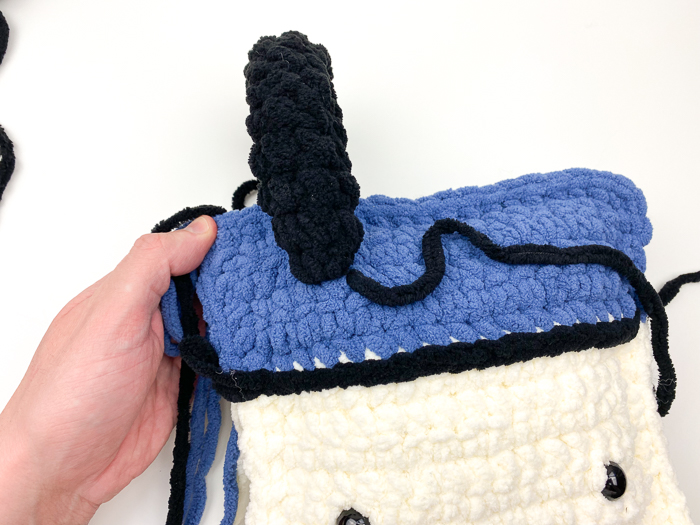
Here is how the rings will look from other angles!
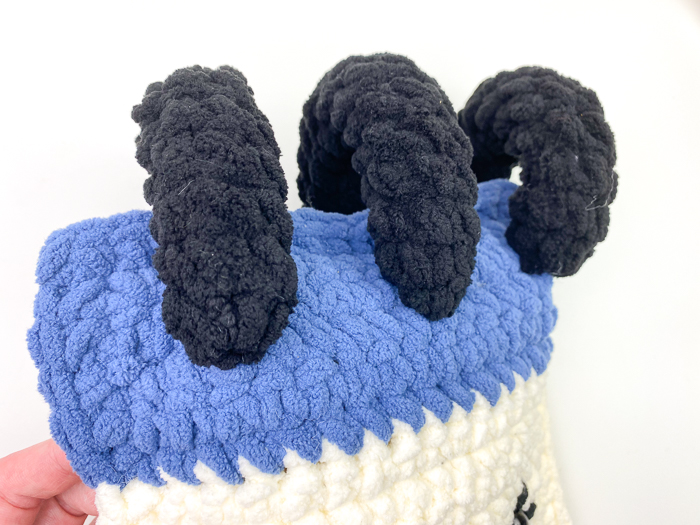
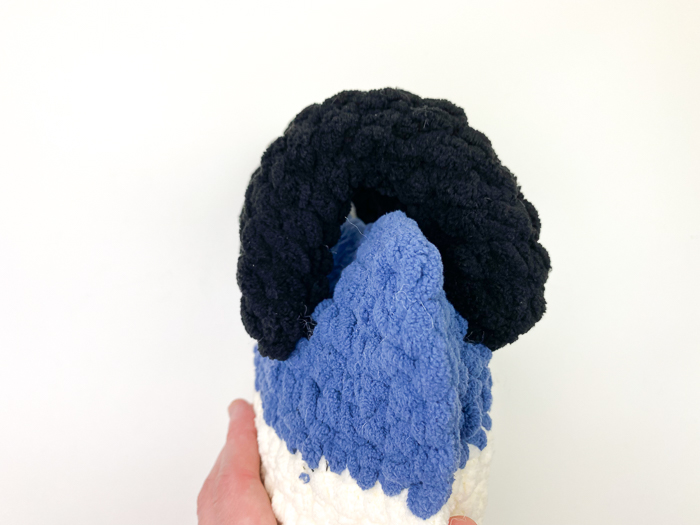
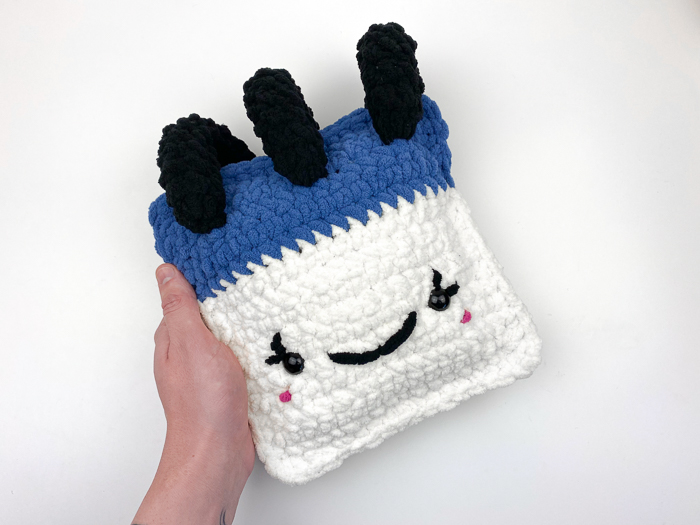
And now you’re done!
I hope you enjoyed this super fun pattern and I hope while you worked on this crochet project from JOANN and I, you were able to manifest what this year could look like for you!
Your dreams are inspirations are well deserved.
This post was sponsored by JOANN Stores but all ideas and opinions are my own. Please do not claim this pattern as your own. If you wish to share this pattern, you may link to this pattern but please do not reprint it on your site.
You may keep a copy for your own personal use but please DO NOT sell the pattern or distribute it. You may sell products made from this pattern but please clearly credit the design to Knot Bad and link it my website knotbadami.com
Make sure to post it! Use the hashtag #yarnpunk and #handmadewithjoann when posting it and please feel free to tag me and show me how yours turned out! You can also find the Facebook group and subreddit r/yarnpunk to post to as well!
Surface Crochet
Down below, you can find the tutorial on how to surface crochet if you are interested in adding a line for a little bit of detail!
Inserting your hook into the stitch you would like to begin in (In this case, between the two colors) you will see your hook poking through.
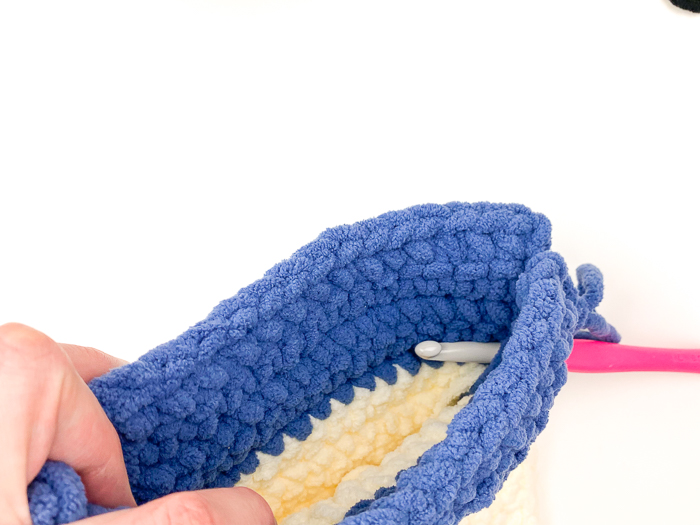
Grab and attach your working yarn
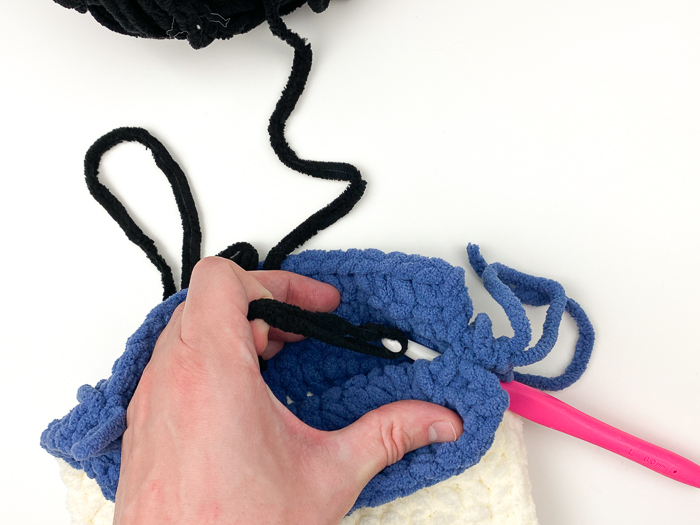
Pull through and slip stitch through the loop
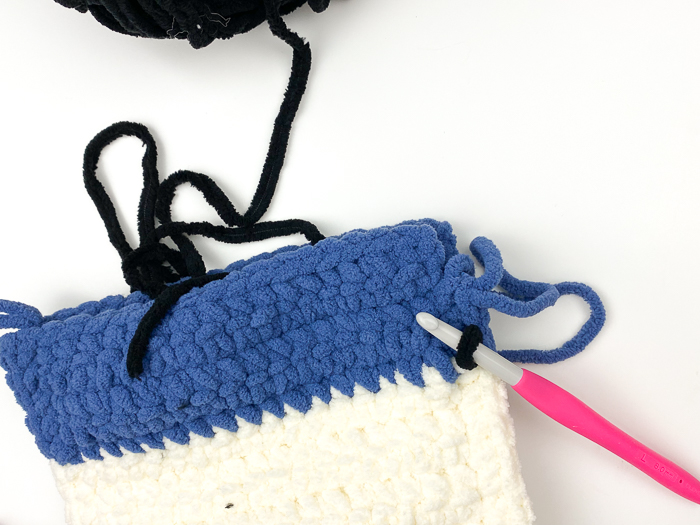
Insert your hook into the next stitch just like you did at the beginning.
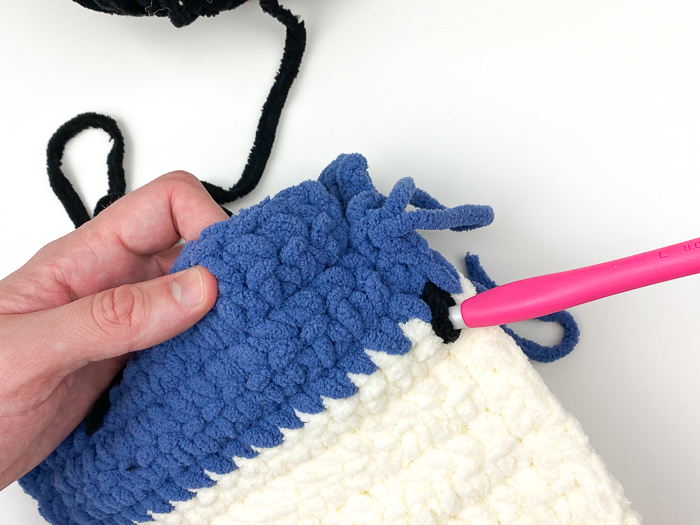
You will once again grab your working yarn that is left in the back and pull through
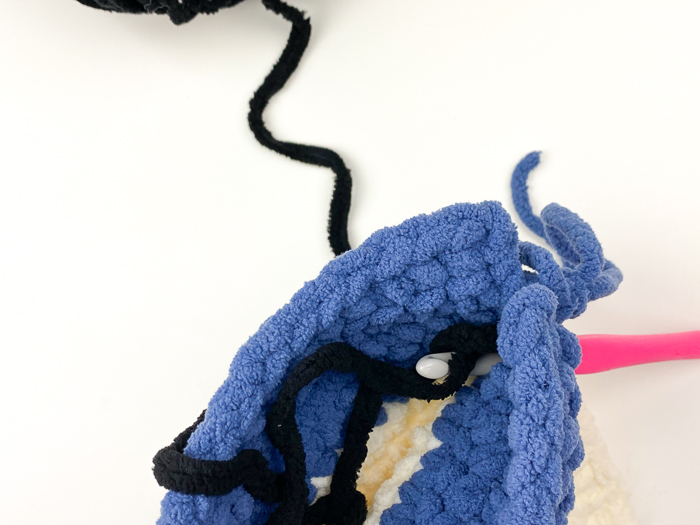
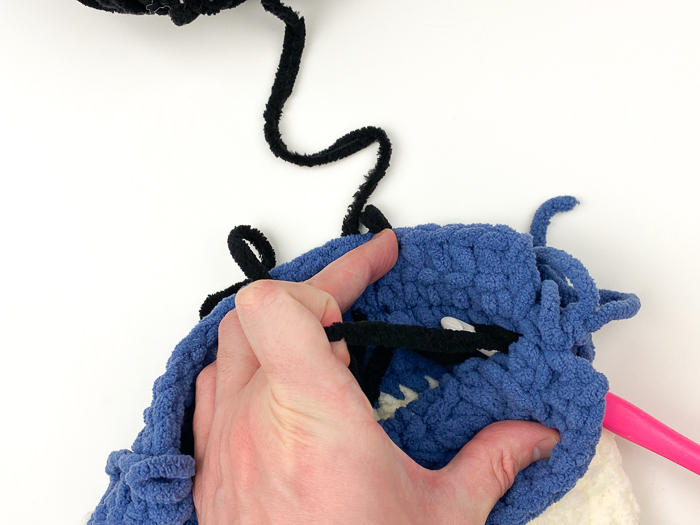
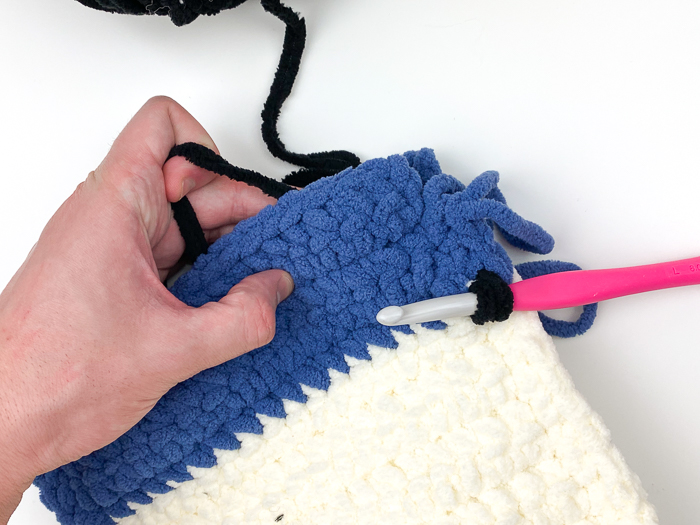
Continue this process all the way along the desired area and then finish off!
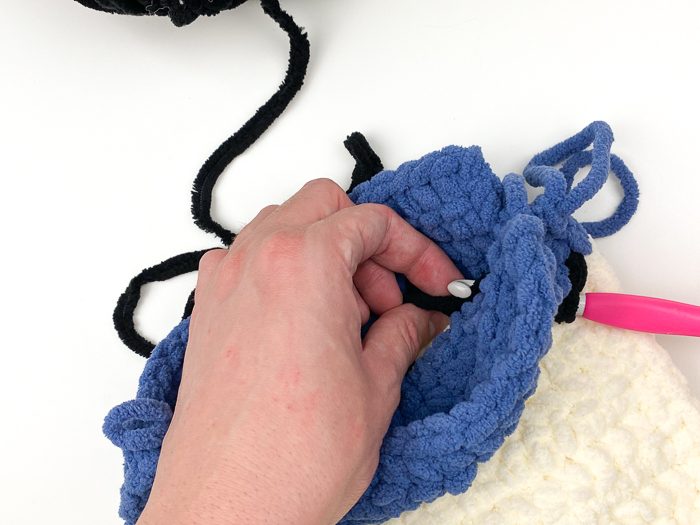
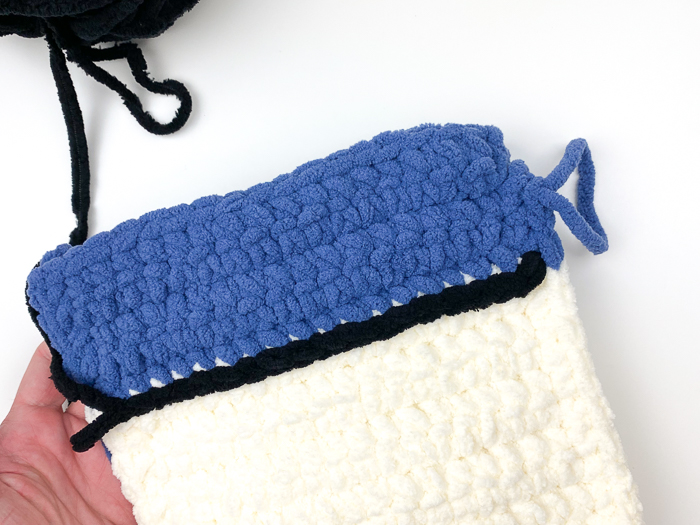
I hope this part was helpful and you can add any fun little details to your project!
Thank you so much supporting me and visiting my blog today! It means so much to me that you come and visit. I hope this project from JOANN’s and I could be a nice way to either end or start your new year into 2022!
You’ll be seeing a lot of this little notepad on my socials for sure – let me know at the end of the year if your accomplished your goals!
This post was sponsored by JOANN Stores but all ideas and opinions are my own. Please do not claim this pattern as your own. If you wish to share this pattern, you may link to this pattern but please do not reprint it on your site.
You may keep a copy for your own personal use but please DO NOT sell the pattern or distribute it.
You may sell products made from this pattern but please clearly credit the design to Knot Bad and link it my website knotbadami.com Make sure to post it!
Use the hashtag #yarnpunk and #handmadewithjoann when posting it and please feel free to tag me and show me how yours turned out! You can also find the Facebook group and subreddit r/yarnpunk to post to as well!


