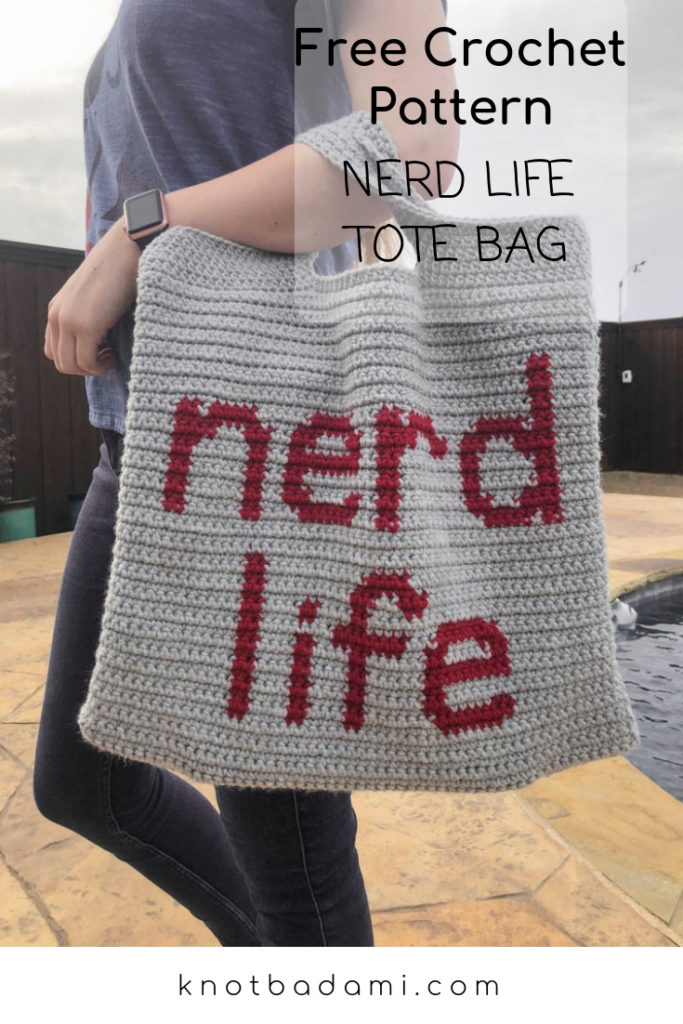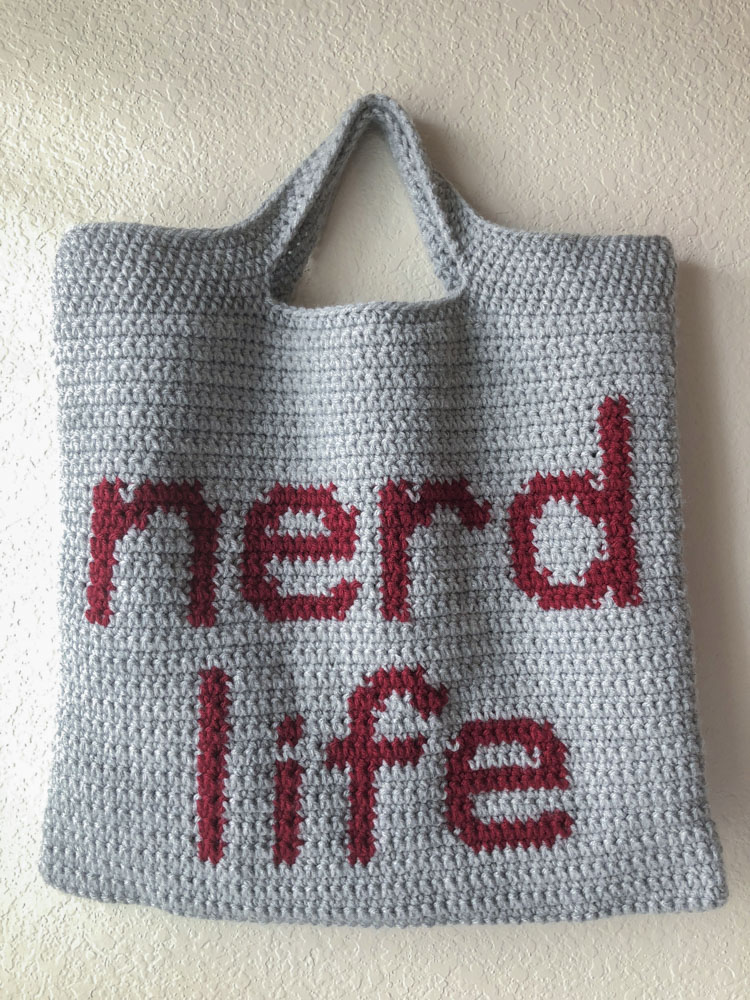
We all need to find a way to show off our nerdy side, and there’s no better way to do that while also being earth conscious! This wonderful Nerd Life Tote Bag is is a fun way to show off your inner nerd with confidence and our newest Yarn Punk Feature is here to show you how to make your own! Do you have a favorite “nerdy” thing? If you follow me on my socials, you know mine is Pokemon!
Please Welcome This Amazing Artist!
“Hi! I’m the designer behind Yarn Has My Heart. I’ve been crocheting for eight years and knitting for six, and I don’t plan to stop anytime soon! When I’m not yarning or going to class, I enjoy drawing, reading, listening to music, and hanging out with my sister. I hope you enjoyed this pattern as much as I enjoyed writing it! You can find me all over the internet, such as Instagram, Pinterest, and Facebook. I sell over on Ravelry and Redbubble!”
The Nerd Life Tote Bag is perfect for carrying around laptops, books, and everything else you need! It’s worked flat in two pieces, seamed, and then finished in the round, and it features a stranded tapestry crochet design.
Don’t forget to Pin for later!

Materials:
- 523 yards of worsted weight (CYC-4) yarn for the main color and 31 yards for the contrast color
- US G/6 (4.25 mm) crochet hook
- Tapestry needle
- Scissors
Skill Level: Intermediate
Gauge: 14 sts and 16 rows = 4 inches in single crochet
Finished Size: 16” wide by 15” tall
Stitch Abbreviations (US Terms):
ch = chain
sc = single crochet
hdc = half double crochet
MC = main color
CC = contrast color
st(s) = stitch(es)
RS = right side
WS = wrong side
Rep = repeat

Helpful Tips Before You Begin:
- When changing colors, draw up the last loop of the last old-color stitch in the new color
- Make sure all the floats are carried on the WS
- Throughout the pattern, the ch 1 does not count as a st
Instructions:
Front-
Row 1 (WS): ch 57, sc in second ch from hook, sc across, ch 1, turn
Row 2: sc across, ch 1, turn
Rows 3-8: rep row 2
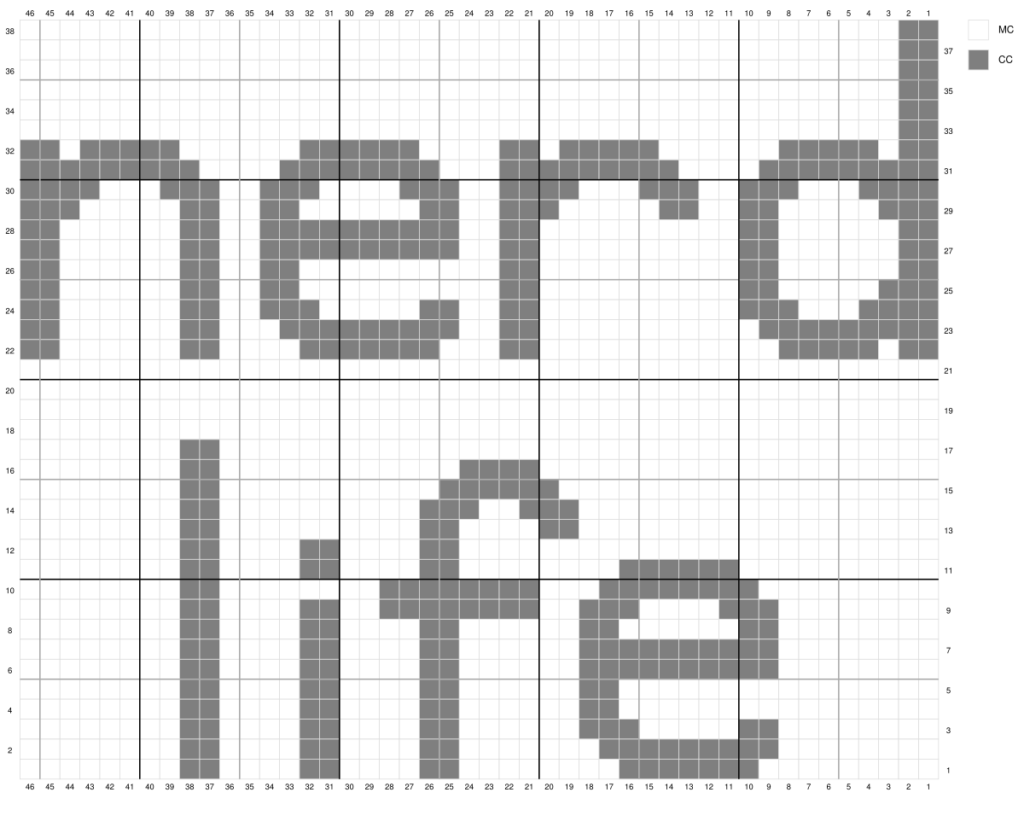
Rows 9-46: sc 5, sc chart, sc to end, ch 1, turn
Row 47-54: rep row 2
To make a border, continue working down the edge of the piece, around the bottom, up the other side, and along the top. You should work 54 sc along each side, 56 sc along the top and bottom, and 3 sc in each corner. When you get back to where you started, sl st to join and fasten off.
Back-
Row 1 (WS): ch 57, sc in second ch from hook, sc across, ch 1, turn
Row 2: sc across, ch 1, turn
Rows 3-54: rep row 2
Work the border the same way as the front, then fasten off.
Join the front and back-
Line up the front and back so the right sides are together.

Make a slipknot and begin slip stitching around the sides and bottom of the bag, starting in the top corner. Work the sl st through the inner loop of each piece’s sc border, ignoring the outer loops.

The seam should look like the photo.

Continue down the side, across the bottom, and up the other side. When you are finished, ch 1 and turn the bag inside out, but do not cut the yarn.
Handles-
Round 1: hdc 1 at the seam, hdc 56 along the front, hdc 3 at the seam, hdc 56 along the back, hdc 2 at the seam, join with a sl st in the first hdc, ch 1
Round 2: hdc in same st as join, hdc 18, ch 25, skip the next 20 hdc, hdc 39, ch 25, skip the next 20 hdc, hdc 20, join with a sl st in the first hdc, ch 1
Round 3: hdc in same st as join, hdc 18, hdc in next 25 ch, hdc 39, hdc in next 25 ch, hdc 20, join with a sl st in the first hdc, ch 1
Round 4: hdc in same st as join, hdc around, join with a sl st in the first hdc, ch 1
Round 5: hdc in same st as join, hdc around, join with a sl st in the first hdc, fasten off
Weave in all ends.
Chart:

Be sure to tag @knot.bad and @yarnpunk on your socials and use the hashtag #yarnpunk!
(Have something to show to the world as well and want to share you creative intelligence? You can be a Featured Yarn Punk too! Click the image below to be directed to applying!)


