 Love is in the air and even with todays day and age of technology, nothing can beat the purity of a handwritten note coming from a loved one! I’m sure we would all appreciate one over a text, right? Today I have for all of you a new pattern for Valentines Day; A Love Letter Envelope! It can hold a letter that is 5′ tall and 3.5′ wide with a sincere touch of creativity! The design is up to you!
Down below, you can find the free pattern to make your own! This was made with Lion Brand Yarn and it can be worked up fairly quickly!
Materials
Yarn: Lion Brand Yarn in Vannas’ Choice (Head over to their website to order some!)
Hook: 5mm
Scissors
Darning needle
Printing may be helpful!
Pattern Key
Ch: Chain
Sc- Single crochet
Dc- Double crochet
Tc- Triple Crochet
Sl st- slip stitch
Inc- Increase
Dec- decrease
( )- number of stitches at the end of the round
Before we begin, to make this helpful for you (as I found it very helpful) you can head over to this link to print out the cut out sheet for a DIY envelope, as it will give you an idea on the shape!
Let’s get started on the pattern!
Begin by Chaining 23 in white
Row 1: Sc in second chain from hook, sc across (22)
Row 2-21: Ch 1, turn. Sc across (22)
I apologize this is in white background, but as you can see, you can use the cut out template to keep a gauge on how you’re doing!

Now, you’ll keep working upward into the top corner
Row 22-26: Ch 1, turn. Sc across.
Row 27: Ch 1, dec into first 2, sc across, dec into last 2 stitches. (From here, you’ll be decreasing into the first 2, sc across, and then dec into the last 2) (20)
Row 28: Ch 1, dec into first 2, sc across, dec into last 2 stitches. (18)
Row 29: Ch 1, dec into first 2, sc across, dec into last 2 stitches. (16)
Row 30: Ch 1, dec into first 2, sc across, dec into last 2 stitches. (14)
Row 31: Ch 1, dec into first 2, sc across, dec into last 2 stitches. (12)
Row 32: Ch 1, dec into first 2, sc across, dec into last 2 stitches. (10)
Row 33: Ch 1, dec into first 2, sc across, dec into last 2 stitches. (8)
Row 34: Ch 1, dec into first 2, sc across, dec into last 2 stitches. (6)
Row 35: Ch 1, dec into first 2, sc across, dec into last 2 stitches. (4)
Row 36: Ch 1, dec into first 2, sc across, dec into last 2 stitches. (2)
Row 37: Ch 1, sc into second chain from hook. Finish off!
Now, on the right and left sides, you will reconnect your yarn on the end:

Like before, you will start each round with a Dec, sc across, and then ending with a Dec (Do on both sides)
Row 1: Ch 1, dec into first 2, sc across, dec into last 2 stitches. (16)
Row 2: Ch 1, dec into first 2, sc across, dec into last 2 stitches. (14)
Row 3: Ch 1, dec into first 2, sc across, dec into last 2 stitches. (12)
Row 4: Ch 1, dec into first 2, sc across, dec into last 2 stitches. (10)
Row 5: Ch 1, dec into first 2, sc across, dec into last 2 stitches. (8)
Row 6: Ch 1, dec into first 2, sc across, dec into last 2 stitches. (6)
Row 7: Ch 1, dec into first 2, sc across, dec into last 2 stitches. (4)
Row 8: Ch 1, dec into first 2, sc across, dec into last 2 stitches. (2)
Row 9: Ch 1, sc into second stitch (1)
The bottom portion is no different, you just end a little earlier! Once you connect your yarn, follow as the pattern states:
Row 1: Ch 1, dec into first 2, sc across, dec into last 2 stitches. (20)
Row 2: Ch 1, dec into first 2, sc across, dec into last 2 stitches. (18)
Row 3: Ch 1, dec into first 2, sc across, dec into last 2 stitches. (16)
Row 4: Ch 1, dec into first 2, sc across, dec into last 2 stitches. (14)
Row 5: Ch 1, dec into first 2, sc across, dec into last 2 stitches. (12)
Row 6: Ch 1, dec into first 2, sc across, dec into last 2 stitches. (10)
Row 7: Ch 1, dec into first 2, sc across, dec into last 2 stitches. (8)
Row 8: Ch 1, dec into first 2, sc across, dec into last 2 stitches. (6)
Row 9: Ch 1, dec into first 2, sc across, dec into last 2 stitches. (4)
Row 10: Ch 1, dec into first 2, sc across, dec into last 2 stitches. (2)
Row 11: Ch 1, sc into second stitch (1)

Now, for the final piece to make is the heart! I followed a lovely heart pattern by Craftaholics Anonymous who do an absolutely WONDERFUL and in depth tutorial on an easy heart here!
The heart will be sewn onto the tip of the top corner.
You should now have all your corners done! Now, time to sew it together. Leaving the top portion alone, pull the bottom corner (the flat ended one) and a side piece together and sewing together:


Do this for the other corner as well!
Once you have this part completed, sew on the heart to the tip of the top corner that is NOT sewn together with the other corners.
Once the heart is one, you will want your small chain so you can keep your envelope safe and closed. To do that, pull through a stitch below and start chaining around.
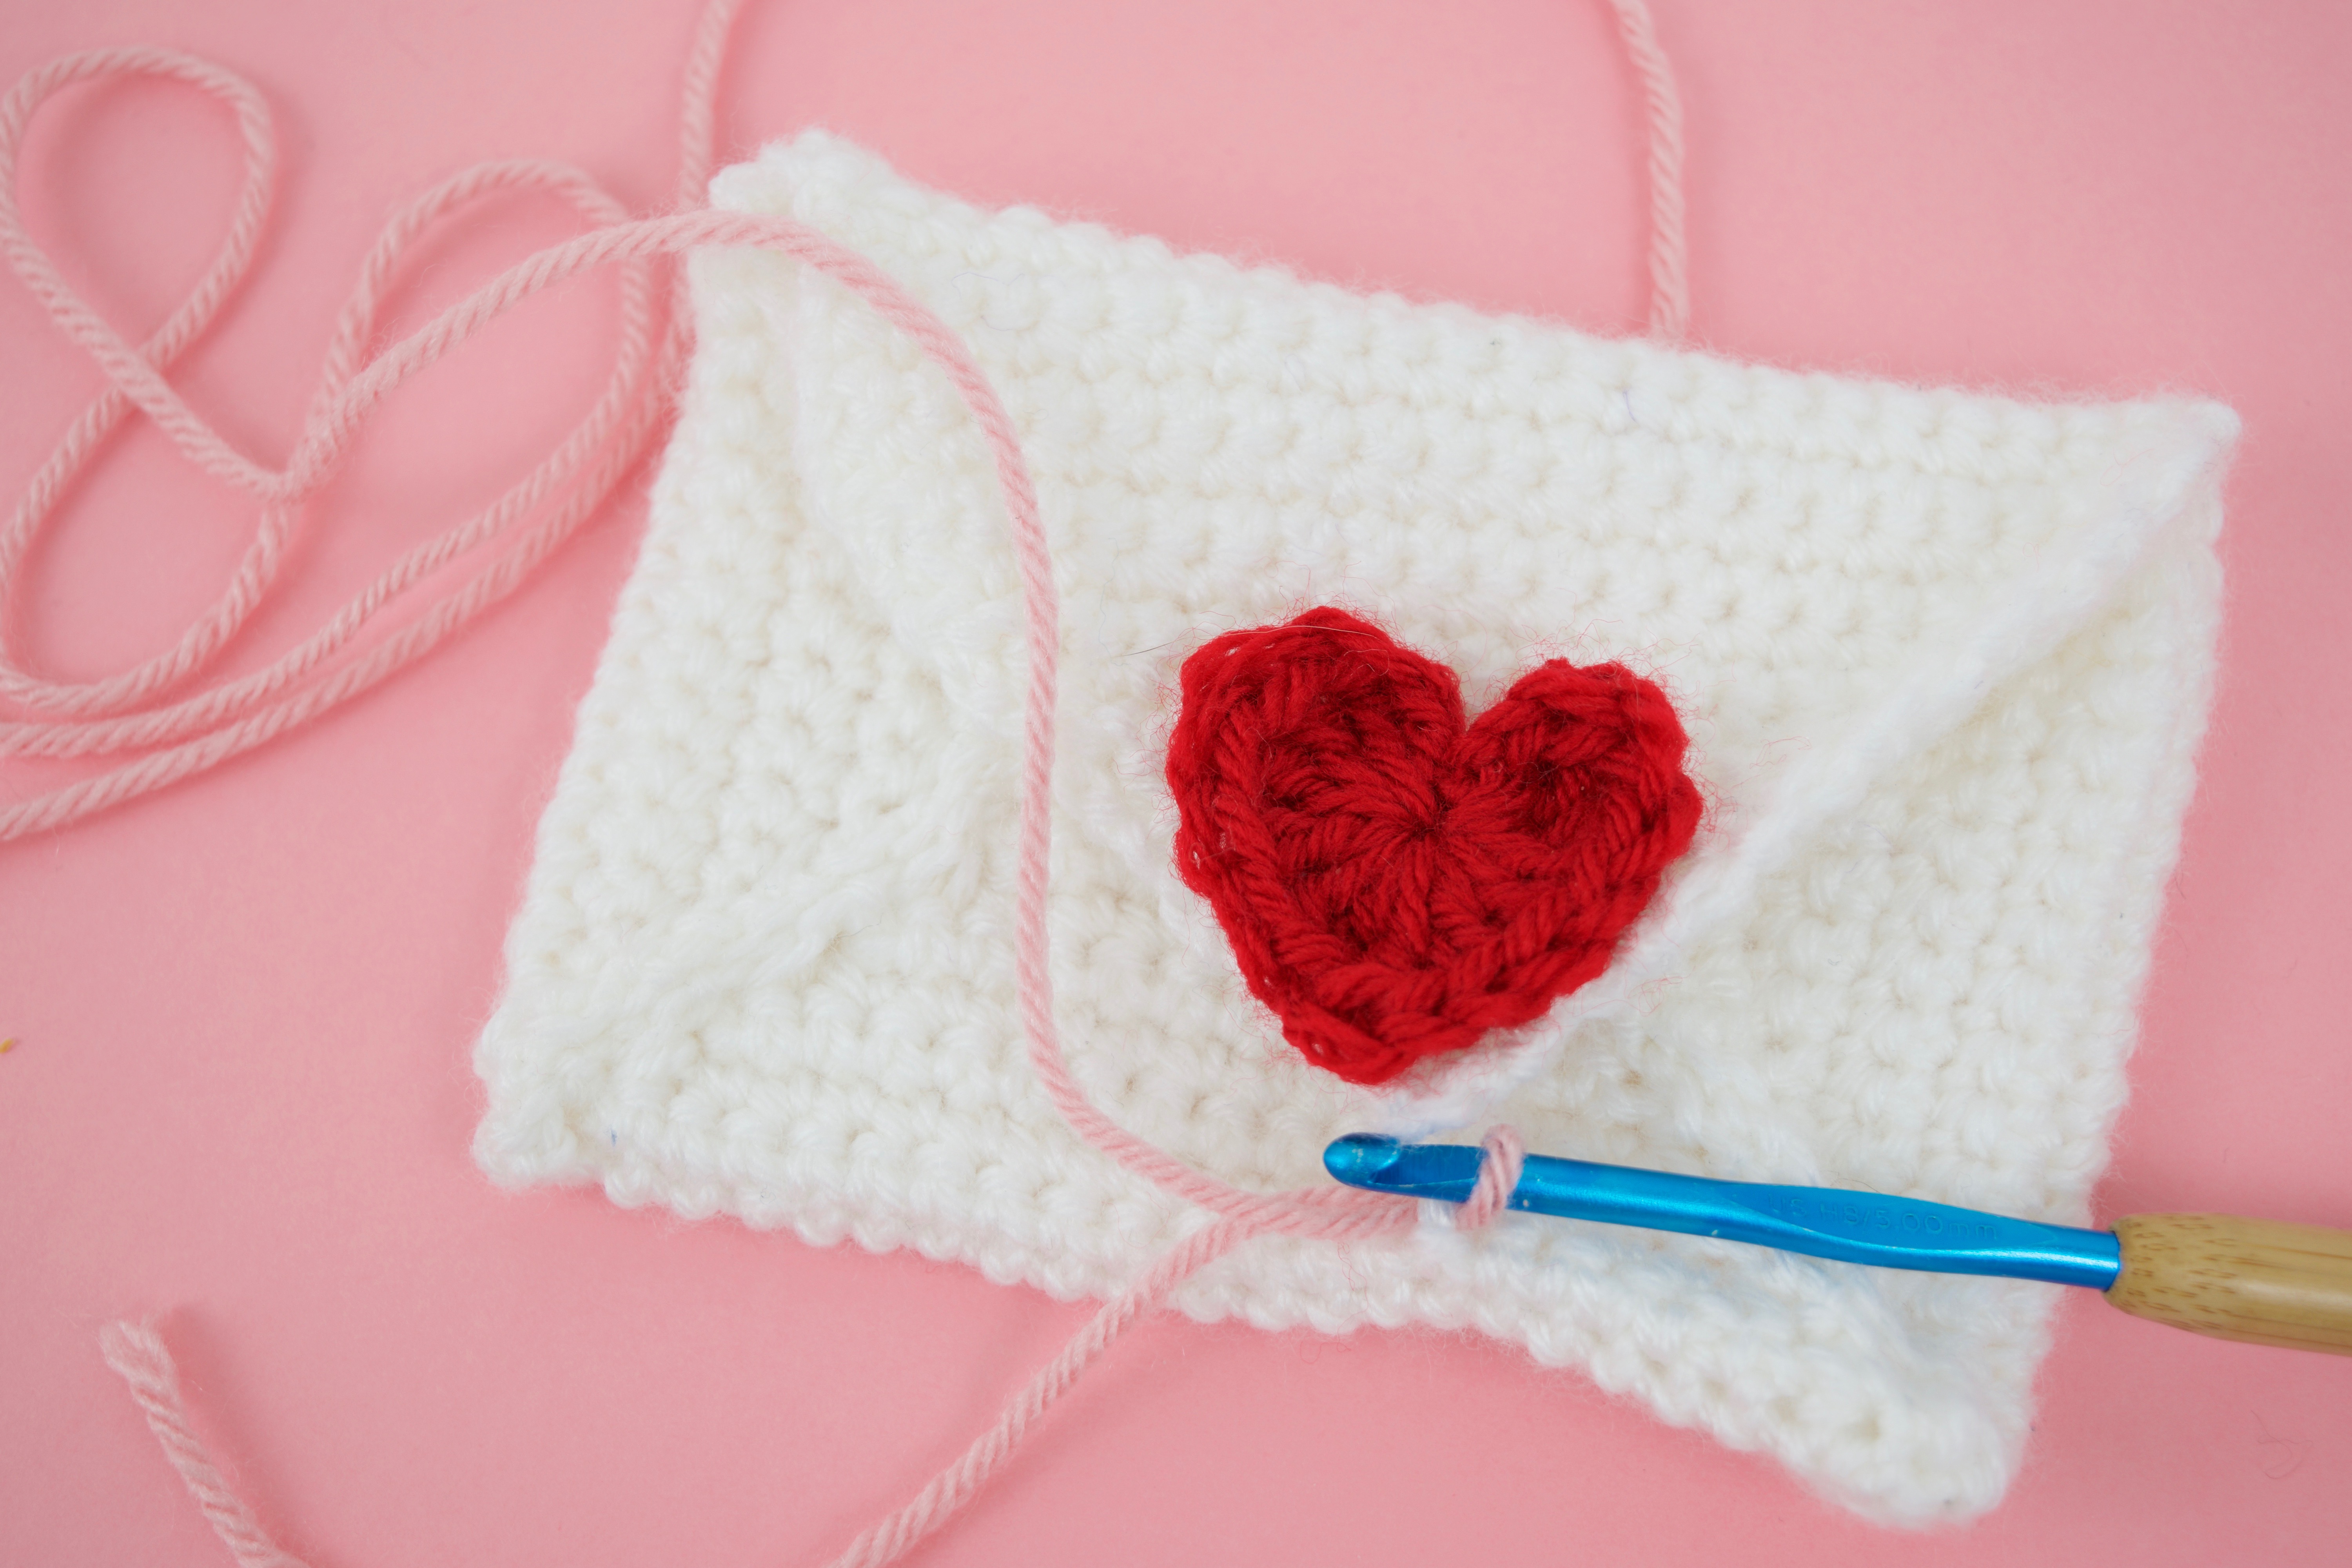

Chain around however tight or loose you desire (it needs to wrap around the heart!) and sl st into the stitch next to where you started. You will end up with this!

For the final piece of detail, its time to add the border! Grab your pink yarn and sewing needle and do small streaks across the border of the entire envelope:
Once you have that, you’re all done! <3
I hope this envelope lands it’s way into someones hands with a nice letter inside; thank you for following this pattern! I hope you have as much fun with it as I did!
Please do not claim this pattern as your own. If you wish to share this pattern, you may link to this pattern but please do not reprint it on your site. You may keep a copy for your own personal use but please DO NOT sell the pattern or distribute it.