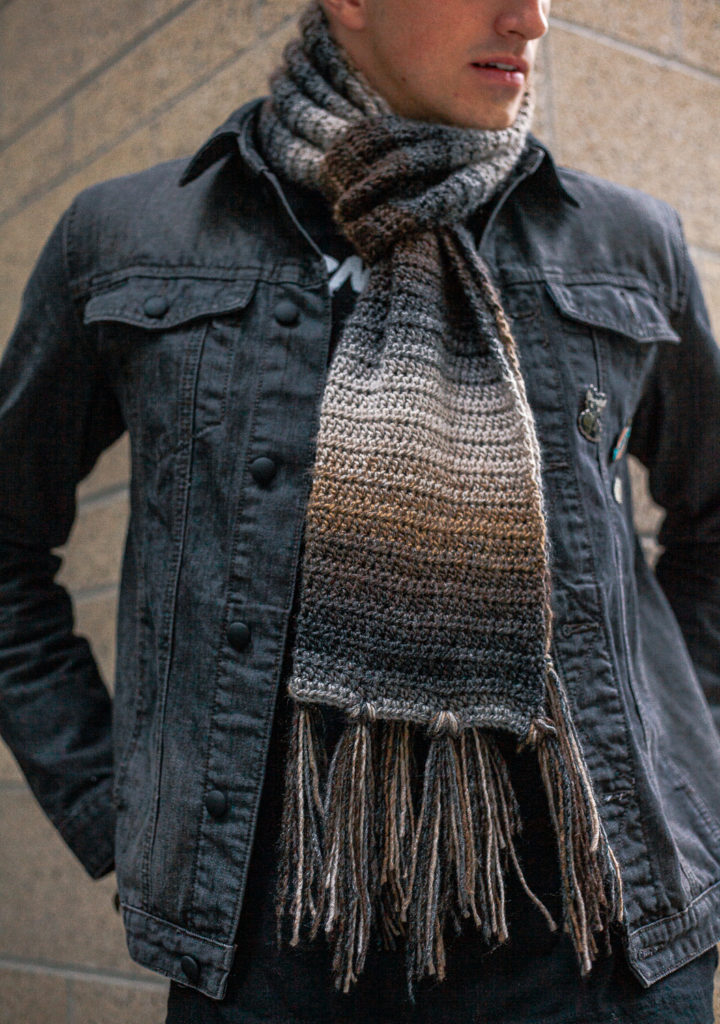
Color changing – something that some people have troubles doing. I myself am not very good at knowing how to make color appealing to the eye and I am usually sticking to just my basic, solid colors. And if you take a look at my other work and website, I like to use mainly red and black. However, I got to play with Lion Brand Yarn’s Ferris Wheel Yarn from JOANN and oh my gosh, I had so much fun! It’s such a treat to be able to work with a color changing yarn and seeing each row become it’s own shade. I can confidently say this yarn keeps you from becoming bored.

Looking at my wardrobe, it’s beginning to look pretty dark and punk, which I love! But, I don’t have anything in my closet that says “Classy” and after working with this yarn (That gives me a tweed, business casual feel) I can finally say I have something that would be perfect for meetings! Seeing this yarn pop up in the JOANN shelves, I just knew it would be perfect for the fall. Which, by the way, is right around the corner!
Down below, you can find the free pattern to the Herbal Remedy Scarf, made with JOANN, which is a basic and beginner friendly crochet pattern. And for the finishing touches, adding on some tassels!
All editorial content and projects are intellectual property of Vincent Green-Hite, designer of Knot Bad. This post was sponsored by JOANN Stores but all ideas and opinions are my own.
You can also purchase the ad-free, printer friendly PDF HERE!
Skill Level: Beginner

Materials:
3 Skeins of Lion Brand Ferris Wheel Yarn
Dimensions:
Width: 10′ inches
Length: 90″ inches
Gauge:
16 stitches x 10 rows – 4×4″ in Hdc

Abbreviations:
Ch – chain
Hdc – Half Double Crochet
Sl st – Slip stitch
FO -Finish Off


Let’s Begin!
Create a slip knot
Ch 37

Row 1: In second chain from hook, Hdc. Hdc across (36)
Row 2: Ch 2, turn. Hdc into first stitch, hdc across (36)
Row 3 – 176: ch 2, turn. Hdc into first stitch, hdc across (36)
As you can see, it really begins to change color quickly!

Finish off
Tassels
You will have 5 tassels on each side consisted of 8 strings of yarn. You will do this on both sides, so cut 80 14″ inch strings! I tried to use as much color to match the project!

You will be pulling all 8 strings through the scarf – I find it easiest to start on the two corner, then the center, and then the two on the sides to even it out!


Pull through to create a loop

With the ends of your loop, pull that through the center

Pull it snug!

And here are your finished tassels!

You may not sell my patterns or claim them as your own. You may make items to sell(i.e. on Etsy, at craft fairs) from my patterns but I ask that you link back to my blog and provide credit for the pattern. You are welcome to share my patterns on social media so long as you link back directly to my blog post(providing the link). No copy & paste of my patterns will be allowed under any circumstances.
Be sure to tag @knot.bad and @yarnpunk on your socials and use the hashtag #yarnpunk!


Beautiful scarf! Love the colors… This definitely IS a classy scarf, as you said! I’m sure it will go great with your “punk” wardrobe! Thanks for all your reviews and patterns!