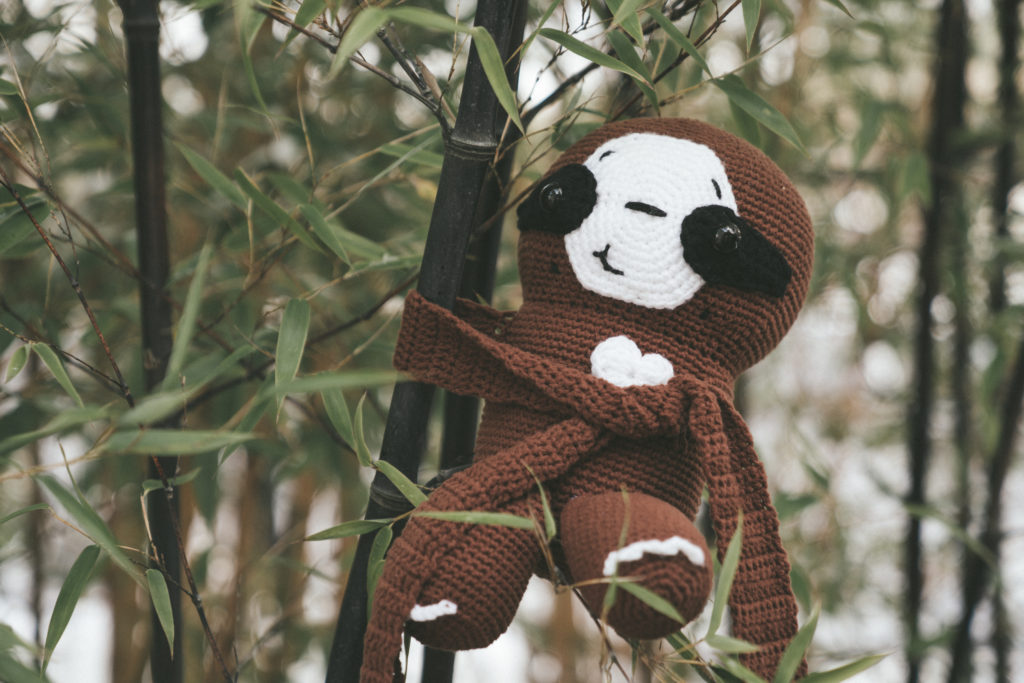
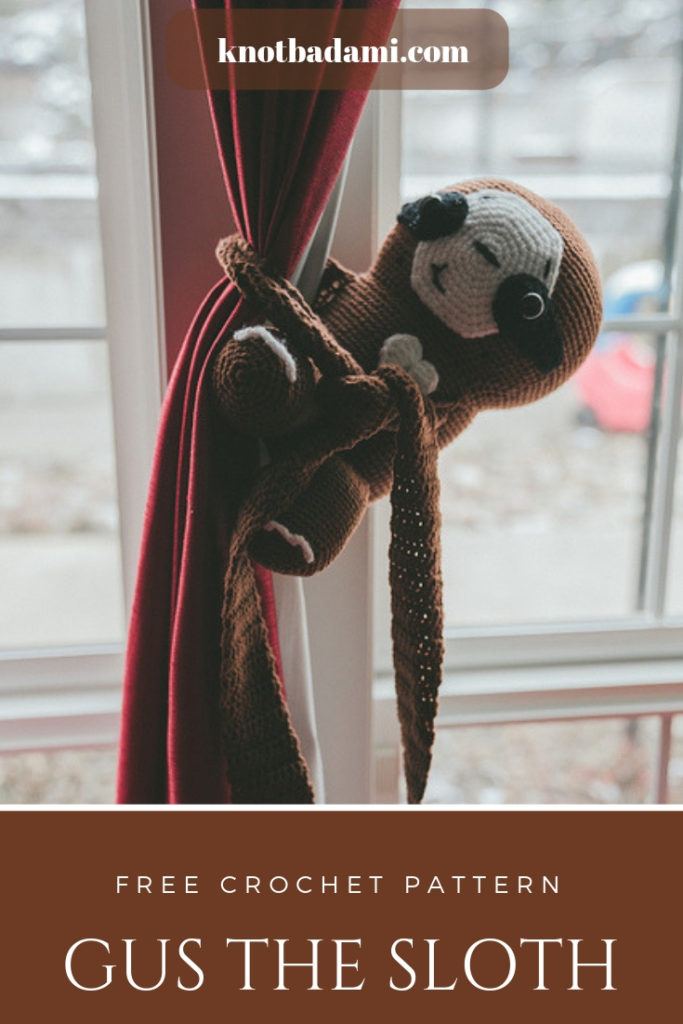
Everyone likes hugs. Dolls and other stuffed animals are great, but this Sloth takes it to a new level – to be able to wrap its arms around you / anything around the house! The cuddliest doll of mine to date. Made with Feel’s Like Butta, he is impossible to not want to touch; he really does feel like butter! Squishy and adorable, he’s the perfect cuddle buddy! Also made for home décor, this hanging sloth can bring light and whimsy to any room.
Disclaimer: Down below will be affiliate links. When you purchase through these links, you are supporting me. I already thank you so much for being here!!
The FREE Pattern for this piece can be found below and the full KIT from Lion Brand Yarn can be found HERE!
A little over a year ago, Lion Brand Yarn and I reached out to one another to do a project, and that was when I made the original Bonds the Slothie Scarf! It was so much fun to revisit this project and make it better than the original. The free pattern is still available for Bonds, which can be found HERE.

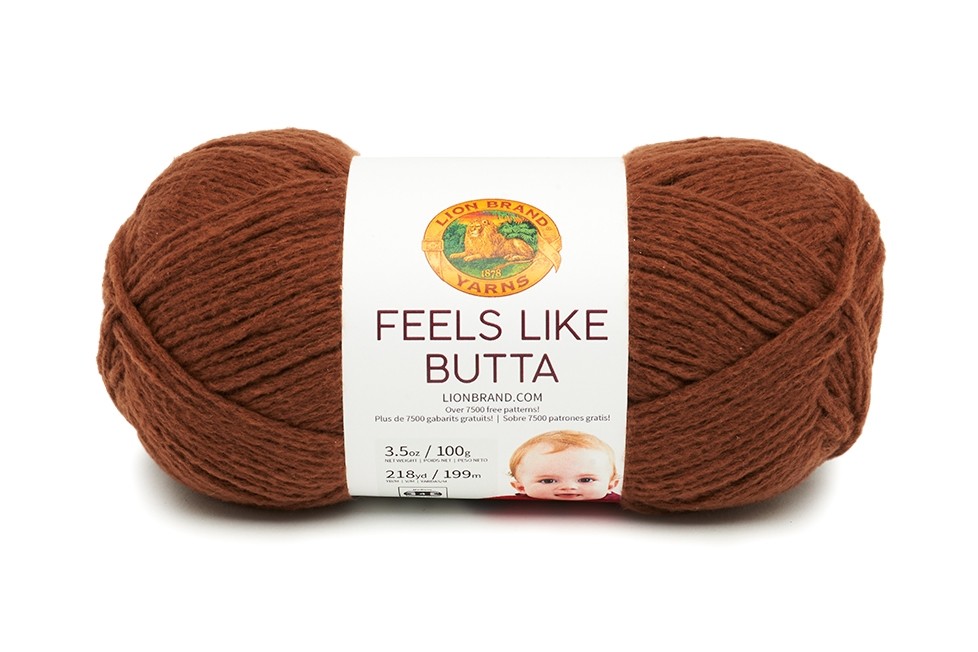
This pattern was made out of Feel’s Like Butta, which isn’t a yarn I’m used to using when it comes to Amigurumi. After using it though, I fell in love. It glides through your fingers and as the name suggests, really does feel like butter! You can order your own by clicking the photo below or clicking the link HERE.
Here are all the things you will need for this project!
Materials:
4mm Crochet Hook
A LOT of Polyfill
21mm Safety Eyes (Which can be found in any major craft stores)
Gauge: 24 stitches x 16 rows = 4×4” in sc (Main body that is worked in Feels Like Butta)
Skill Level: Intermediate
Dimensions:
Height – 14” inches (from foot to top of head)
10” inches (When sitting)
Width of Head – 7” inches
Width of Body – 5.5” inches
Arm Length – 28” inches (Each arm)
Abbreviations:
Mr – Magic Ring
Ch – chain
Sc – single crochet
Dc – double crochet
Tc – treble crochet
Inc – Increase (2 Sc in next stitch)
Dec – decrease (Sc 2 together)
FLO – front loop only
BLO – back loop only

Notes:
- This pattern is worked in continuous rounds.
- Be sure to keep notice of when you are working in the Front Loops and Back Loops!
- When working this pattern, the gauge of Feel’s Like Butta will turn out differently than other worsted weight yarns, due to its thickness. For the Appliques, you may have to Scale up if you use another worsted weight yarn for the body!
- The instructions for the photo tutorial will be BELOW the photos.
Let’s Begin!
Beginning with the head:
Rnd 1: 6 Sc into Magic Ring (6)
Rnd 2: *Inc* around (12)
Rnd 3: *Sc, Inc* around (18)
Rnd 4: *Sc 2, Inc* around (24)
Rnd 5: *Sc 3, Inc* around (30)
Rnd 6: *Sc 4, Inc* around (36)
Rnd 7: *Sc 5, Inc* around (42)
Rnd 8: *Sc 6, Inc* around (48)
Rnd 9: *Sc 7, Inc* around (54)
Rnd 10: *Sc 8, Inc* around (60)
Rnd 11: *Sc 9, Inc* around (66)
Rnd 12: *Sc 10, Inc* around (72)
Rnd 13: *Sc 11, Inc* around (78)
Rnd 14: *Sc 12, Inc* around (84)
Rnd 15: *Sc 13, Inc* around (90)
Rnd 16-30: Sc around (90)
Rnd 31: *Sc 13, Dec* around (84)
Rnd 32: *Sc 12, Dec* around (78)
Rnd 33: *Sc 11, Dec* around (72)
Rnd 34: *Sc 10, Dec* around (66)
Rnd 35: *Sc 9, Dec* around (60)
Rnd 36: *Sc 8, Dec* around(54)
Rnd 37: *Sc 7, Dec* around (48)
Rnd 38: *Sc, Inc* around in FLO (72)
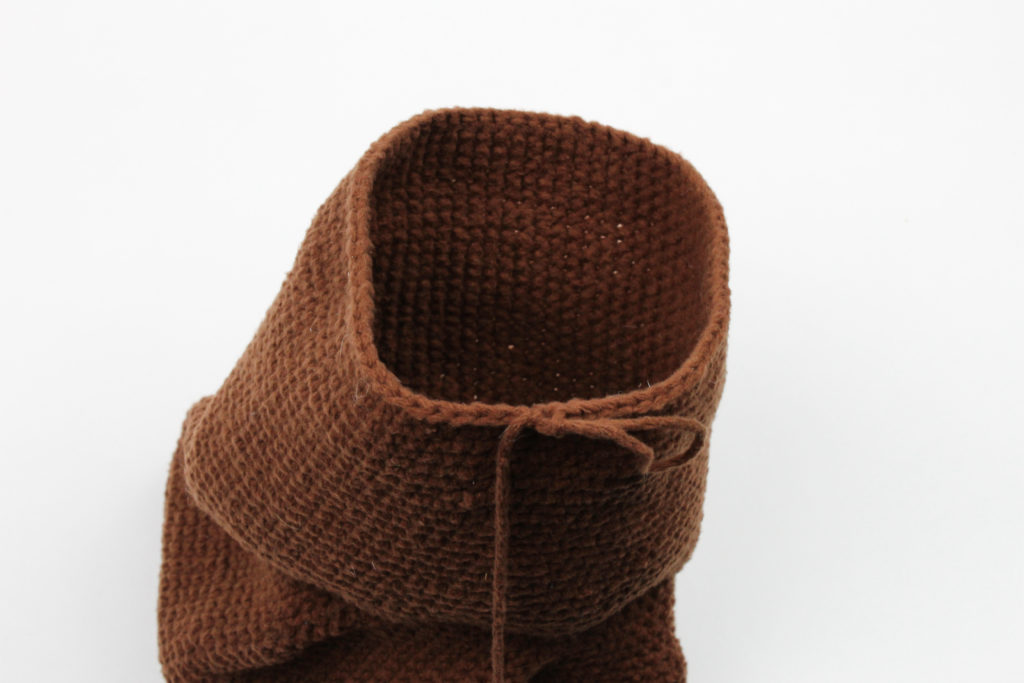

Working in the Front Loop allows for the body to start taking shape!
Rnd 39 – 63: Sc around (72)

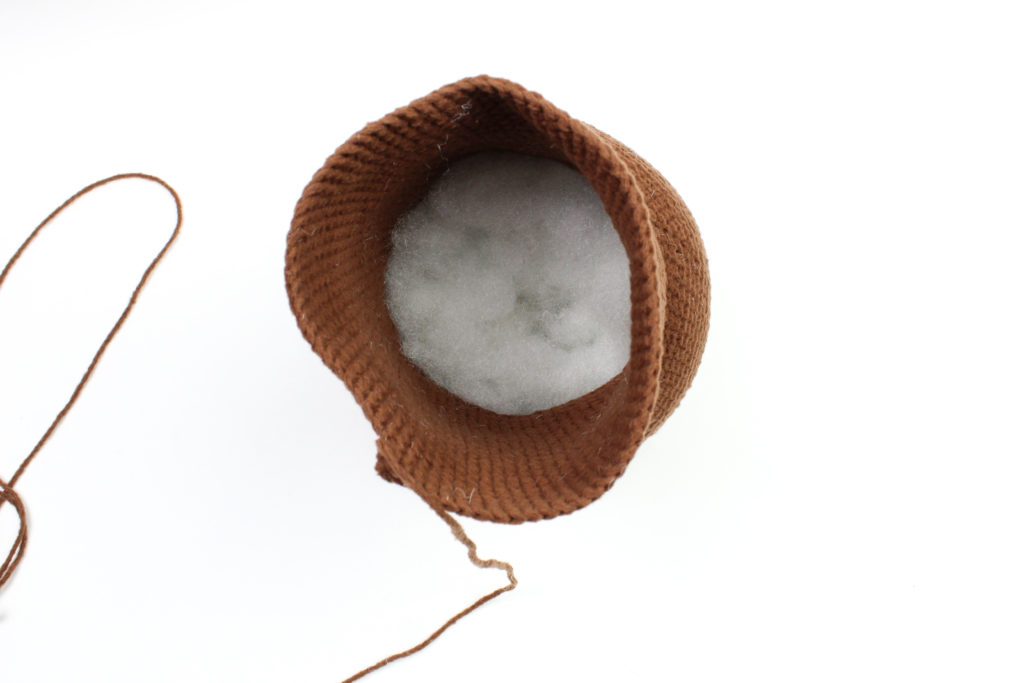
You will want to be sure you’re stuffing the head and body firmly as you work before the hole gets too small!
Rnd 64: *Sc 10, Dec* around (66)
Rnd 64: *Sc 10, Dec* around (66)
Rnd 65: *Sc 9, Dec* around (60)
Rnd 66: *Sc 8, Dec* around(54)
Rnd 67: *Sc 7, Dec* around (48)
Rnd 68: *Sc 6, Dec* around (42)
Rnd 69: *Sc 5, Dec* around (36)
Rnd 70: *Sc 4, Dec* around (30)
Rnd 71: *Sc 3, Dec* around (24)
Rnd 72: *Sc 2, Dec* around (18)
Rnd 73: *Sc, Dec* around (12)
Finish off
Face Applique
(Begin in white)
Rnd 1: 6 Sc into Magic Ring (6)
Rnd 2: *Inc* around (12)
Rnd 3: *Sc, Inc* around (18)
Rnd 4: *Sc 2, Inc* around (24)
Rnd 5: *Sc 3, Inc* around (30)
Rnd 6: *Sc 4, Inc* around (36)
Rnd 7: *Sc 5, Inc* around (42)
Rnd 8: *Sc 6, Inc* around (48)
Rnd 9: *Sc 7, Inc* around (54)
Finish off and leave tail for sewing
Don’t Forget to Pin this pattern for later!
Eyes (Make 2)
Ch 10
In second chain from hook, sc. Sc into next stitch, Hdc, hdc, Dc, Dc, Dc, Tc, tc 8x into the last stitch (your work will begin turning, and now you will be working on the other side) Tc, Dc, Dc, Dc, Hdc, Hdc, sc, sc.
Feet (Make 2)
Rnd 1: 6 Sc into Magic Ring (6)
Rnd 2: *Inc* around (12)
Rnd 3: *Sc, Inc* around (18)
Rnd 4: *Sc 2, Inc* around (24)
Rnd 5: *Sc 3, Inc* around (30)
Rnd 6: *Sc 4, Inc* around (36)
Rnd 7: Sc into BLO around (24)
Rnd 8-21: Sc around (24)
Rnd 22: *Sc 4, Dec* (30)
Rnd 23-24: Sc around (30)
Rnd 25: *Sc 3, Dec* around (24)
Rnd 26: Sc around (24)
Finish off and leave tail for sewing

You will want to sew on the top portion of the foot like you normally would. However, the bottom portion of it will be a little bit different!

You will want to sew this under-half of the leg as close to the top portion as you can. This allows it to move around and not be so stiff!

They will be around this close to one another.
Attaching the toes!
Attach your white yarn through on of the front loops available (There will be 10 spaces you’ll be working with, so be sure to eyeball that and where you’ll start and end!)


Now, you will Ch 4, skip 2 stitches, sl st into 3rd. Ch 4, skip 2 stitches, sl st into 3rd. Ch 4, skip 2 stitches, sl st into 3rd

Finish off and do the same thing on the next foot!
Arms (make 2)
Ch 10
Row 1: In second chain from hook, Dc. Dc across (9)
Row 2 – 65: Ch 2, turn. Dc across (9)
Row 66: Switch to white, Ch 4, skip 2 stitches, sl st into 3rd. Ch 4, skip 2 stitches, sl st into 3rd. Ch 4, skip 2 stitches, sl st into 3rd.
Finish off (Photo tutorial below, this will be just like the foot!)


Heart:
Create a Magic Ring, ch 3.
Insert 3 Tc, 3 Dc, Ch 1, Tc, Ch 1, 3 Dc, 3 Tc, ch 2, sl st back into the center of the hole.
Finish off.

You may not sell my patterns or claim them as your own. You may make items to sell(i.e. on Etsy, at craft fairs) from my patterns but I ask that you link back to my blog and provide credit for the pattern. You are welcome to share my patterns on social media so long as you link back directly to my blog post(providing the link). No copy & paste of my patterns will be allowed under any circumstances.
Be sure to tag @knot.bad and @yarnpunk on your socials and use the hashtag #yarnpunk!
