Down below, you will find the written / photo tutorial. You can find the full video tutorial here!
Halloween is all year round!
Back in the day when I started crocheting, I really wanted to make some simple ghosts for my blog and ever sine then, it has become one of my most popular patterns. Down below, you can find my Chibi Ghosts I am talking about! With that said, I wanted to revisit the pattern and put a little more flare to it. We’re going chunky this time around with some blanket yarn!
I know the blanket yarn amigurumi has been pretty popular lately so I wanted to jump in on the fun when it comes to it. These make me feel like it’s Fall! I really like how these super simple and beginner friendly ghosts came out. Any experience level can make this project.
Want to get started on the mini chibi version? Tap the photo or head here!
How Do I Get Started?
Easy! Down below, you will find all the materials you need, abbreviations, and the full written / photo tutorial below. Be sure to keep your tension tight and filling your doll as you continue working on your project. This pattern is simple for anyone trying their hand at amigurumi! It’s definitely good practice on learning how to stuff your crochet patterns strategically and some interesting sewing positions.
Learn better with video? You can find the full video tutorial here on my YouTube channel.
What do you do with your plushies?
I always have to wonder what all of my readers do with their plushies, especially as it becomes crafting and gift season! Usually its easy for me to put my dolls into a box but now that I am using blanket yarn, I am running out of space fast. Any tips?
I hope you can use this ghost as a gift or as home décor! My dolls don’t leave my home so it’ll be propped up as home décor for all my house guests to see. Really makes it feel like Halloween over here!
JOANN is always trying to help me find ways to help you want to keep discovering your crochet passion and walking down the isles make it too easy. They’ve become my go to when it comes to materials, especially the yarn I use! This is where I found the Bernat Baby Blanket Yarn that I used for this project.
Other criteria someone might meet who would enjoy this project:
- Someone who is / looking to make a project in a day
- Looking for a quick and free project
- Someone wanting to be festive
- Needing a gift for the holidays
- Wanting to learn more Amigurumi
My other social media platforms you can find me at:
Instagram: @knot.bad
Tik Tok: @knotbad
Twitter: @knotbadcrochet
Looking to find all my other Halloween patterns? Find my entire round – up here!
Disclaimers
All editorial content and projects are intellectual property of Vincent Green-Hite, designer of Knot Bad.
If you wish to share this pattern, you may link to this pattern but please do not reprint it on your site. You may keep a copy for your own personal use but please DO NOT sell the pattern or distribute it.
You may sell products made from this pattern but please clearly credit the design to Knot Bad and link it my website knotbadami.com Make sure to post it! Use the hashtag #yarnpunk and #handmadewithjoann when posting it and please feel free to tag me and show me how yours turned out! You can also find the Facebook group and subreddit r/yarnpunk to post to as well!
So here’s what you’ll need:
These colors will be interchangeable and identified with Color A and Color B to decide which kind you would like to make.
Enjoy what I do? You can send me a tip if you would like or even follow me on Ko-fi!

Skill Level:
Easy+
Dimensions
Height: 4.5″ inches roughly
Width: 5.25″ inches roughly
Abbreviations (In US terms)
Sl st – Slip Stitch
Ch – Chain
Sc – Single Crochet
Inc – Increase
Hdc – Half Double Crochet
* *- Repeat
FO – Finish Off
( ) – Number of stitches
Notes:
- This pattern is worked continuously and not joined.
- This pattern is written in US terms
- You can find helpful tutorials throughout, but if you would like to find some of my tips and tricks you can head HERE!
- The photo for each step will be found BELOW explanation.
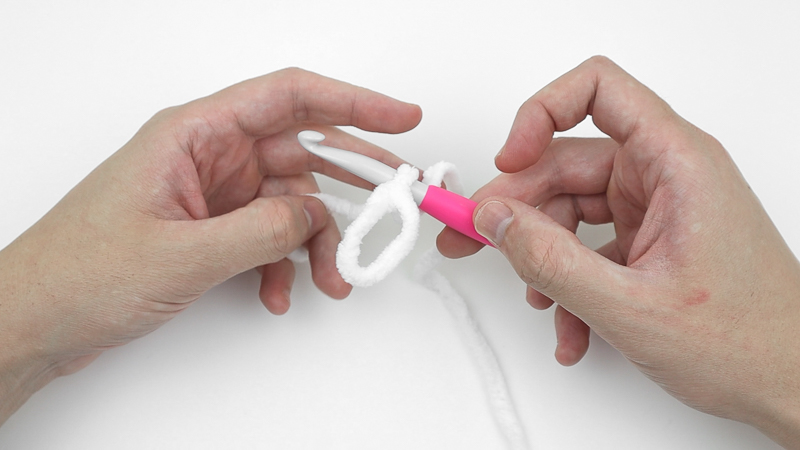
- Find my YouTube tutorial for the Magic Ring here!
Let’s Begin
Main Body
Begin in White
Rnd 1: 6 Single crochet into Magic Ring (6)

Rnd 2: *Inc* around (12)
Rnd 3: *Sc, Inc* around (18)
Rnd 4: *Sc 2, Inc* around (24)
Rnd 5: *Sc 3, Inc* around (30)

Rnd 6 -12: Sc around (30)


Rnd 13: In FLO, Hdc x4 into the first stitch, *sk st, sl st, sk st, hdc x4*, repeat from *.
As you can see in the photo below, you will begin to see these “hills” while following this round.

Rnd 14: In next stitch, sl st. Finish off.

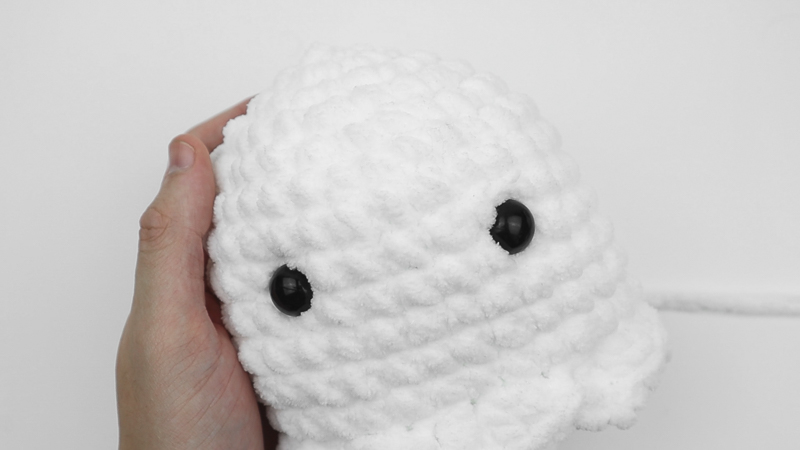
Insert Safety eyes into round 9 (counting from the middle of the magic ring) with 5 stitches apart from each safety eyes.

To figure out the round, you can count down starting from the very center of the original magic ring that you made

There will be 5 stitches apart from each safety eyes.


Bottom
Begin in White
Rnd 1: 6 Single crochet into Magic Ring (6)
Rnd 2: *Inc* around (12)
Rnd 3: *Sc, Inc* around (18)
Rnd 4: *Sc 2, Inc* around (24)
Rnd 5: *Sc 3, Inc* around (30)
Finish off and leave generous tail for sewing.

Assembly
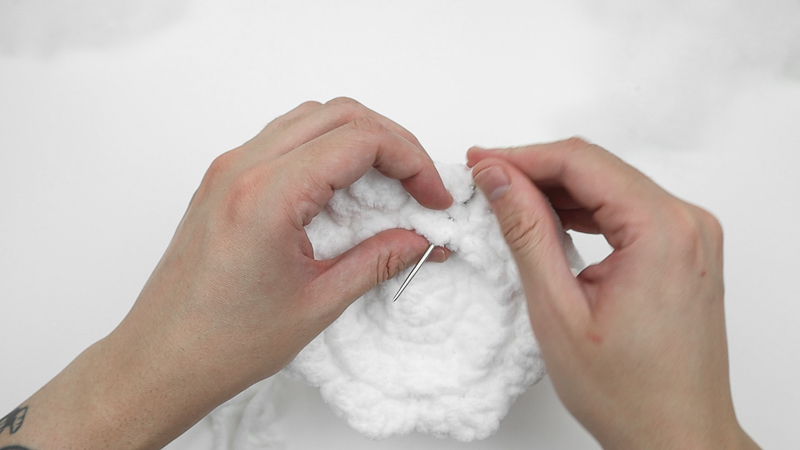
With the bottom portion of your project, insert the tail into your darning needle and we will be sewing it all together!
With your darning needle, insert the needle through the first loop on the main body.

Next, insert the darning needle through the next loop on the main body and pull the the loop and the next stitch on the bottom portion that we are attaching.

Pull firmly after each stitch!

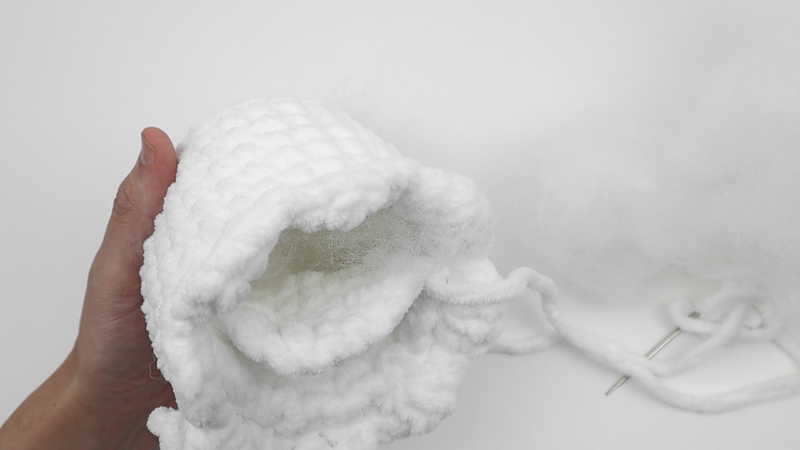
As you continue sewing around, begin stuffing your work as the hole gets smaller.


When filled firmly enough, sew the the last and weave in your tail. Finish off

And now your ghost should be squishy!

Adding on the arms (Do this same step for both sides)
With your hook, insert through the same round that the safety eyes are in and count 3 stitches to the right / left. Into the 4th stitch, insert your hook.

Pull your yarn through the stitch and then Chain 3

Into the same stitch that we began in, insert your hook through and perform a slip stitch.

Pull your yarn through. Weave in ends and finish off


Adding the face
Our final step is to now embroider the face onto our doll! This part is completely optional.
Beginning with our black yarn, attach to darning needle and insert into the side of our ghost. Pull through the first stitch at the corner of the safety eye.

Pull through on both ends so you get a > look! (Video tutorial HERE)

And finally, embroider on the smile! There will be 3 stitches between both ends of the smile.

Weave in your ends and now you’re DONE!
I hope you enjoyed the pattern as much as I did and I hope either the photo or video tutorial was helpful to you!
All editorial content and projects are intellectual property of Vincent Green-Hite, designer of Knot Bad.
This post was sponsored by JOANN Stores but all ideas and opinions are my own. Please do not claim this pattern as your own. If you wish to share this pattern, you may link to this pattern but please do not reprint it on your site. You may keep a copy for your own personal use but please DO NOT sell the pattern or distribute it.
You may sell products made from this pattern but please clearly credit the design to Knot Bad and link it my website knotbadami.com Make sure to post it! Use the hashtag #yarnpunk and #handmadewithjoann when posting it and please feel free to tag me and show me how yours turned out! You can also find the Facebook group and subreddit r/yarnpunk to post to as well!


