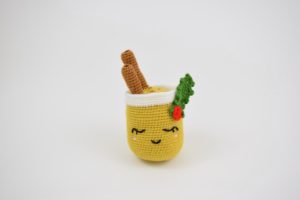
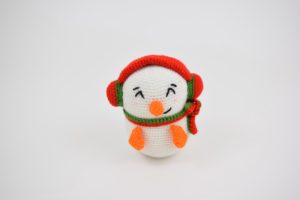
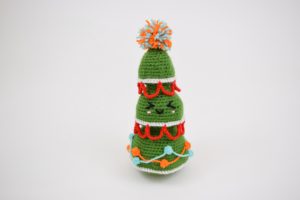
 Getting ready for the holidays? Here are 4 wonders that’ll bring the holiday spirit into your home! Say hello to Charlie the Gingerbread Woman, Casper the Snowman, Eve the Christmas Tree, and Jeffrey the Eggnog! All standing about 7 ½ inches tall!
******This was made with all of Lion Brand Yarn and now, you can buy the full kit for the ENTIRE Christmas Collection on their website Here! During the holidays, it’s 20% off. If you would like to purchase the ad free, and printer friendly version, it is also available on my Raverly page!
Looking to make the others from the Collection? Click the picture below to be directed to the other patterns that are part of Knot a Bad Christmas Collection!
Materials
· Yarn: Lion Brand’s Vanna Choice in one skein of each color:
- Vanna’s Choice Honey
- Vann’s Choice Kelly Green
- DIYarn Black
- DIYarn Red
- DIYarn Pink
- DIYarn Aqua
- DIYarn Orange
· Hook: 4mm
· A generous amount of polyester fiber fill
· scissors
· Darning needle
· Pins (Not mandatory but very helpful for assembly!)
· Holiday spirit!
Sizing
· Gauge is not critical.
Pattern Key
· ch: chain (for example)
· sc = single crochet
· hdc = half-double crochet
· dc = double crochet
· tc = treble crochet
· mr = magic ring
· inc = increase (2 sc in next stitch)
· dec = decrease (sc 2 together)
· FLO = front loop only
· BLO = back loop only
Experience Level
· Moderate experience in amigurumi and sewing
Knot a Bad Christmas!
Special Pattern Notes:
· Treat every decrease as an invisible decrease. Although it won’t change the outcome of the pattern, it will look cleaner if you do invisible! (Tutorial below)
· When there are pictures side by side, work left to right!
Pattern Instructions
Charlie the Gingerbread Woman

Body (Honey)
Rnd 1: 6 sc in mr (6)
Rnd 2: *inc* x 6 (12)
Rnd 3: *sc, inc* around (18)
Rnd 4: *sc 2, inc* around (24)
Rnd 5: *sc 3, inc* around (30)
Rnd 6: *sc 4, inc* around (36)
Rnd 7: *sc 5, inc* around (42)
Rnd 8: *sc 6, inc* around (48)
Rnd 9: *sc 7, inc* around (54)
Rnd 10: *sc 8, inc* around (60)
Rnd 11: *sc 9, inc* around (66)
Rnd 12-22: sc around (66)
Rnd 23: *sc 9, dec* around (60)
Rnd 24: *sc 8, dec* around (54)
Rnd 25: *sc 7, dec* around (48)
Rnd 26: *sc 6, dec* around (42)
Rnd 27: *sc 5, dec* around (36)
Rnd 28: *sc 4, dec* around (30)
Rnd 29: sc in FLO (30)(see photo)
You can begin stuffing at this point, and be generous! You want the head to be firm.
Rnd 30-40: sc around (60)

Rnd 41: *sc 8, dec* around (54)
Rnd 42: *sc 7, dec* around (48)
Rnd 43: *sc 6, dec* around (42)
Rnd 44: *sc 5, dec* around (36)
Rnd 45: *sc 4, dec* around (30)
Rnd 46: *sc 3, dec* around (24)
Rnd 47: *sc 2, dec* around (18)
Rnd 48: *sc, dec* around (12)
Finish off and leave tail to sew hole closed.
Frosting on head (pink)
Rnd 1: 6 sc in mr (6)
Rnd 2: *inc* x 6 (12)
Rnd 3: *sc, inc* around (18)
Rnd 4: *sc 2, inc* around (24)
Rnd 5: *sc 3, inc* around (30)
Rnd 6: *sc 4, inc* around (36)
Rnd 7: *sc 5, inc* around (42)
Rnd 8: *sc 6, inc* around (48)
Rnd 9: *sc 7, inc* around (54)
Rnd 10: *sc 8, inc* around (60)
Rnd 11: *sc 9, inc* around (66)
Rnd 12: sc around (66)
Rnd 13: Ch 1. *hdc, dc, tc, tc, dc, hdc* across next 6 stitches, and repeat around, ending on a dc.
Next, sew on the frosting (pinning in place will be helpful to keep it even!)
As you can see, the frosting dips a bit. You will be sewing along the same row as for the “tips” of the frosting to give it the length for the dripping look.
[/vc_column_text][vc_row_inner][vc_column_inner width=”1/2″][vc_single_image image=”968″ img_size=”large”][/vc_column_inner][vc_column_inner width=”1/2″][vc_single_image image=”967″ img_size=”large” alignment=”right”][/vc_column_inner][/vc_row_inner][vc_column_text]
When you are sewing the part of the frosting that isn’t dripping as far, you will move up a row and pull through.
[/vc_column_text][vc_row_inner][vc_column_inner width=”1/2″][vc_single_image image=”970″ img_size=”large”][/vc_column_inner][vc_column_inner width=”1/2″][vc_single_image image=”969″ img_size=”large” alignment=”right”][/vc_column_inner][/vc_row_inner][vc_column_text]
Continue this all the way around the head!
Arms (begin in Honey)
Rnd 1: 6 sc in mr (6)
Rnd 2: *inc* x 6 (12)
Rnd 3: *sc, inc* around (18)
Switch to pink
Rnd 4-5: sc around (18)
Switch back to Honey
Rnd 6-7: sc around (18)
Finish off and leave tail for sewing

Legs (begin in Honey)
Rnd 1: 6 sc in mr (6)
Rnd 2: *inc* x 6 (12)
Rnd 3: *sc, inc* around (18)
Switch to pink
Rnd 4-5: sc around (18)
Switch back to Honey
Rnd 6-8: sc around (18)
Finish off and leave tail for sewing
Bow (Red)
Ch 12.
Rnd 1: sc in second chain from hook and sc across.
Rnd 2-4: Ch 1, turn, sc across.
Finish off and weave in end.
(Green is used in this diagram, but use white when making!)To finish off making the bow, take your white yarn and pull through the middle. While pinching the middle, wrap it around pretty tight![/vc_column_text][vc_row_inner][vc_column_inner width=”1/2″][vc_single_image image=”973″ img_size=”large”][/vc_column_inner][vc_column_inner width=”1/2″][vc_single_image image=”974″ img_size=”large” alignment=”right”][/vc_column_inner][/vc_row_inner][vc_column_text]
When it is as tight as you like, take your needle and pull the yarn though the center. Leave a tail to be able to sew on!
[/vc_column_text][vc_row_inner][vc_column_inner width=”1/2″][vc_single_image image=”975″ img_size=”large”][/vc_column_inner][vc_column_inner width=”1/2″][vc_single_image image=”976″ img_size=”large” alignment=”right”][/vc_column_inner][/vc_row_inner][vc_column_text]Buttons (Make one in green and one in red)
Rnd 1: 6 sc in mr (6)
Sl st to join.
Finish off and leave tail for sewing.
When embroidering eyes, keep 6 stitches between them. Pull black yarn through (arrow on right photo indicates how many stitches apart)[/vc_column_text][vc_row_inner][vc_column_inner width=”1/2″][vc_single_image image=”978″ img_size=”large”][/vc_column_inner][vc_column_inner width=”1/2″][vc_single_image image=”979″ img_size=”large” alignment=”right”][/vc_column_inner][/vc_row_inner][vc_column_text]
Working outward, leave two crocheted stitches between each embroidered stitch. When coming out, leave one stitch in between: Don’t pull too tightly!
[/vc_column_text][vc_row_inner][vc_column_inner width=”1/2″][vc_single_image image=”980″ img_size=”large” alignment=”center”][/vc_column_inner][vc_column_inner width=”1/2″][vc_single_image image=”981″ img_size=”large” alignment=”center”][/vc_column_inner][/vc_row_inner][vc_column_text]
Once you have the basic eye, you can stitch the eyelashes
[/vc_column_text][vc_row_inner][vc_column_inner width=”1/2″][vc_single_image image=”982″ img_size=”large”][/vc_column_inner][vc_column_inner width=”1/2″][vc_single_image image=”982″ img_size=”large” alignment=”right”][/vc_column_inner][/vc_row_inner][vc_column_text]Now it’s time to add the rest of the body part! (Buttons, arms, legs, and bow!)
I would recommend sewing on the buttons first as it gives you a good indictor of where the middle is!

Happy Crafting and I hope you enjoyed making her! Make sure to go check out all the other patterns to make the rest of the Collections on the patterns tab 🙂

Please do not claim this pattern as your own. If you wish to share this pattern, you may link to this pattern but please do not reprint it on your site. You may keep a copy for your own personal use but please DO NOT sell the pattern or distribute it.
You may sell products made from this pattern but please clearly credit the design to Knot Bad and link it my website Knotbad-crochet.com
If you do decide to post it anywhere, especially Instagram, please feel free to tag me and show me how yours turned out! 🙂[/vc_column_text][/vc_column][/vc_row]


