How cute would it be to be able to create a mini version of yourself?! So cute, that’s how cute! When I first started crocheting, I was so lost on where to begin on how to create a body for my pieces. I would generally follow the basic routine of creating a head and the body in multiple pieces and sewing it all together – I soon lost a lot of my desire to create Amigurumi due to all the sewing. That’s right – I hate sewing. It is my least favorite part of the Amigurumi process. Today, I have a pattern/tutorial showing you how to create a BASIC body shape, that requires less sewing! The body is created all in one piece.

This will be basic pattern on creating a “canvas” if you will. Photo tutorials are available down below for the body, limbs, and how to add hair. The face comes down to you – if you would like to see some popular options, you can head to my “How to Choose Amigurumi Eyes” blog post HERE.
Disclaimer: There are a number of other “Basic body” patterns out there on the internet that will look similar. This pattern will offer how to do something alike, and introduce you on how to attach hair to your custom figures! Along with body parts (Legs and arms) in a chibi fashion that I myself find to be the cutest. Here is an example of how mine turned out!

Here are the materials you will need to make this pattern and what I recommend for beginning on your amigurumi endeavor
Materials:
(There will be affiliate links below to Amazon!)
- Worsted weigh yarn will be best for this! My go-to is anything from Lion Brand Yarn
- For Hook size, I always stick with a 4mm! Keeping your hook size small keeps the stitches tight to avoid polyfill spilling out.
- To stuff your dolls, you will need some Polyfill, which can be found HERE
- There is still sewing, in which you will need Darning Needles
- Scissors
- Pins
- Stitch Markers
Abbreviations:
Ch – Chain
Sl St- Slip Stitch
Sc -Single Crochet
FLO – Front Loop Only
Inc – Increase
Notes:
- This pattern is worked in continuous rounds, so you will not be joining each round together.
- The color options are up to YOU
- Ideas and advice on how to do the face can be found HERE.
- The photo instructions will be BELOW the step
- The finished piece will stand roughly 5.5″ inches
Don’t forget to Pin for Later!

Let’s Begin!
(This will be the head, so you will want to choose the skin color of your choosing)
Rnd 1: 6 Single crochet into Magic Ring (6)
Rnd 2: *Inc* around (12)
Rnd 3: *Sc, Inc* around (18)
Rnd 4: *Sc 2, Inc* around (24)
Rnd 5: *Sc 3, Inc* around (30)
Rnd 6: *Sc 4, Inc* around (36)
Rnd 7: *Sc 5, Inc* around (42)
Rnd 8-14: Sc around (42)
Rnd 15: *Sc 5, Dec* around (36)
Rnd 16: *Sc 4, Dec* around (30)
At this point, you will want to begin stuffing the head firmly!
Rnd 17: *Sc 3, Dec* around (24)
Rnd 18: *Sc 2, Dec* around (18)
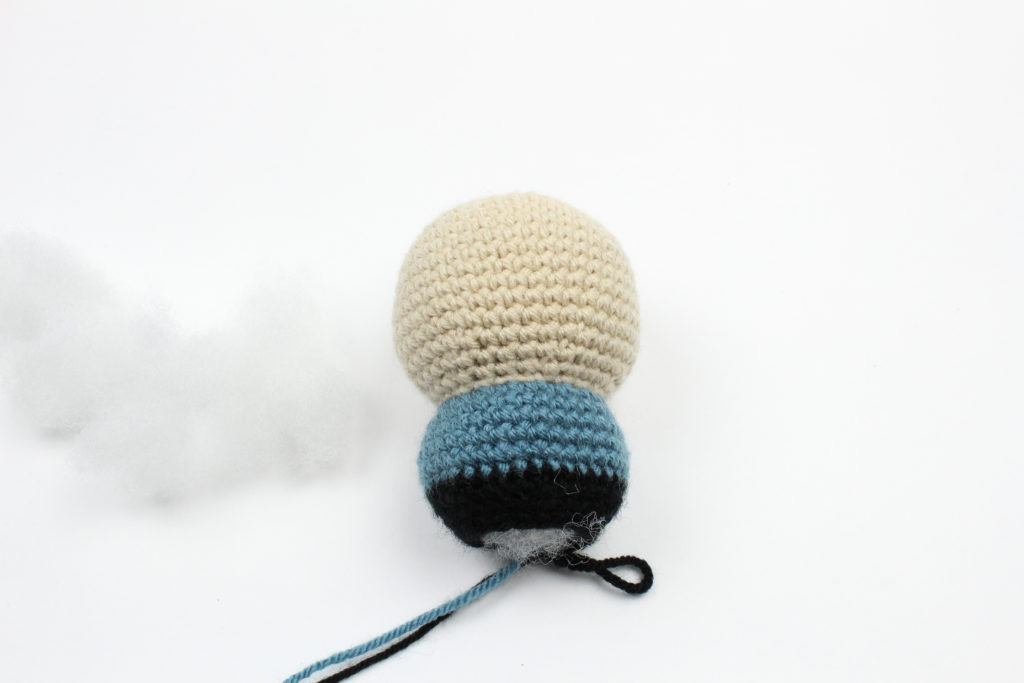
This is the point you will be creating the body portion; If you are wanting to give your creation a shirt or different body color, now is the time to switch colors!
Don’t forget to be stuffing the head firmly! If you are using Safety Eyes, be sure to place those before stuffing.
Rnd 19: *Inc* around in the FLO (36)

Rnd 20-23: Sc around (36)
Rnd 24: Switch Colors for pants, Sc around (36)
Rnd 25: *Sc 4, Dec* around (30)
Rnd 26: *Sc 3, Dec* around (24)
Begin stuffing body, but not as firm as head. This gives it some squish to be able to sit!

Rnd 27: *Sc 2, Dec* around (18)
Rnd 28: *Sc, Dec* around (12)
Finish off and leave tail to close hole
Arms:
Beginning with Skin color:
Rnd 1: 6 Single crochet into Magic Ring (6)
Rnd 2: *Inc* around (12)
Switch Colors
Rnd 3-4: Sc around (12)
Finish off and leave tail for sewing
Legs:
Begin in Color of pants
Rnd 1: 6 Single crochet into Magic Ring (6)
Rnd 2: *Inc* around (12)
Rnd 3-5: Sc around (12)
Finish off and leave tail for sewing
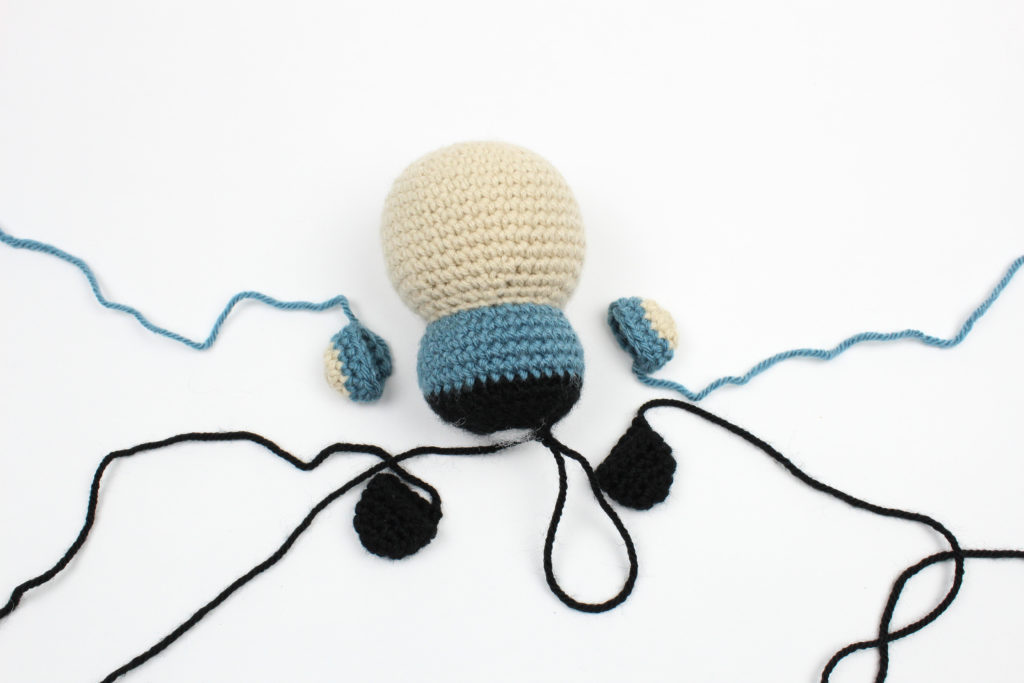
You will now sew on your body parts using your darning needle; it can be helpful to use pins to pin your pieces into place when sewing!

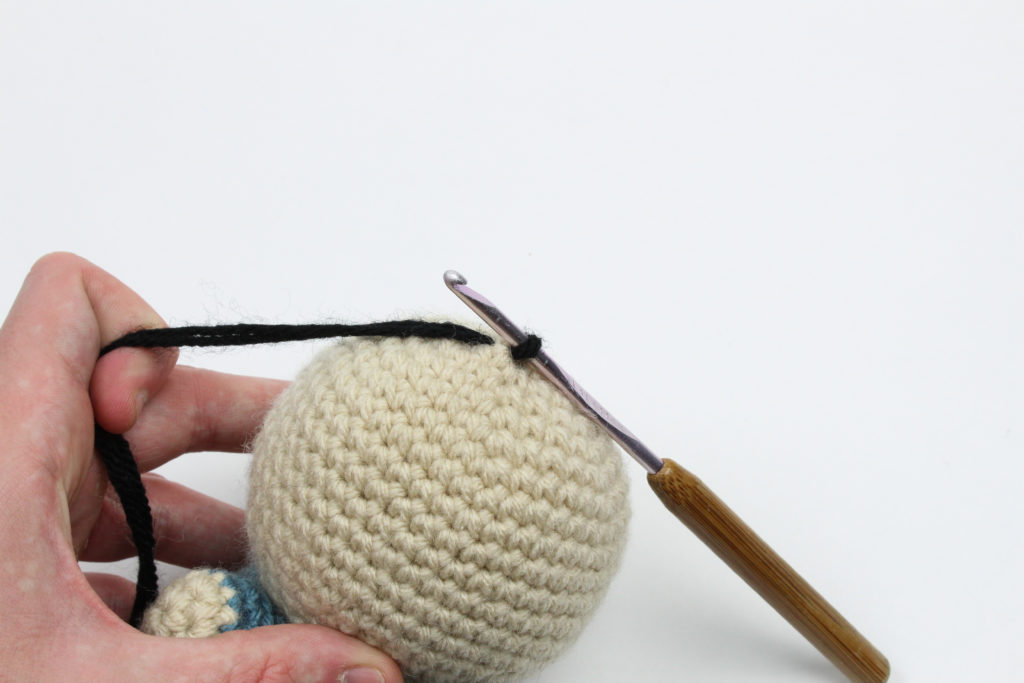
Attaching Hair:
You do NOT have to give your doll the same hairstyle as mine; this just shows how to attach yarn into your doll!
Take a strand of yarn (You can cut later, so don’t worry about it being too long!) and pull through a stitch with your hook.

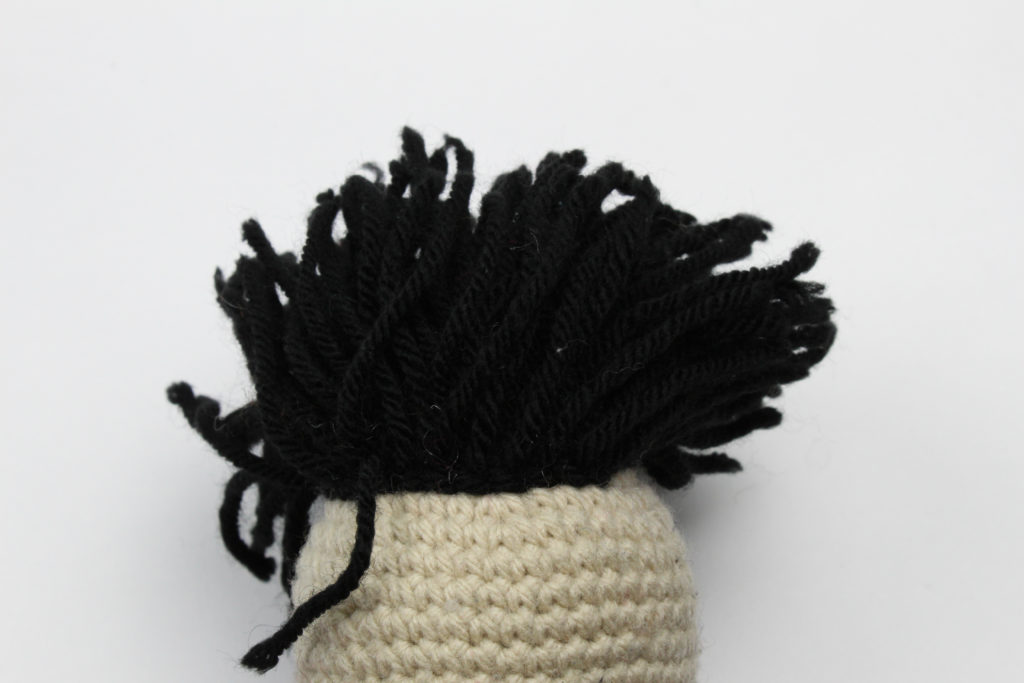
You will now open up the knot you’ve created and pull your tow tails through.

Pull tight!

Repeat this this process all along the desired hairline!
Adding the Face:
Head HERE for ideas and tutorials!

Now that you have the basic body done, time to get started on your own Amigurumi! You can check out All Free Crochet’s Crochet Amigurumi to get some ideas!
You may not sell my patterns or claim them as your own. You may make items to sell(i.e. on Etsy, at craft fairs) from my patterns but I ask that you link back to my blog and provide credit for the pattern. You are welcome to share my patterns on social media so long as you link back directly to my blog post(providing the link). No copy & paste of my patterns will be allowed under any circumstances.
Be sure to tag @knot.bad and @yarnpunk on your socials and use the hashtag #yarnpunk!
I can’t wait to try this out later.
Side note: the link on you 4mm hook size links to Amazon for 12mm safety eyes.. 😉